12 Xanbus System Control Panel (SCP) Owner’s Guide
Xanbus System Control Panel Installation
4. Route the Xanbus cable(s) from other Xanbus-enabled devices inside
the wall and through the opening.
5. Connect the Xanbus cable(s) (and terminator if necessary) to either
network input on the back of the SCP.
6. Connect a network terminator to the SCP if it is the last device at the
end of a daisy chain network layout.
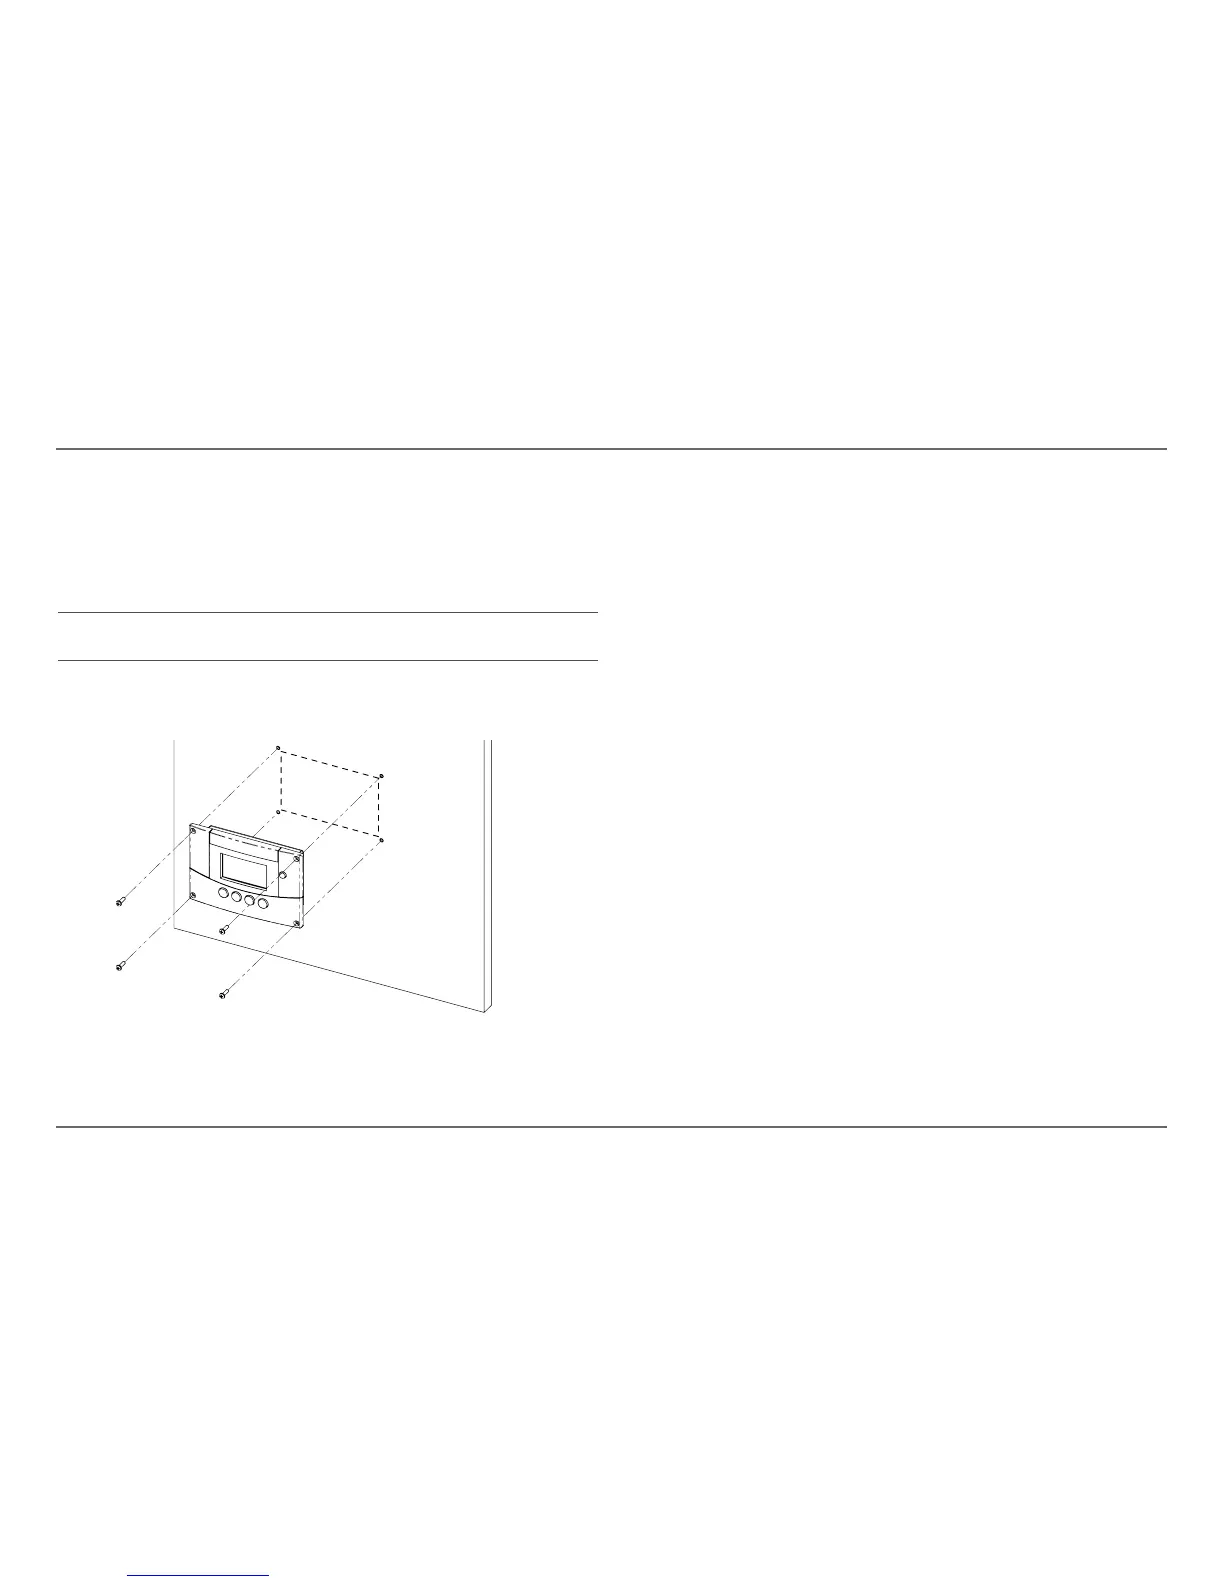
7. Place the unit in the opening and secure it with four mounting screws.
8. Peel off the protective plastic film covering the screen and indicator
light.
Verifying the Installation
If network power (from an inverter/charger or external power supply) is
present, the LCD backlight comes on and the SCP shows the startup screen.
When the SCP is started up on the Xanbus system for the first time, it
displays a fault message asking you to set the clock before proceeding. For
procedures for setting the clock, see “Setting the Time” on page 21 and
“Setting the Date” on page 22.
IMPORTANT: To ensure communication signal quality, the network must
be terminated at each end with a terminator. See Figure 3 on page 6.
Figure 7
Flush Mounting the SCP

 Loading...