WARNING
• Ensure that a space of 5~10cm (2-4 inches) is maintained around the
QB device for air circulation.
• Do NOT stack anything on top of the QB device.
• The QB2 and QB3 are best installed – wall-mounted or rack mounted.
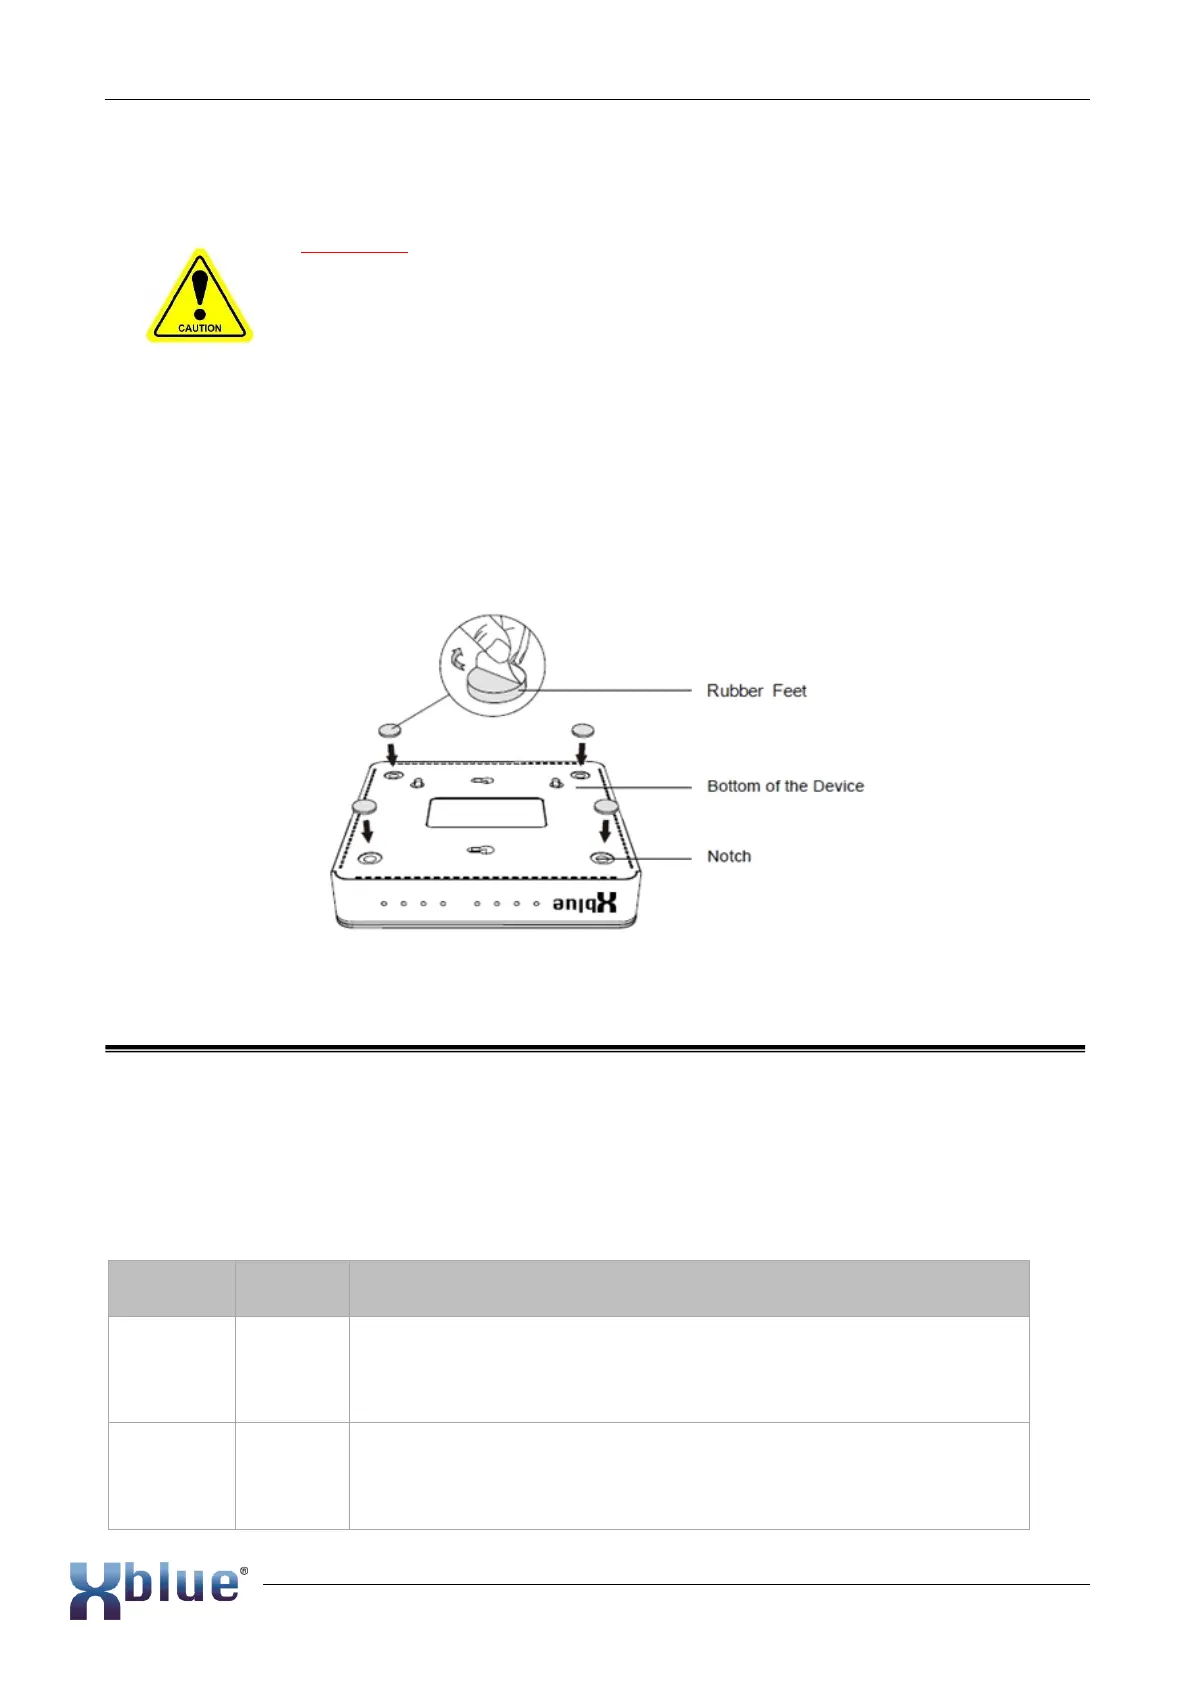
QB1 is a desk-mounted device and shipped with rubber feet to keep it stable on the desktop. The
rubber feet cover the device’s assembly screws when installed. These screws are accessible when
shipped to allow Module configuration changes if desired.
• STEP 1 Place the QB1 server upside-down on a stable surface.
• STEP 2 Remove the adhesive backing paper from the rubber feet provided.
• STEP 3 Attach the rubber feet to the recessed areas on the bottom at each corner of the
device.
Connecting the Equipment
STEP 1 Connect one end of a network cable (provided) to the LAN port of XBLUE QB1, and the
other end to any LAN port of your company’s LAN data-switch or router. It must be
connected to the same network to which the XBLUE IP Phones are connected.
STEP 2 Connect the telephone lines from your service provider interface to the ports of the QB
(QB1: 1~4)(QB2: 1~8). Note: VoIP Lines have no cable/wire connections, they are
programmed into the server.
Connect phone cable to Analog Phone/Speakerphone/Cordless
Connect phone cable to Telephone Line (Provider)
Connect phone cable to Telephone Line (Provider)
Connect phone cable to Telephone Line (Provider)
Connect phone cable to Telephone Line (Provider)
Connect phone cable to Telephone Line (Provider)
Connect phone cable to Telephone Line (Provider)
Connect phone cable to Telephone Line (Provider)
 Loading...