Phaser 3100MFP/S
- 18 -
2 - Installation
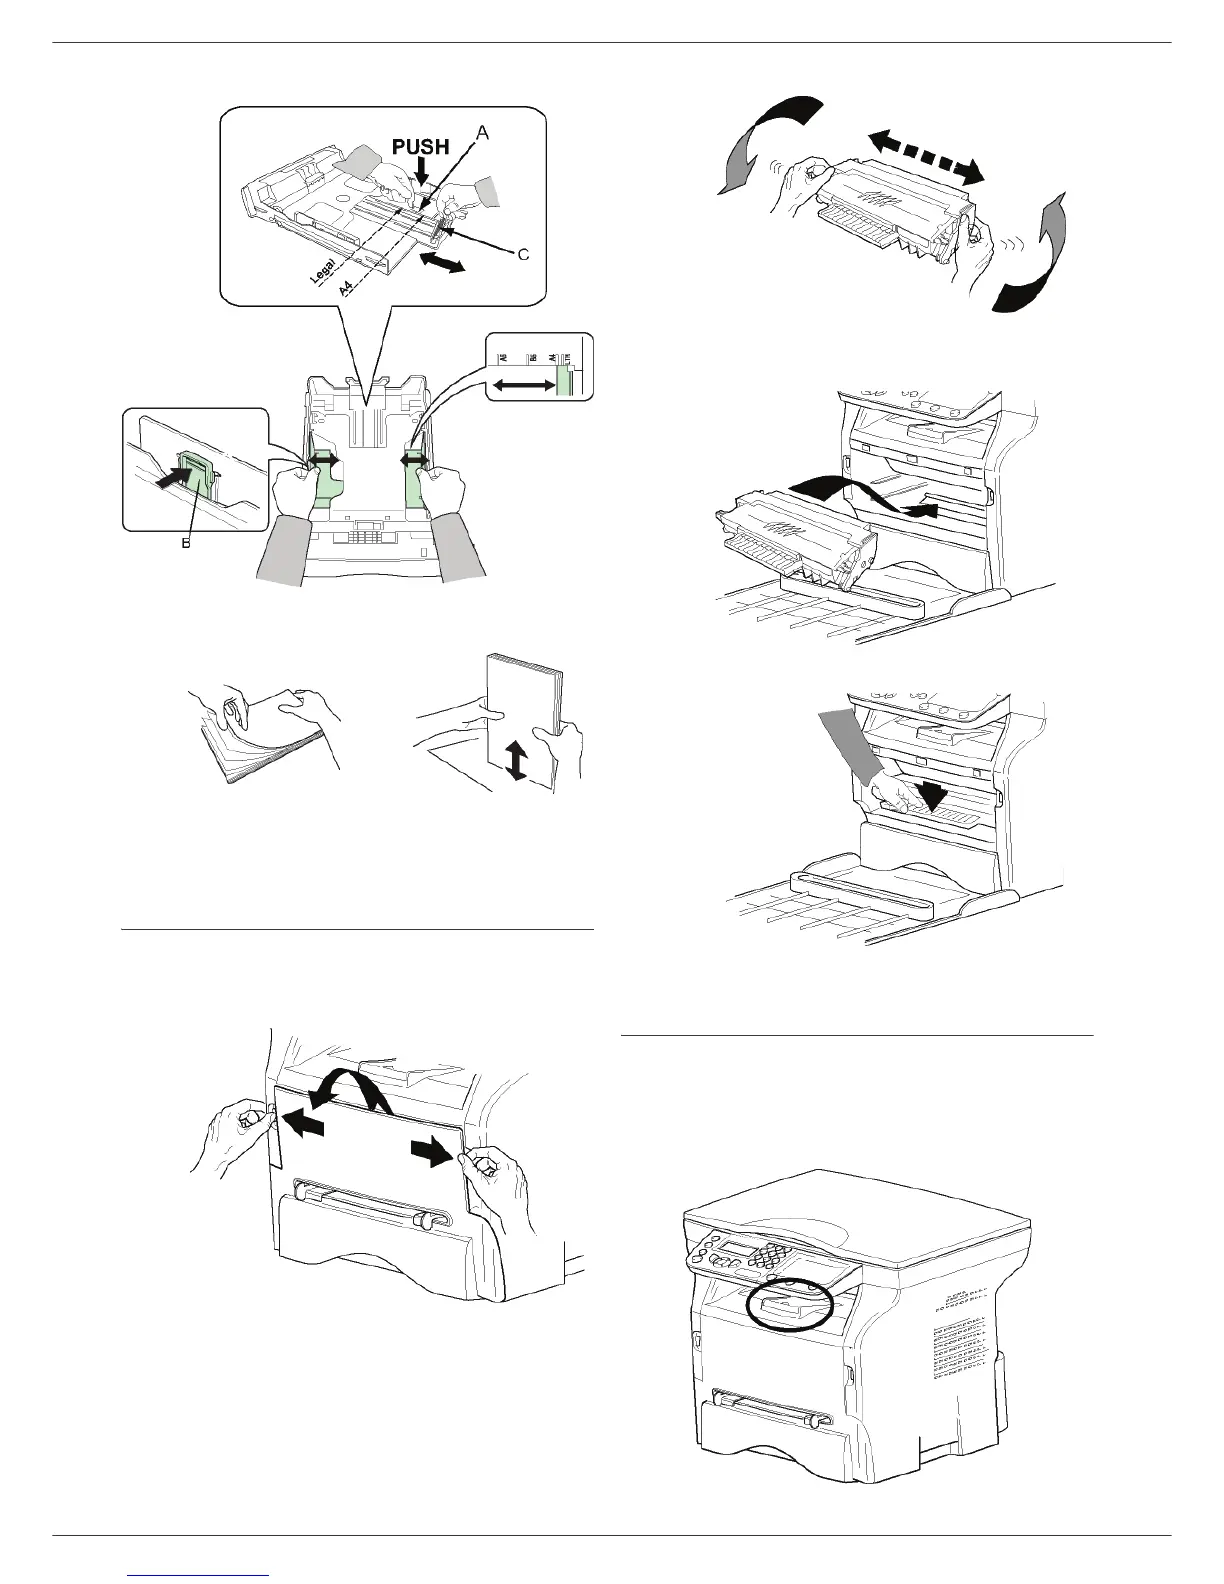
pushing lever (C).
4 Take a paper stack, pull the paper off and align it
on a flat surface.
5 Put the paper stack in the tray (200 sheets of 80 g/
m² paper for instance).
6 Slide the tray back in its location.
Print cartridge installation
1 Stand in front of the machine.
2 Grasp the left and right sides of the cover and pull
it towards you at the same time.
3 Unpack the new print cartridge. Gently roll the
cartridge 5 or 6 times to distribute the toner evenly
inside the cartridge. Thoroughly rolling the
cartridge will assure the maximum copies per
cartridge.
Hold it by its handle.
4 Insert the cartridge in its slot by pushing it until it
clicks, then gently push the handle down (as shown
below).
5 Close the cover.
Output Support Tab
Adjust the paper output support tab depending on the size
of the document to be printed. Do not forget to raise the
flap to prevent output sheets from falling out of the
machine.
 Loading...


