ML505/ML506/ML507 Getting Started Tutorial www.xilinx.com 19
UG348 (v3.0.2) October 9, 2008
ML50x Demonstrations in System ACE CF
R
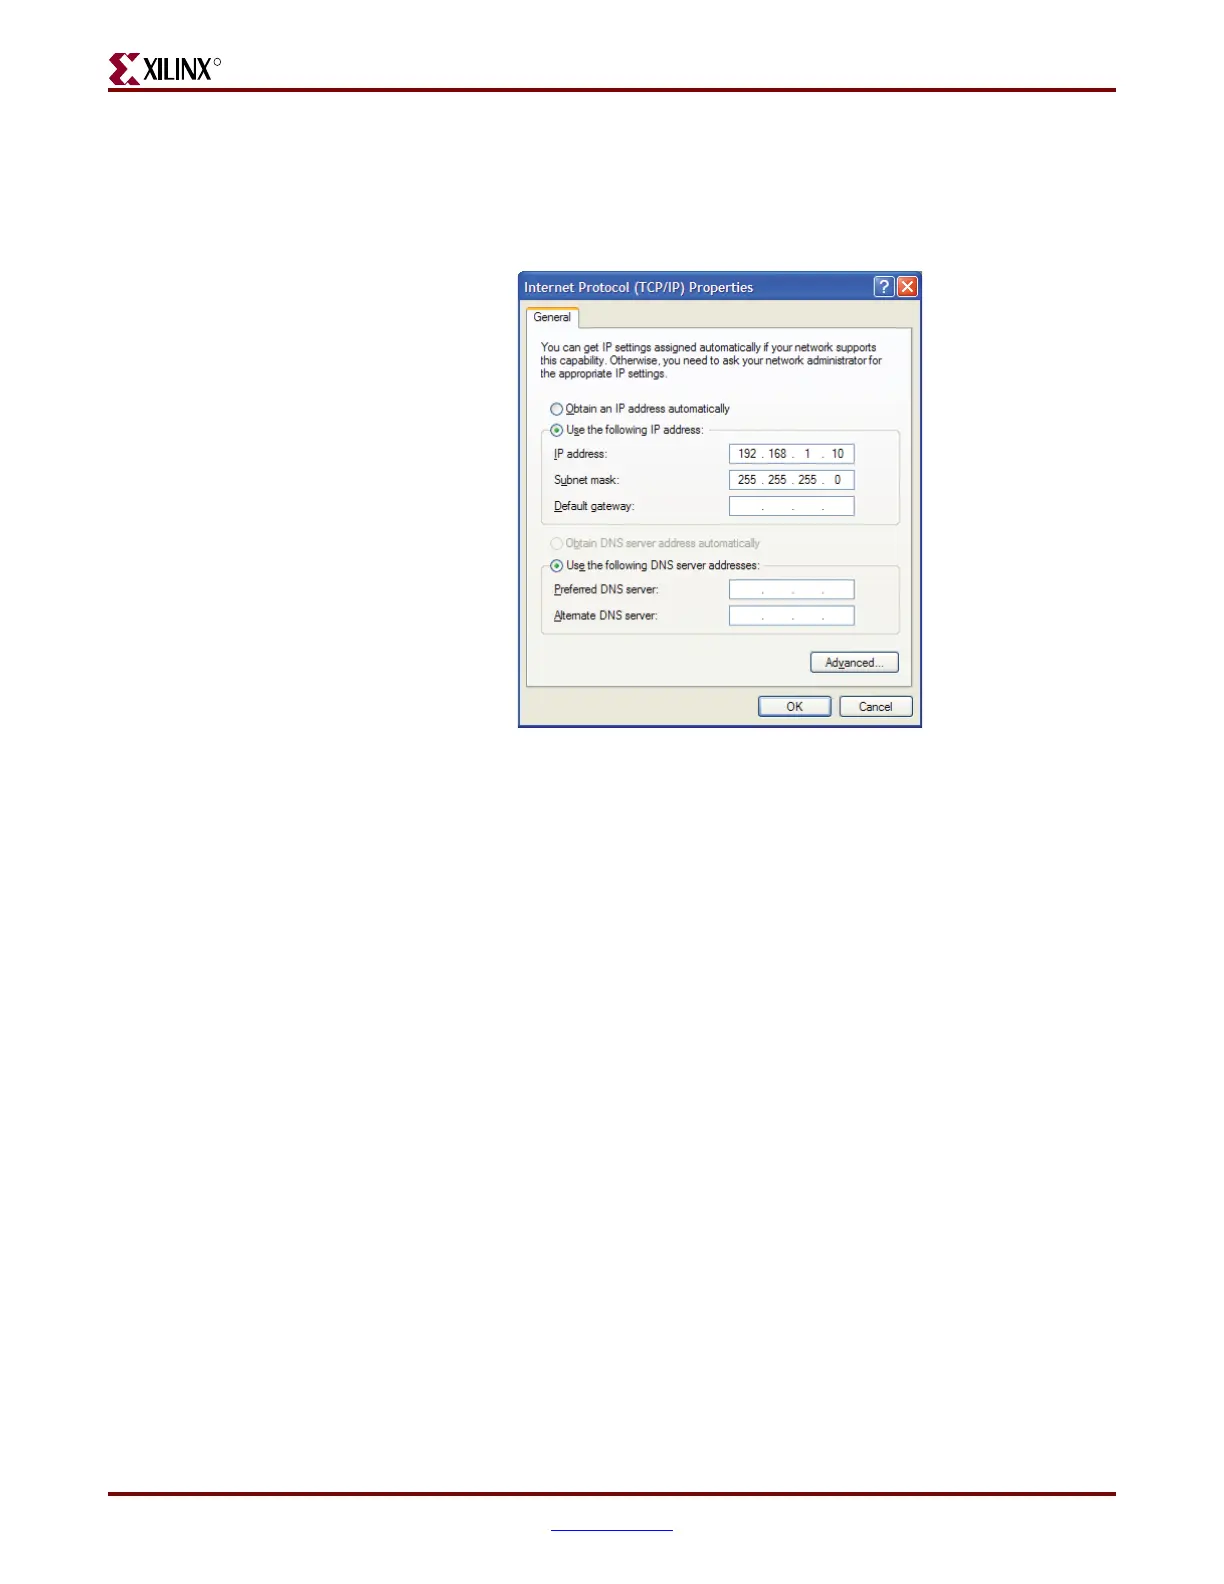
♦ Select Use the following IP address: (see Figure 8)
♦ Enter this information: IP address = 192.168.1.10 and Subnet mask = 255.255.255.0
♦ Click OK → OK to accept settings
3. Make sure the connection is running at 10 or 100 Mb/s and the ML50x board’s link
lights are on (the lights are located in the upper left corner of the board). The link LEDs
labeled 10, 100, and 1000 indicate the link is established at that speed.
♦ You might need to force your computer to link in 10 Mb/s, 100 Mb/s, or
1000 Mb/s (duplex) mode. If so, then:
Right-click Local Area Connection → Properties → Configure → Advanced tab
→ Speed
4. On the remote computer host, open a Web browser connection to http://192.168.1.10,
and follow the instructions on the loaded Web page.
♦ You might need to turn off your browser's proxy (use direct Internet connection
mode) especially if you have multiple networking devices on your computer.
♦ On the remote computer host, you can ping 192.168.1.10 to confirm that the
network connection is alive.
Restore your computer's network settings when finished.
Figure 10: IP Settings
UG348_12_051408
 Loading...