Maintenance
39
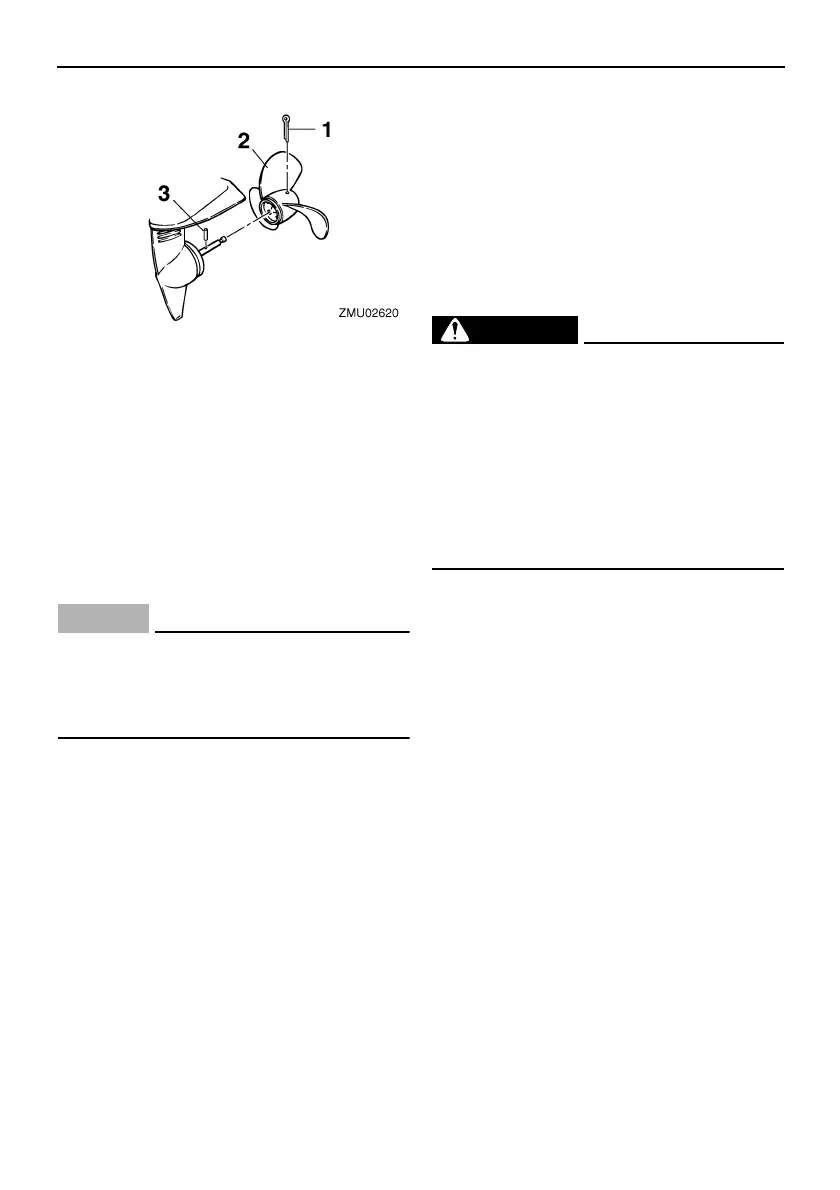
2. Remove the propeller nut and washer, if
equipped. WARNING! Do not use your
hand to hold the propeller when loos-
ening the propeller nut.
[EWM01890]
3. Remove the shear pin and the propeller.
EMU30672
Installing propeller
EMU29222
Shear pin models
NOTICE
ECM00500
Be sure to use a new cotter pin and bend
the ends over securely. Otherwise the pro-
peller could come off during operation and
be lost.
1. Apply Yamaha marine grease or corro-
sion resistant grease to the propeller
shaft.
2. Insert the shear pin into the hole in the
propeller shaft.
3. Align the shear pin with the groove in the
propeller boss, and slide the propeller
over the propeller shaft.
4. Align the hole in the propeller with the re-
cess in the propeller shaft. Insert a new
cotter pin in the hole and bend the cotter
pin ends. NOTICE: Do not reuse the
cotter pin installed. Otherwise the pro-
peller can come off during operation.
[ECM01890]
IP:
There is a holder on the steering handle for
spare shear and cotter pins. Be sure to re-
place a pin in the holder if one is used.
EMU29287
Changing gear oil
WARNING
EWM00800
● Be sure the outboard motor is securely
fastened to the transom or a stable
stand. You could be severely injured if
the outboard motor falls on you.
● Never get under the lower unit while it is
tilted, even when the tilt support lever or
knob is locked. Severe injury could oc-
cur if the outboard motor accidentally
falls.
1. Tilt the outboard motor so that the gear oil
drain screw is at the lowest point possi-
ble.
2. Place a suitable container under the gear
case.
3. Remove the gear oil drain screw and gas-
ket. NOTICE: If there is an excessive
quantity of metal particles on the mag-
netic gear oil drain screw, this can in-
dicate lower unit problem. Consult
your Yamaha dealer.
[ECM01900]
1. Cotter pin
2. Propeller
3. Shear pin
U6A12RE0.book Page 39 Friday, February 27, 2009 10:26 AM
 Loading...