Quick Guide — Advanced Course
Creating a Song on the MOTIF ES
115
Owner’s Manual
Using the Groove settings to change the Pattern data
Grid Groove is a playback-only feature that processes the recorded data of a Pattern without actually changing it. In other
words, the original data (created via the Recording, Sampling, File Loading and Patch functions) remains intact. If you
want to make the Grid Groove settings permanent and change the data, use Normalize Play Effect in the Pattern Jobs
([PATTERN] → [JOB] → [F5] TRACK → 04: Normalize Play Effect). From this display, specify the track to be changed
according to the Groove settings, and press the [ENTER] button to execute.
Creating a Section and Pattern Chain
■ Creating a Section
Each Pattern consists of 16 Sections (A~H) which can be used as Pattern variations. Create the desired rhythm pattern
variations, or Sections, that you wish to use as accompaniment and backing for your new Song. After you’ve created the
Sections, you can string these Sections together in any order desired to assemble the backing part of the Song, over which you
can record a melody line and any other parts, in the Song Record mode.
n Pattern Mixing, Groove, and Phrase Voice (Track Voice) on/off (page 167) cannot be set independently for each Section, but apply to all Sections.
The same User Phrases can be assigned to different Sections within a pattern. Keep in mind, however, that the Section data will automatically be changed
if another Section sharing the same User Phrase is changed. For example, if you’ve assigned a certain User Phrase to both Section A and Section D, and
you change that User Phrase for Section A, the same Phrase will be changed for Section D as well.
■ Creating a Pattern Chain by changing a Section
while playing a Pattern
Switching of sections, track muting, scene/mute changes,
and tempo changes can all be recorded in real time as the
Pattern Chain.
In the Pattern Chain Record Setup display, you can set the
Recording track and tempo. Three Pattern Chain track types
are available. The Tempo track lets you record tempo
changes for the Chain, and the Scene track lets you record
track on/off changes.
The Pattern (“patt”) track lets you record Section changes at
the desired measure points in the Song.
4
Save the created Pattern data to a SmartMedia/USB storage device (page 132) before turning the power off.
........
Section A Section B Section F Section H
Convert
Song
Pattern Chain
.....Enter the desired Sections for the Song
CAUTION
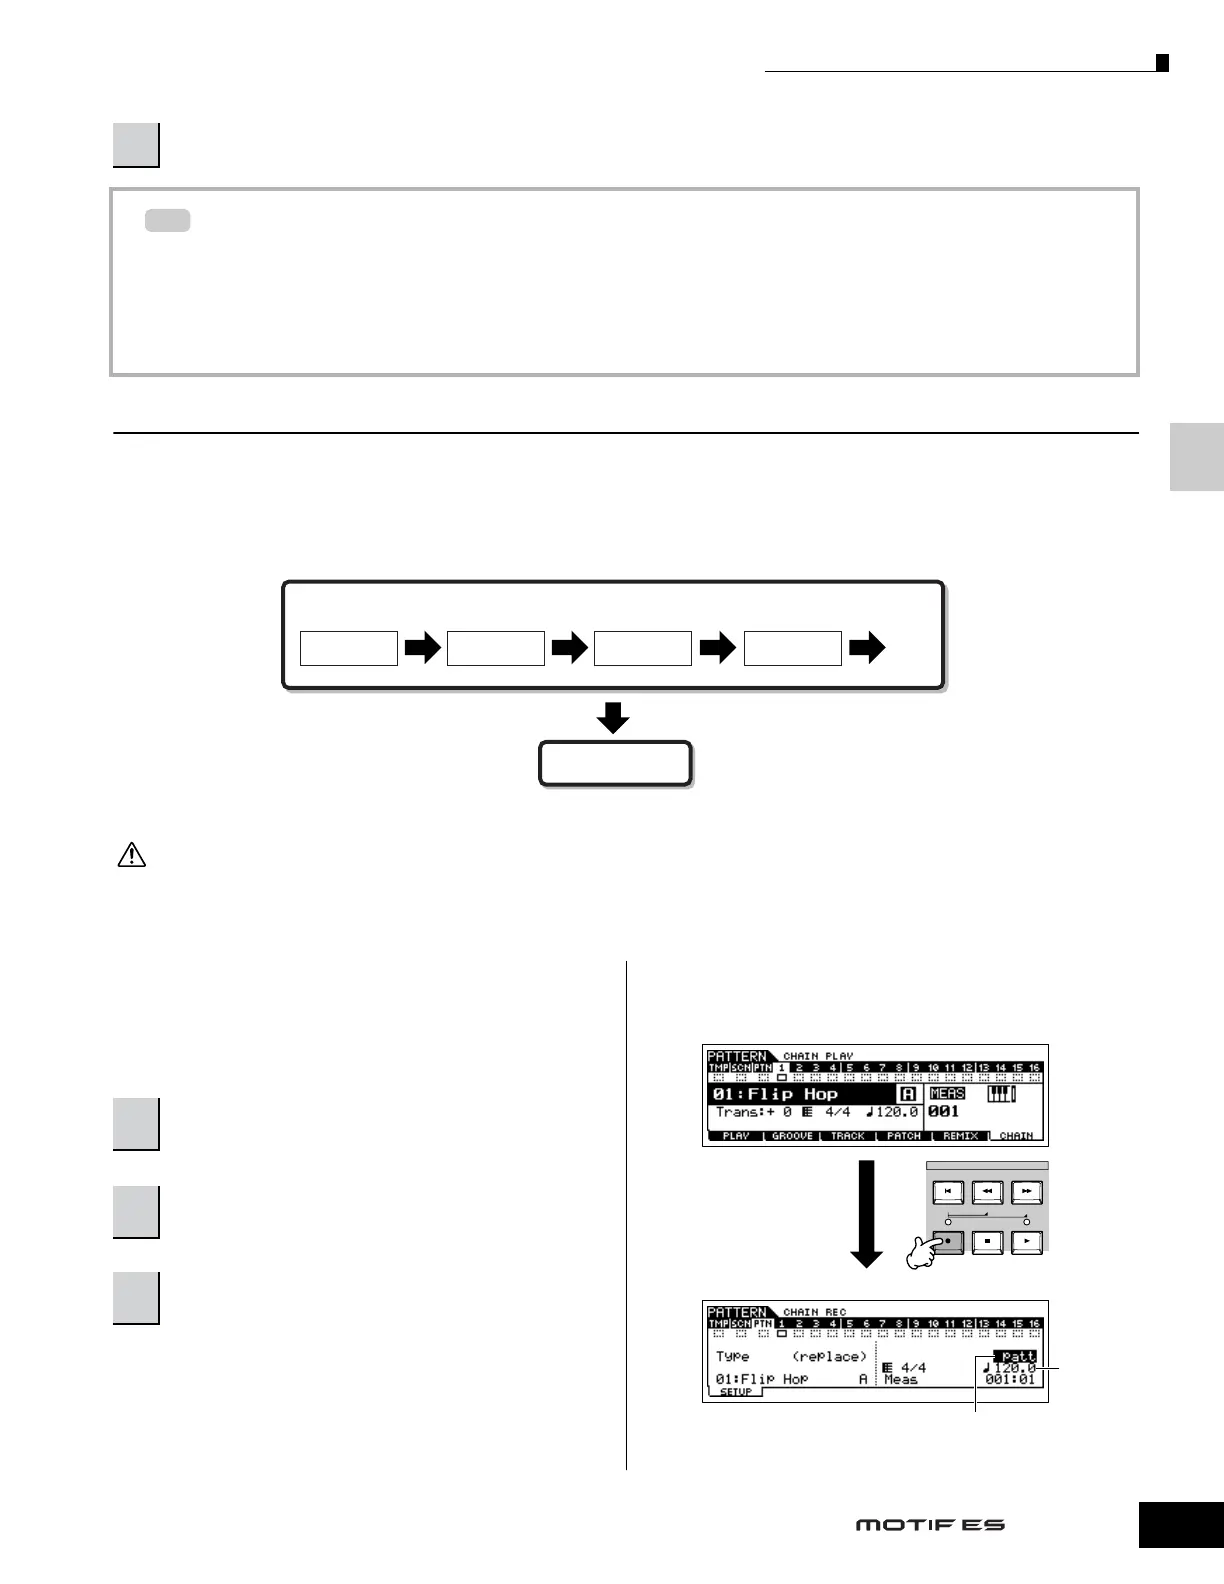
1
In the Pattern Play mode, select a Pattern for
which data has already been created.
2
Press the [F6] CHAIN button to call up the
Pattern Chain Play display.
3
Press the [
●
] (REC) button to enter the Pattern
Chain Record mode, then set the basic parameters.
SEQ TRANSPORT
LOCATE 1 2
Pattern Chain Play display
Pattern Chain Record Setup display
Set the recording track to “patt” and enter
the Sections to the desired measures.
Tempo

 Loading...