QL5/QL1
166
UPDATING DANTE MODULE (Brooklyn2)
1) Equipment and material
PC: 1 unit, Windows XP with Ethernet port, Windows
Vista or Windows 7
Cable: Ethernet (CATSe) straight cable 1 pc.
2) Application
Dante Firmware Update Manager
Stored in ¥driver in Updata (QL_updata)
When DanteFirmwarUpdateManager***.exe is executed,
the updata will be installed.
(*** represents the version number)
* Premise: Bonjour is installed and operates properly.
* If the version of the firmware is not the latest one,
update it to the latest.
3) Connection
Connect the PC and the primary port of QL with the
Ethernet (CAT5e) straight cable.
* Only the above connection is required and nothing
should be connected to any other terminal.
• Updating Procedure
1) Turning on the power of QL.
Use the normal starting for updating.
2) Starting Application
Using Firmware Update Manager provided by Audinate,
execute updating of the DANTE fi rmware.
(Started by Start menu – Program – Audinate – Dante
Firmware Update Manager – Dante Firmware Update
Manager)
Immediately after starting, the screen is as shown below.
(The interface selection screen may appear depending on
your PC. In that case, select the interface to be connected
to the Dante firmware and proceed to the following
screen.) Start the updating procedure by pressing the
[Update Dante Firmware]
button.
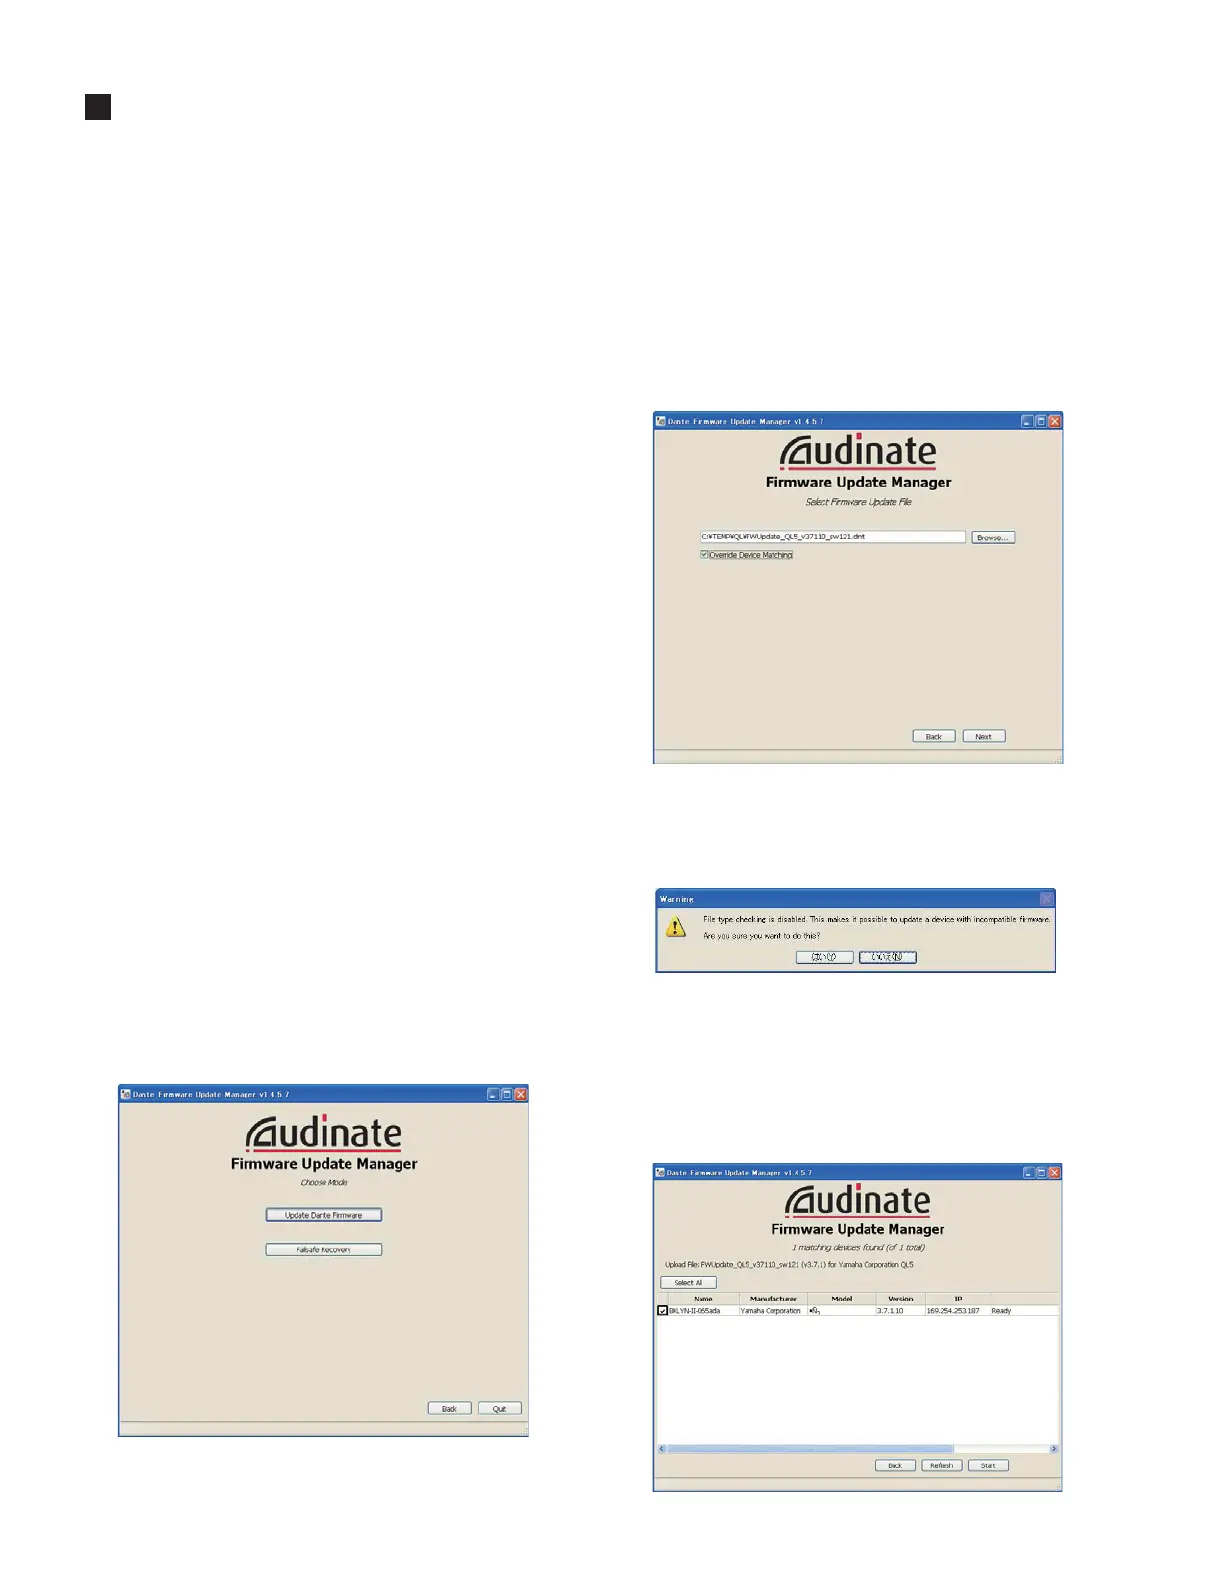
3) Selecting Firmware
Select the fi rmware to be updated. Press the
[BROWSE]
button and the file selection message will appear. Select
FWUpdate???vxxxxswxxx.dnt
in brooklyn2¥ in
Updata (QL_Updata).(
xxxx,xxx
represents the version
number, ??? represents the model name.)
The image here shows that of Rio3224-D but same with
QL except the fi le name/device name to be updated.
Check Override Device Matching.
When checking Override Device Matching after pressing
the [Next] button, a pop-up window will appear to confi rm
whether to ignore the fi le type comparison. Click the [YES]
button here.
4) Selecting Device
When QL connected to the network is found, it will be
included in the list of items to be updated.
Put a check mark at the left end of QL to be updated.
At this time, do not select more than one QLs. Execute
updating one by one.

 Loading...


