10
Operational instructions
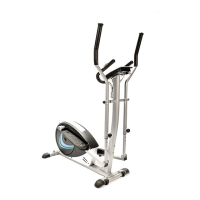
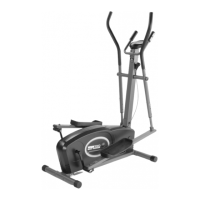
Adjusting The Resistance
This cross trainer features a speed independent braking (resistance) system. The resistance is controlled by a
magnet, which is moved closer or further away from the ywheel - the closer the magnet is to the ywheel the higher
the resistance. The magnet is computer controlled, to adjust simply use the UP / DOWN keys on the console.
Hand Pulse Sensors
This cross trainer is tted with 2 hand pulse sensors. To
obtain a pulse reading you must have both your left and
right hands on the sensors at the same time. Do not
grip the hand sensors too tight and allow the computer
a few seconds to display the reading.
Hand Pulse
Sensors
REC OVER Y
RES ET
MOD E
STAR T
STO P
Levelling Your Cross Trainer
To help you level the cross trainer on uneven surface,
2 height adjusters are included on the rear stabilizers.
Simply twist these around to adjust the height of the
cross trainer.
Adjust The Seat
Simply adjust the knob under the seat to move forward
or backward.
Adjust The Seat Height
Note: Do not pull the seat out too far - the maximum is indicated with a
piece of tape on the seat post.
1. Unscrew the hand wheel.
2. Adjust the seat up or down to your required height - to line it up
correctly, make sure the number and line is visible at the top of the seat
post mounting tube.
3. Re-screw the hand wheel - make sure it is screwed tightly.
4. The basic rule for getting the seat height right is that as the pedal
reaches its lowest point, the leg is almost straight.
 Loading...