GB
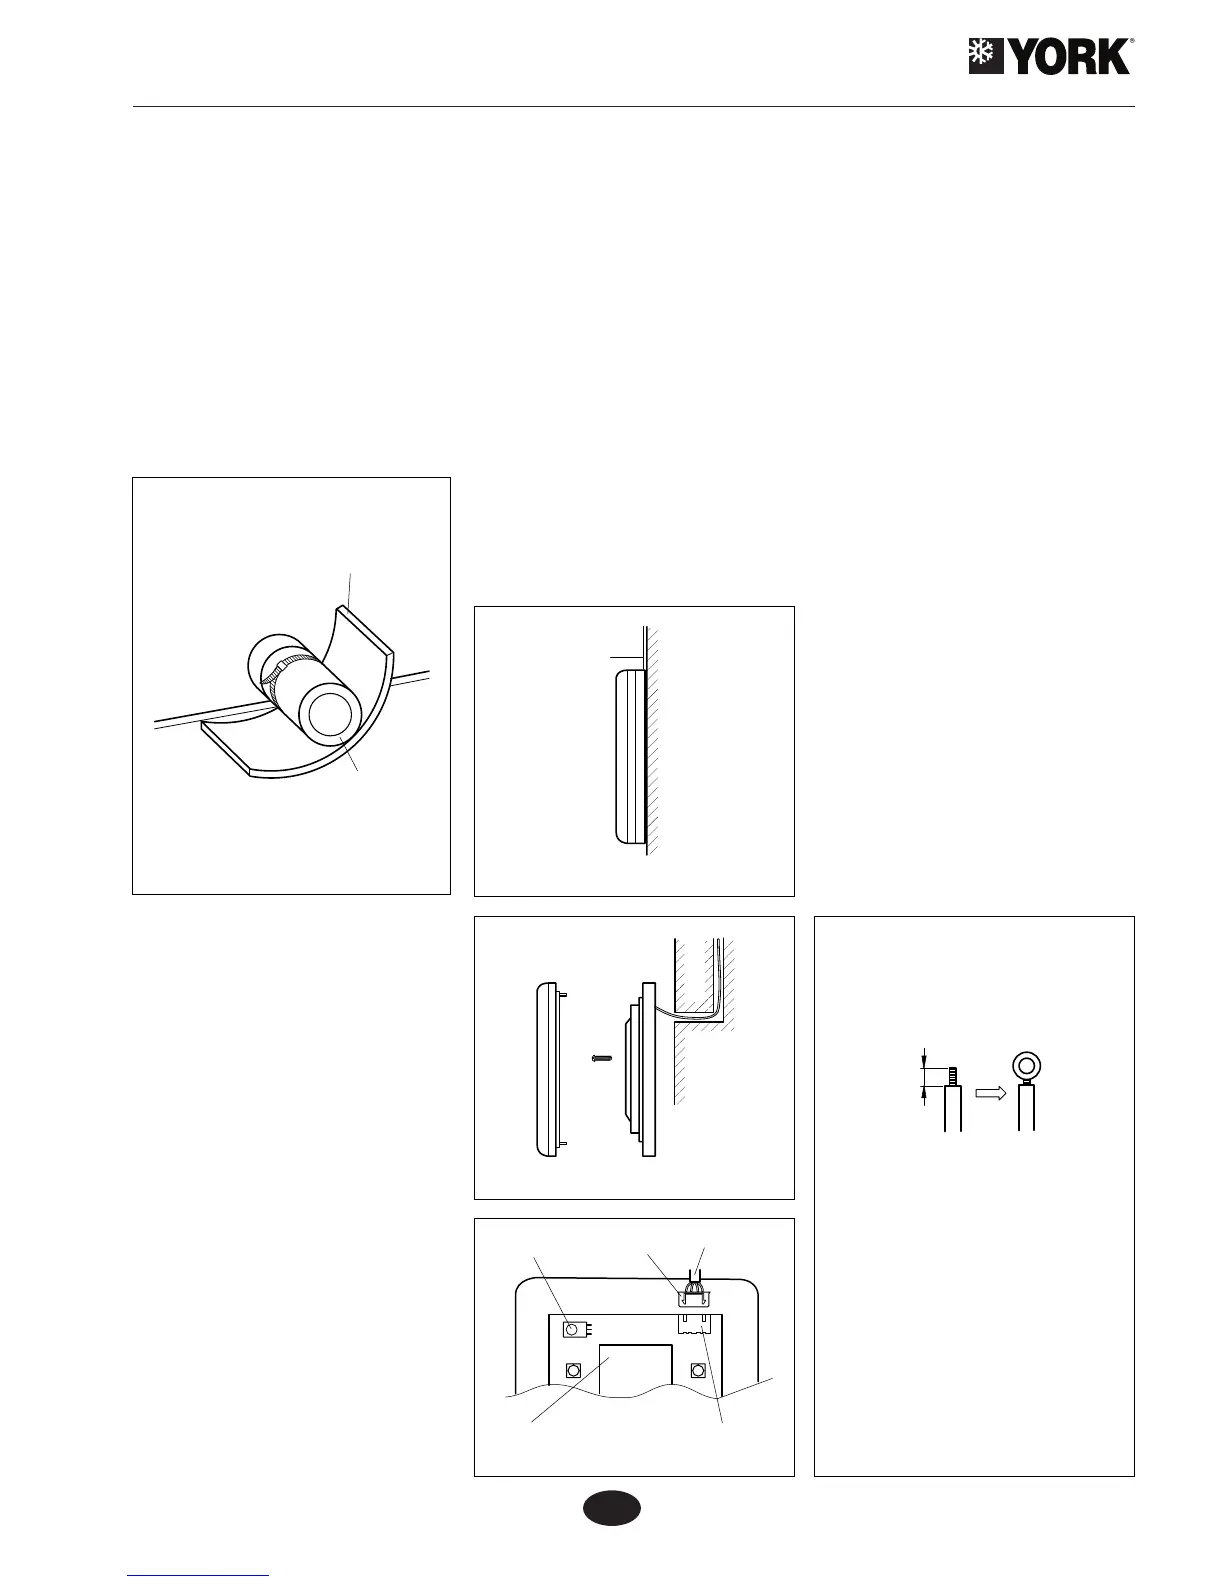
Installing the drain
1. Install the drain with a slope of about 10°
so as to drain condensed water easily.
Make sure the drain joint does not leak.
These parts should also be insulated so
as to avoid condensation of the surface
of same.
2. There is a drain outlet on both sides.
Select the desired outlet and insert a
plug on the other side. The clamp must
be used to fasten and isolate the drain
outlet correctly.
3. When the unit is received from the
factory, the drain is on the right hand
side of the unit.
NOTE: Drain joints must be insulated so as
to avoid water leaks.
Drain design
1. Install the drain with a 1/50 - 1/100 slope
so as to avoid buckling and bends.
2. When the drain is connected to the unit,
stress on the drain side should be slight,
and the pipe should be located and
fastened close to the unit.
3. As a general rule, the drain pipe should
be hard PVC. When connection is made,
insert one end of the PVC pipe in the
drain hole and fasten.
4. When drains are used for different units,
the position of the common pipes should
be at about 100 mm. below each unit.
Checking drain system
1. Drain system must be checked after
installation.
2. Make sure water ow through the pipe
is correct and there are no leaks at the
joint.
3. For new constructions, it is advisable to
check prior to installing furniture.
Installing wall remote
control unit
(Duct type unit)
1. First, select the location. Remember you
must drill a hole or groove to pass the
cable through.
2. The connecting cable between the wall
remote control unit (dimensions: 85 x 85 x
16) and the indoor unit can be concealed
beneath a PVC gutter (Fig. 2); or can be
embedded (Fig. 3). Connect the cable to
the wall remote control unit (Fig. 4) and
fasten the control unit to the wall.
3. Drill two holes in the wall in
correspondence with the position of the
rear screws, insert the wedges, align the
holes with the screws and tighten the
latter.
4. Connect the four-wire cable to the CN10
connector on the indoor board.
Special functions
Dual ambient temperature sensor
This series of ducted air conditioning units
has two ambient temperature sensors. One
is located in the indoor unit return, and the
other in the wall thermostat.
The user can select the probe to be
used in accordance with architectural
requirements. (For further information,
please see the Operating Instructions.) The
default ambient temperature sensor is the
one located in the indoor unit return.
Outdoor temperature control
Users can check the outdoor temperature
on the wall thermostat. (For further
information, please see the Operating
Instructions.)
Cable connections
Connecting cables to the
terminals (Fig. 5)
NOTE: Please check the following points
prior to installation.
1. Make sure power supply voltage
coincides with the indication on the
electronic board.
2. Power contracted must be in accordance
with your corresponding needs, and the
power supply cable must have a section
of over 2.5 mm².
3. Wiring should be carried out by qualied
personnel. It should include a safety
system with a differential switch having
a 3 mm. separation between contacts.
Fig. 1
Fig. 2
Fig. 3
Fig. 4
CABLE
Fig. 5
10
Flexible cable.
1. Strip about 10 mm. of cable.
2. Remove screws from the
connecting strip.
3. Place a round terminal on the
stripped part of the cable.
4. Insert the screw in the circuit
and tighten the terminals.
INSULATION
DRAIN
Drain insulation
Surface installation
Embedded installation
RECEIVER
CONNECTOR
CONNECTORLCD DISPLAY
FLEXIBLE
CABLE
 Loading...