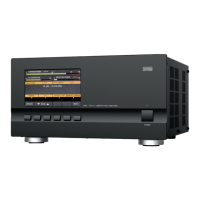
3.2. Front Panel
a) POWER button
Please, see Figure 3-1 | Front panel - Controls and Readouts (Pos. (a)).
When the rear panel mains switch is turned on, push and hold for 1-2 seconds to start the amplifier up. When
the amplifier is turned on, push to turn it off (back to Low Energy standby mode).
b) LED indicator above the POWER button
Please, see Figure 3-1 | Front panel - Controls and Readouts (Pos. (b)).
When lit red and the screen is dark, the amplifier is in Low Energy standby mode and may be turned on by
pushing the POWER button.
c) Functional buttons
Please, see Figure 3-1 | Front panel - Controls and Readouts (Pos. (c)).
Six functional buttons keypad for manual (local) control of the amplifier. The function of each button is
indicated on the display above it. Depending on the displayed menu, the buttons may have different
functions (soft key).
d) A high resolution, 24-bit color display showing the operating information.
Please, see Figure 3-1 | Front panel - Controls and Readouts (Pos. (d)).
3.3. Initial Turning On
In order to start up the amplifier, push and hold the front panel POWER button for one or two seconds. About
ten seconds later (boot sequence) the display will flash and show the basic screen with the amplifier
information (see Figure 3-2 | Basic screen).
The amplifier may start in either STANDBY or OPERATE mode depending on AUTO OPERATE user setting (see
Section 4.1.c) AUTO OPERATE user setting).

 Loading...