en | AHT Cooling Systems GmbH Switch the cooling function on and off | 1.1.1
398051_4_0119 9 / 16
1.1.1 Switch the cooling function on and off
Switch off the cooling function for cleaning purposes
only.
Switch off cooling
function (start
manual defrost):
Press for at least 3 s.
„OFF“ and the current
temperature are shown on the
display.
Switch on cooling
function (normal
operation):
Press for at least 3 s.
The current temperature and
the symbols are
shown on the display.
1.1.2 Setpoint
Display setpoint
Show set setpoint
(temperature):
Press 1 s.
Leave setup menu:
Press again.
Change setpoint
Show set setpoint
(temperature):
Press 1 s.
Increase setpoint:
Press .
Decrease setpoint:
Press .
Assume new
setpoint:
Press .
1.1.3 Assign bus address
Before assigning the bus addresses, the devices (1,
2,...n) must be networked with an appropriate bus
cable.
The first device (1) must be connected to market mon-
itoring (M) via the bus cable.
The bus cable must be terminated with a terminating
resistor (R) on the last device (n).
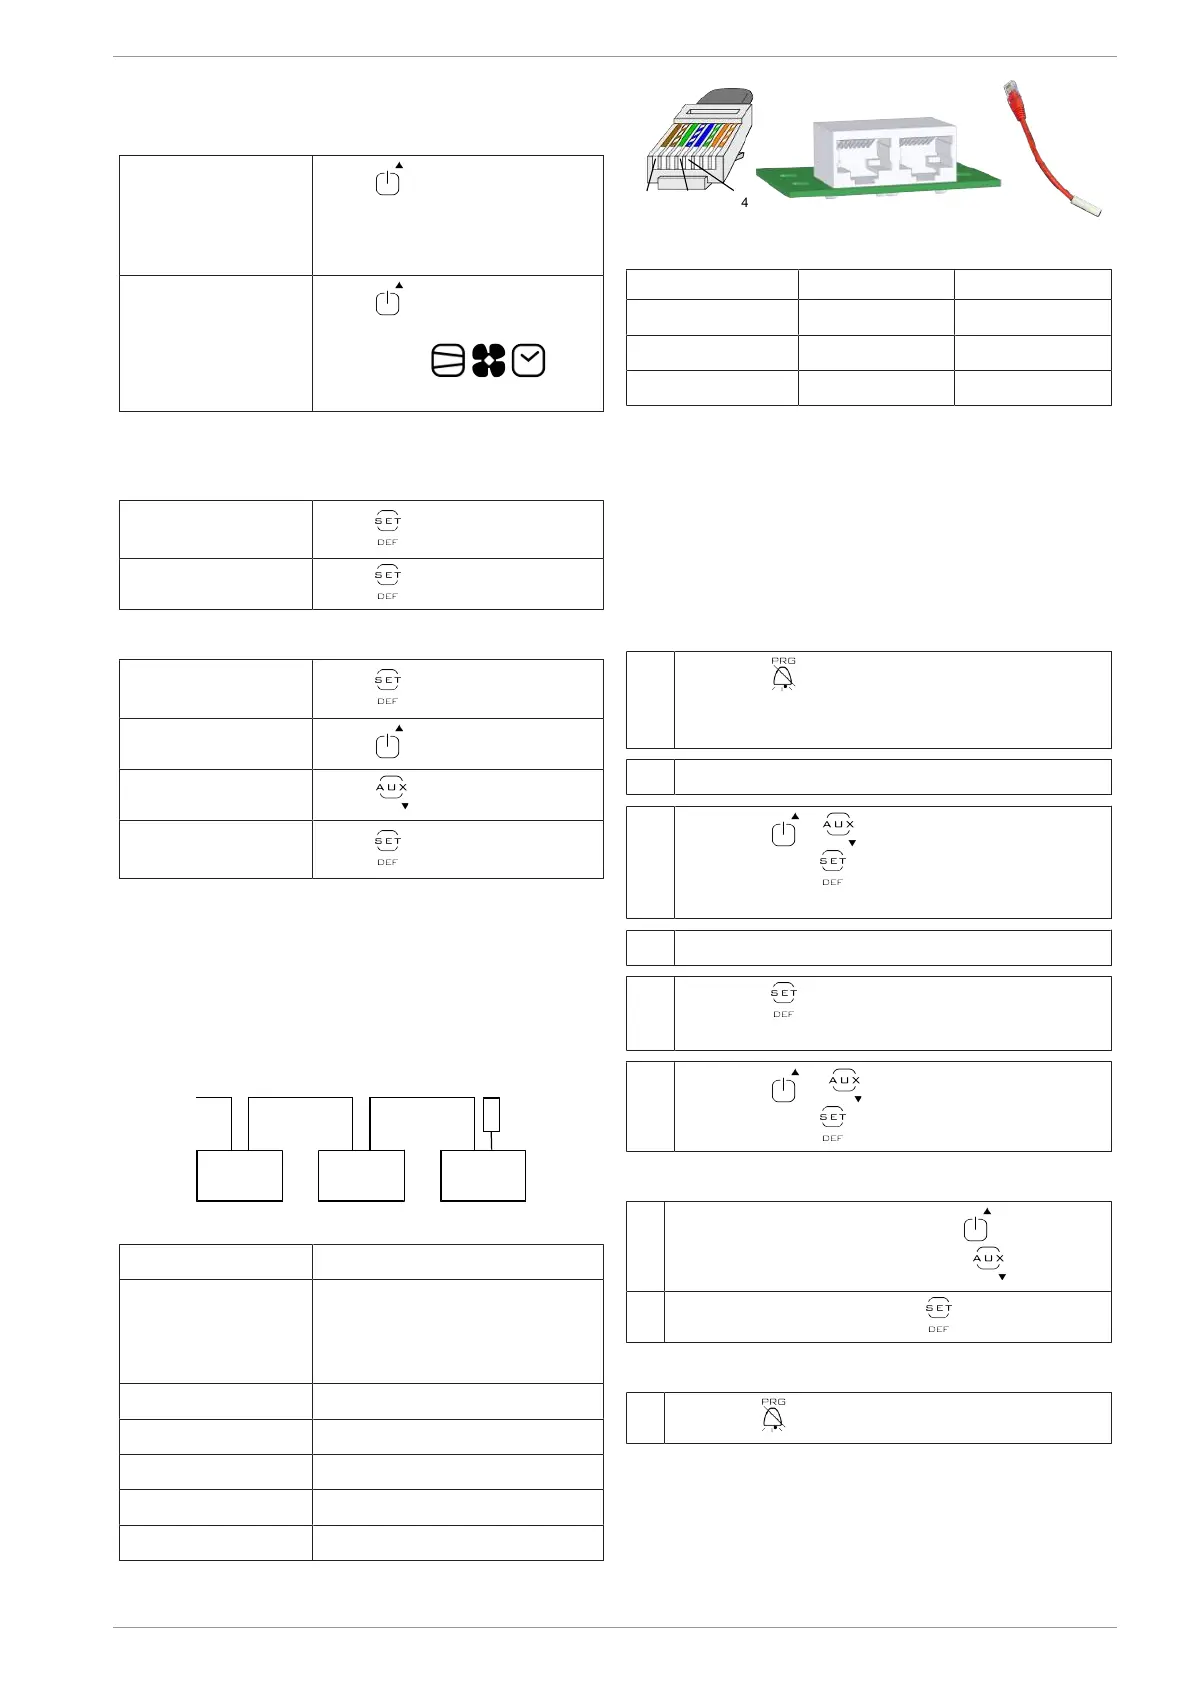
Fig.4: Bus system diagram
Bus cable Patch cable CAT 5-S/FTP
Bus system
(optional)
PROTOCOL MODBUS RTU
RS-485 2-WIRE
Connection via RJ45 socket/
RJ45 plug
Baudrate 9600 oder 19200 Bit/s
Data Lenght 8 Bit
Parity none
Stop bit 1
Minimum TimeOut 60ms
Fig.5: RJ45 connector bus cable, RJ45 sockets device and
terminating resistor (R)
Pin Data Colour
4 B / + Blue
5 A / - Blue/White
8 Ground Brown
The controller are delivered with the bus address
„1“ (corresponds to a „stand-alone“- unit). For identific-
ation of several units in the bus system, the bus ad-
dresses must be assigned starting with „1“.
Bus addresses must not be assigned twice. After-
wards, we recommend entering the addresses accord-
ing to the actual wiring sequence.
A maximum of 207 addresses are possible.
Access programming level
1.
– Press for at least 3 s .
„PS“ and afterwards „0“ are shown on the
display.
2.a Variant with password
– Press or until „22“ appears.
Then press .
„/2“ is shown on the display.
2.b Variant without password
– Press .
„St“ or „H0“ are shown on the display.
3.
– Press or until „H0“ appears.
Then press .
Assign bus address
4.
– Increase bus address: Press .
– Decrease bus address: Press .
5.
– Accept new entry: Press once.
Leave programming level
6.
– Press 5 s.
The current temperature is shown on the display
again.
Assign bus address for subsequent units:
– Repeat point 1 to 6 on each unit and set next free
bus address.
 Loading...