PEQ - Touch and drag the PEQ band dots to adjust the HPF (high pass filter)
and to shape the EQ. Drag up/down to adjust Gain and sideways to adjust
Frequency. Touch a dot to select a band and use the Width slider or pinch
horizontally, diagonally or vertically either side of the dot to adjust the width
(octaves) of the band. At its widest settings the LF and HF bands become
shelving rather than bell shaped. Buttons are available to switch the PEQ in/out
and to reset the EQ flat.
GEQ - 28 sliders display the GEQ settings. Touch a slider and move your finger
to adjust its setting. Touch and move your finger left or right away from the
slider to increase the resolution. The area above the sliders displays the RTA.
Buttons are available to switch the GEQ in/out and to reset the EQ flat.
RTA - An RTA (Real Time Analyser) fed by the current PAFL selection is
displayed above the GEQ sliders. This displays the signal activity as a green
meter for each of the 1/3 octave frequency bands. The dominant frequency
(peak band) displays as a red dot above the meters. This can be helpful when
ringing out monitor speakers or finding problem frequencies in a room. Check
that you have selected PAFL for the channel or mix you want to analyse.
DCA Groups – These control the levels and mutes of the channels assigned
to them. Normal setting for no effect is fader position ‘0’. Touch PAFL to turn
on PAFL monitoring of all assigned channels. Touch the strip to open the
assignments and naming page.
Mute Groups – These control the mutes of the channels assigned to them.
Touch the strip to open the assignments and naming page.
SoftKeys - There are 15 user assignable keys. Their current functions are
labelled. Touch the strip to open the assignment page. Scroll the wheel to
select the function to assign to the key. Touch Apply to confirm.
Custom Layers - Three custom layouts can be assigned using the Setup
screen. These layouts are stored in the iPad and do not affect the mixer.
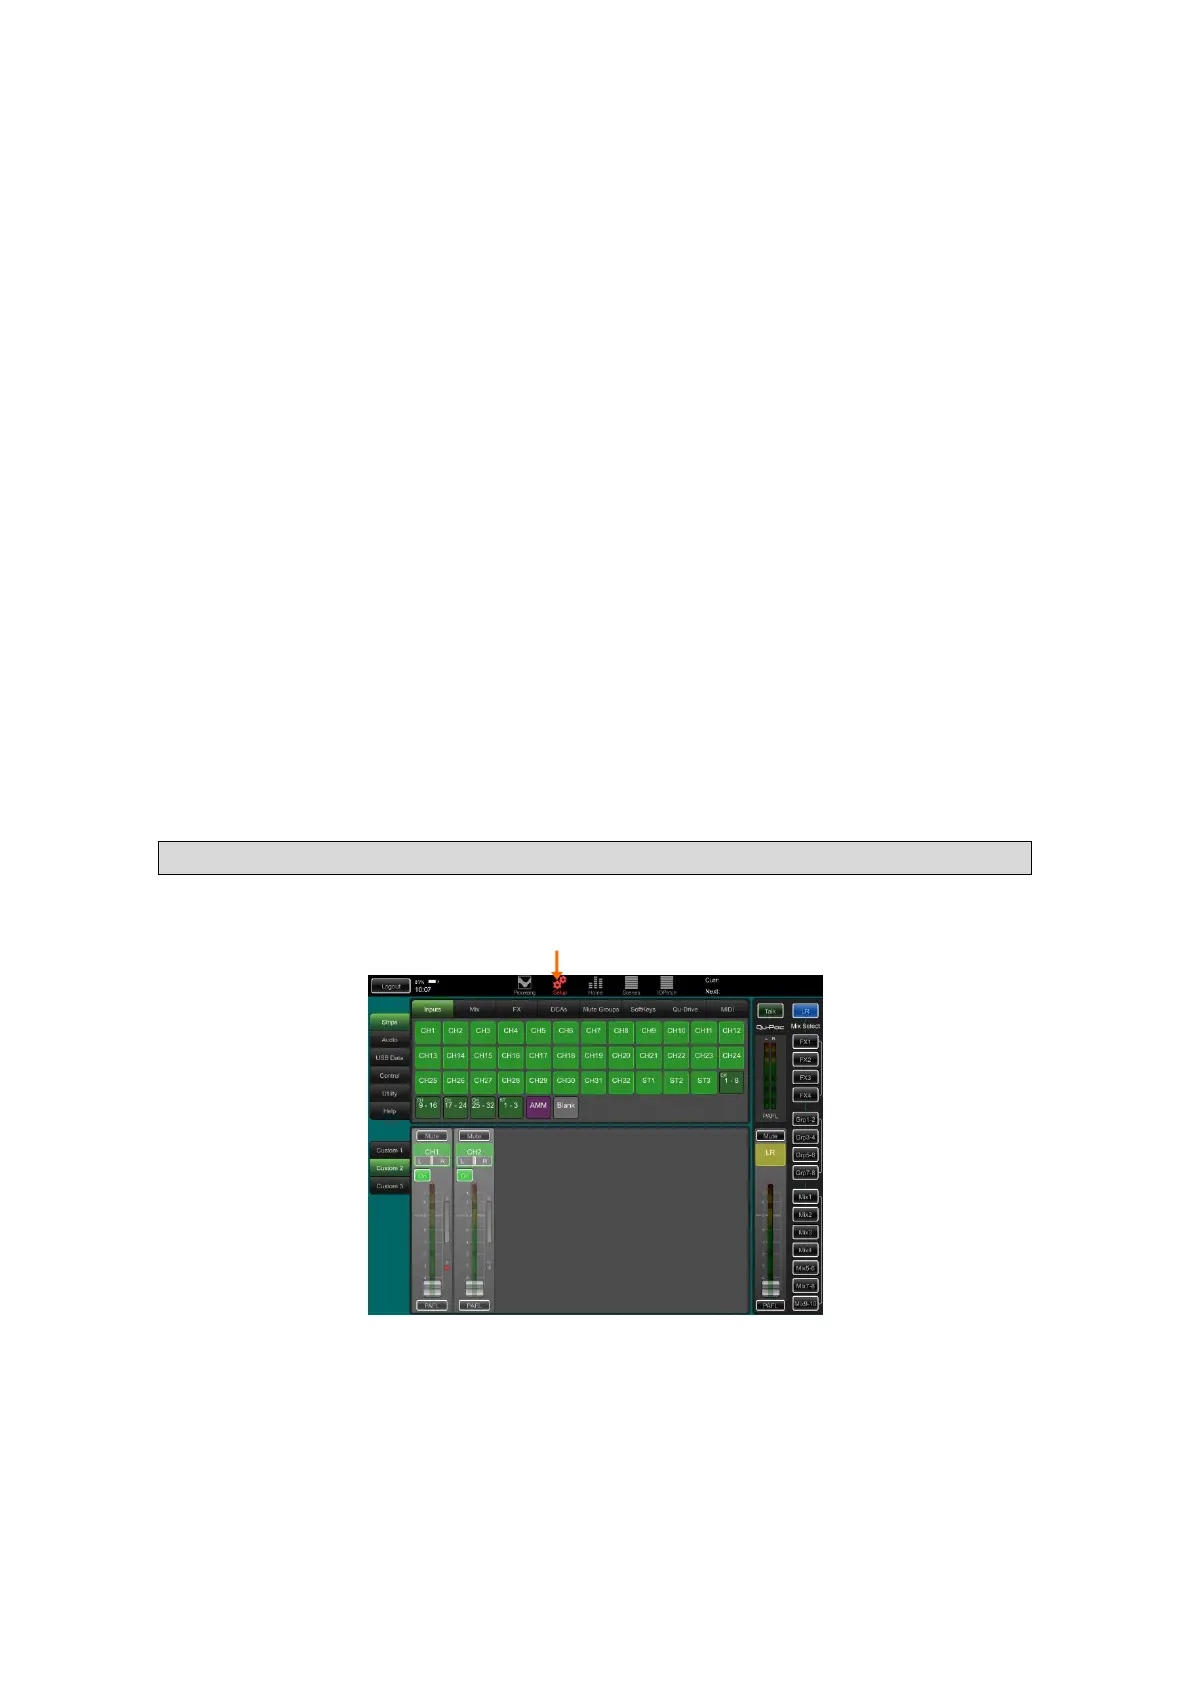
1.3 Setup Screen
Access setup functions and user preferences. Use the vertical tabs on the left to select different setup types.
Use the horizontal tabs across the top to select the associated options.
Strips
Create your own fader layouts with up to 32 strips in each of up to three
Custom layers. These let you combine channels, mixes, FX, matrix, mute and
DCA groups and SoftKeys you want to use in any combination, and to even
add blanks to separate groups of channels. Adding the Inputs AMM item will
let you quickly access the automatic mic mixer settings. Choose Custom 1, 2
or 3 in the bottom panel.
Select the type of channel you want to assign from the top panel. Use your
finger to drag and drop channels where you want them. Drag them down into
the Custom layer to add them. Drag them up out of the layer to remove them.
 Loading...