EasyManua.ls Logo

ALLEN & HEATH QU-PAC User Manual

ALLEN & HEATH QU-PAC
92 pages
To Next Page IconTo Next Page
To Previous Page IconTo Previous Page
Page #72 background imageLoading...
Page #72 background image
Qu Mixer Reference Guide 72 AP9372 iss.9
11.14 I/O Patch Setup Surface
Use this screen to patch signals to
the rear panel Alt Out and AES
outputs. Touch a box to open up the
list of available options. Changes are
applied instantly. You can also touch
outside the list to exit.
Alt Out Choose the source for the
rear panel stereo Alt Out jacks.
AES Out Choose the source for
the rear panel AES digital output.
The reset default for both is LR post-
fade.
Group and Matrix outputs are not
available on the Qu-16.
The Alt Out and AES Out are not provided on Qu-SB.
11.15 I/O Patch dSNAKE In
Use this screen to patch AudioRack input sockets to
the Qu input channels. You can connect up to two
AudioRacks via the dSNAKE Cat5 digital snake.
The button code indicates dSNAKE device:
N/C = No AudioRack is connected
Main = First AudioRack
Expander = Second AudioRack (expander)
Touch a Channel box and turn the screen rotary to
scroll through the dSNAKE socket numbers. These
relate to the AudioRacks currently connected, or to the
dSNAKE channels if no AudioRack is found.
Any AudioRack socket can be patched to any channel.
A socket can be patched to more than one channel. A
channel can only have one socket patched to it.
Touch Apply to confirm changes.
The reset default for the Qu-16, Qu-24 and Qu-32
models is one-to-one mapping of sockets to channels.
The reset default for Qu-SB and Qu-Pac is:
CH1-16 = Local 1-16,
CH17-32 = dSNAKE 1-16
This is because Qu-Pac and Qu-SB can be used as a
stage rack with their 16 local inputs as the source to
CH1-16. One AudioRack connected to the dSNAKE
port could feed CH17-32 to provide the full 32
channels.
Input patching is stored in Scene memories.

Table of Contents

Other manuals for ALLEN & HEATH QU-PAC

Question and Answer IconNeed help?

Do you have a question about the ALLEN & HEATH QU-PAC and is the answer not in the manual?
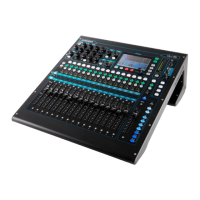
ALLEN & HEATH QU-PAC Specifications

General IconGeneral
TypeDigital Mixer
Channels32
Mic/Line Inputs16
Line Outputs10
TalkbackYes
USB Audio Interface32x32
TouchscreenYes
RackmountableYes
DuckingYes
Sampling Rate48 kHz
DCA Groups4
Mute Groups4
Scene Memories100
Remote ControlYes
USBUSB Type A, USB Type B
Computer ConnectivityUSB, Ethernet
I/O Expansion SlotsdSNAKE
EQ Bands4-band Parametric EQ
Effects4 FX engines
Dynamic ProcessingCompressor, Gate
ConnectivityEthernet, USB
Outputs - Main2 x XLR (Main)

Summary

Limited One Year Manufacturer's Warranty

Conditions of Warranty

Outlines the requirements for the warranty to remain valid, such as proper use and authorized service.

Safety instructions

General precautions

Lists essential precautions for handling, environmental conditions, and maintenance to prevent damage.

10.8 The FX

10.9 Working with FX - Adding vocal reverb:

Provides a step-by-step guide on how to add reverb to a vocal channel for a professional sound.

4. Connection Overview

4.1 Local Input Connections

Details the various local input connections, including mono line, microphone, and stereo line inputs.

4.4 Powering up the mixer

5. Connecting dSNAKE Remote Audio

5.1 Connecting to a remote AudioRack

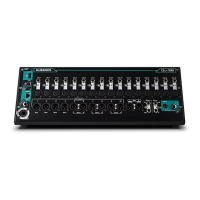
Details connecting the Qu mixer to an Allen & Heath AudioRack via Cat5 cable for remote audio.

5.3 The ME Personal Mixing System

6. Qu-16, 24, 32 Operational Overview

6.1 Fader Strips

Explains the function and layout of the Qu mixer's fader strips, including layers and motorised faders.

9. Processing and Mix Functions

9.1 Channel Naming

Explains how to name channels, FX, mixes, and groups using the screen keypad and pencil icon.

9.2 Channel Processing

9.3 Working with the Processing:

Guides on using Sel keys, Processing key, and touch screen to adjust processing parameters.

9.4 Working with Processing Libraries:

Explains how to store and recall settings using User and Factory Libraries for processing blocks.

Preamp

Channel Preamp source

Details the different preamp sources available: Local, dSNAKE, Qu-Drive, and USB B.

Channel USB source

Explains how to use Qu-Drive or USB B for stereo or multitrack playback and streaming.

Phantom Power

Gain

Guides on adjusting channel gain to achieve optimal signal levels and avoid distortion.

Polarity

Describes how to reverse the input signal polarity for phase alignment or snare drum miking.

Delay

Details how to add up to 85ms of delay to input channels for time alignment or effects.

Insert

Explains how to insert an FX or Ducker into the channel signal path, but not both.

Ducker

Stereo Linking

Describes how to link mono input channels for stereo operation and control parameter sharing.

Gate

HPF (high pass filter)

Details the High Pass Filter for reducing low-frequency noise and pops from signals.

PEQ (parametric equaliser)

Describes the Parametric Equaliser for tonal adjustment with control over four frequency bands.

Compressor

Mix processing

Details processing options available for mix masters, including PEQ, GEQ, Compressor, FX, and Delay.

GEQ (graphic equaliser)

GEQ Fader Flip (Qu-16, 24 and 32)

Explains how to use faders to adjust GEQ frequency bands in Fader Flip mode.

9.5 Processing Libraries

9.7 Channel Routing

9.8 Working with the Routing screens

Guides on navigating Routing screens, using Mix Sends, FX Sends, Grp Sends, and Mute/DCA groups.

Channel Direct Output settings

Channel Mix Sends screen

Guides on managing sends and assignments from one channel to all mixes, setting Pre/Post fader.

Channel FX Sends screen

Details working with sends and assignments from one channel to FX mixes for effects like reverb.

Channel Grp Sends screen

Channel Mute/DCA Group screen

Describes assigning channels to Mute and DCA groups for control of levels and muting.

9.9 Mix Routing

Mix to Matrix Sends

Explains how to send mixes to Matrix outputs for additional routing options.

9.10 Working with the Matrix (Qu-24, Qu-32, Qu-SB, Qu-Pac)

Describes the Matrix mixer function for providing additional outputs like stereo recording or fill speakers.

9.11 Audio Groups

Group Mode

Details setting Groups to operate as audio groups or stereo mixes for different routing needs.

Mix Mode

Explains setting Groups to operate as stereo mixes with send levels and dedicated pans.

9.12 Working with the Groups (Qu-24, Qu-32, Qu-SB, Qu-Pac)

9.13 Mute and DCA Groups

Assigning one source to many Groups

Guides on assigning a single channel to multiple Mute or DCA groups via the Routing screen.

Assigning many sources to one Group

Details how to assign multiple channels to a single group using the Fn key and Masters tab.

9.14 Using Mute Groups

9.15 Using DCA Groups

10. Touch Screen Mixing Functions

10.1 Copy, Paste, Reset keys

10.2 The Sel screens – Processing and Routing

Processing Screen

Details the Processing screen for viewing and adjusting channel or master processing parameters.

10.4 Home Screen – User

10.6 Home Screen – RTA

10.7 Home Screen – Qu-Drive (USB audio)

Multitrack Record

10.8 The FX

Patching the FX

10.9 Working with FX – Adding vocal reverb:

10.10 Scene Memories

Reset Mix Settings

Guides on resetting mixer parameters to a factory default starting point.

11. Touch Screen Setup Functions

11.1 Audio Setup - PAFL

Explains how to configure PAFL (Pre/Post Fade Listen) settings for monitoring and signal checking.

11.2 Audio Setup - Talkback

11.3 Audio Setup –Signal Generator

Explains how to use the Signal Generator to test loudspeakers and align audio levels.

11.4 Audio Setup - Automatic Mic Mixer (AMM)

11.5 Working with the AMM

11.6 Control Setup – Custom Layer

11.7 Control Setup - SoftKeys

11.8 Control Setup - Network

11.9 Control Setup - MIDI

11.10 Control Setup - Preferences

11.11 USB Data – Scene Transfer

11.12 USB Data – Library transfer

11.13 USB Data – Show transfer

11.14 I/O Patch Setup – Surface

11.15 I/O Patch – dSNAKE In

11.16 I/O Patch Setup – dSNAKE Out

11.17 I/O Patch Setup - Monitor

11.18 I/O Patch Setup – USB Audio

11.19 Utility - Calibration

11.20 Utility – Qu-Drive

Explains checking and formatting USB devices for use with Qu-Drive audio recording and playback.

11.21 Utility – Firmware Update

12. USB Audio Interface and DAW Control

12.2 DAW Control

13.Qu-Pac Qu-Control Screen

14. iOS Apps for Wireless Control

Setting up the Qu wireless network

15. Resetting the Mixer

15.1 Reset Mix Settings – A starting point for mixing

Explains how to reset mixer parameters to a factory default for a clean starting point.

15.2 System Hard Reset

16.8 System Specifications

Related product manuals