Installation
3
Axcent
3
and Axcent
3
Pro Integrated Axcess Controllers
Installation
Installing Axcess Control Cards (Axcent
3
Pro Only)
To install Axcess Control Cards:
1. Discharge the static electricity from your body, by touching a grounded object.
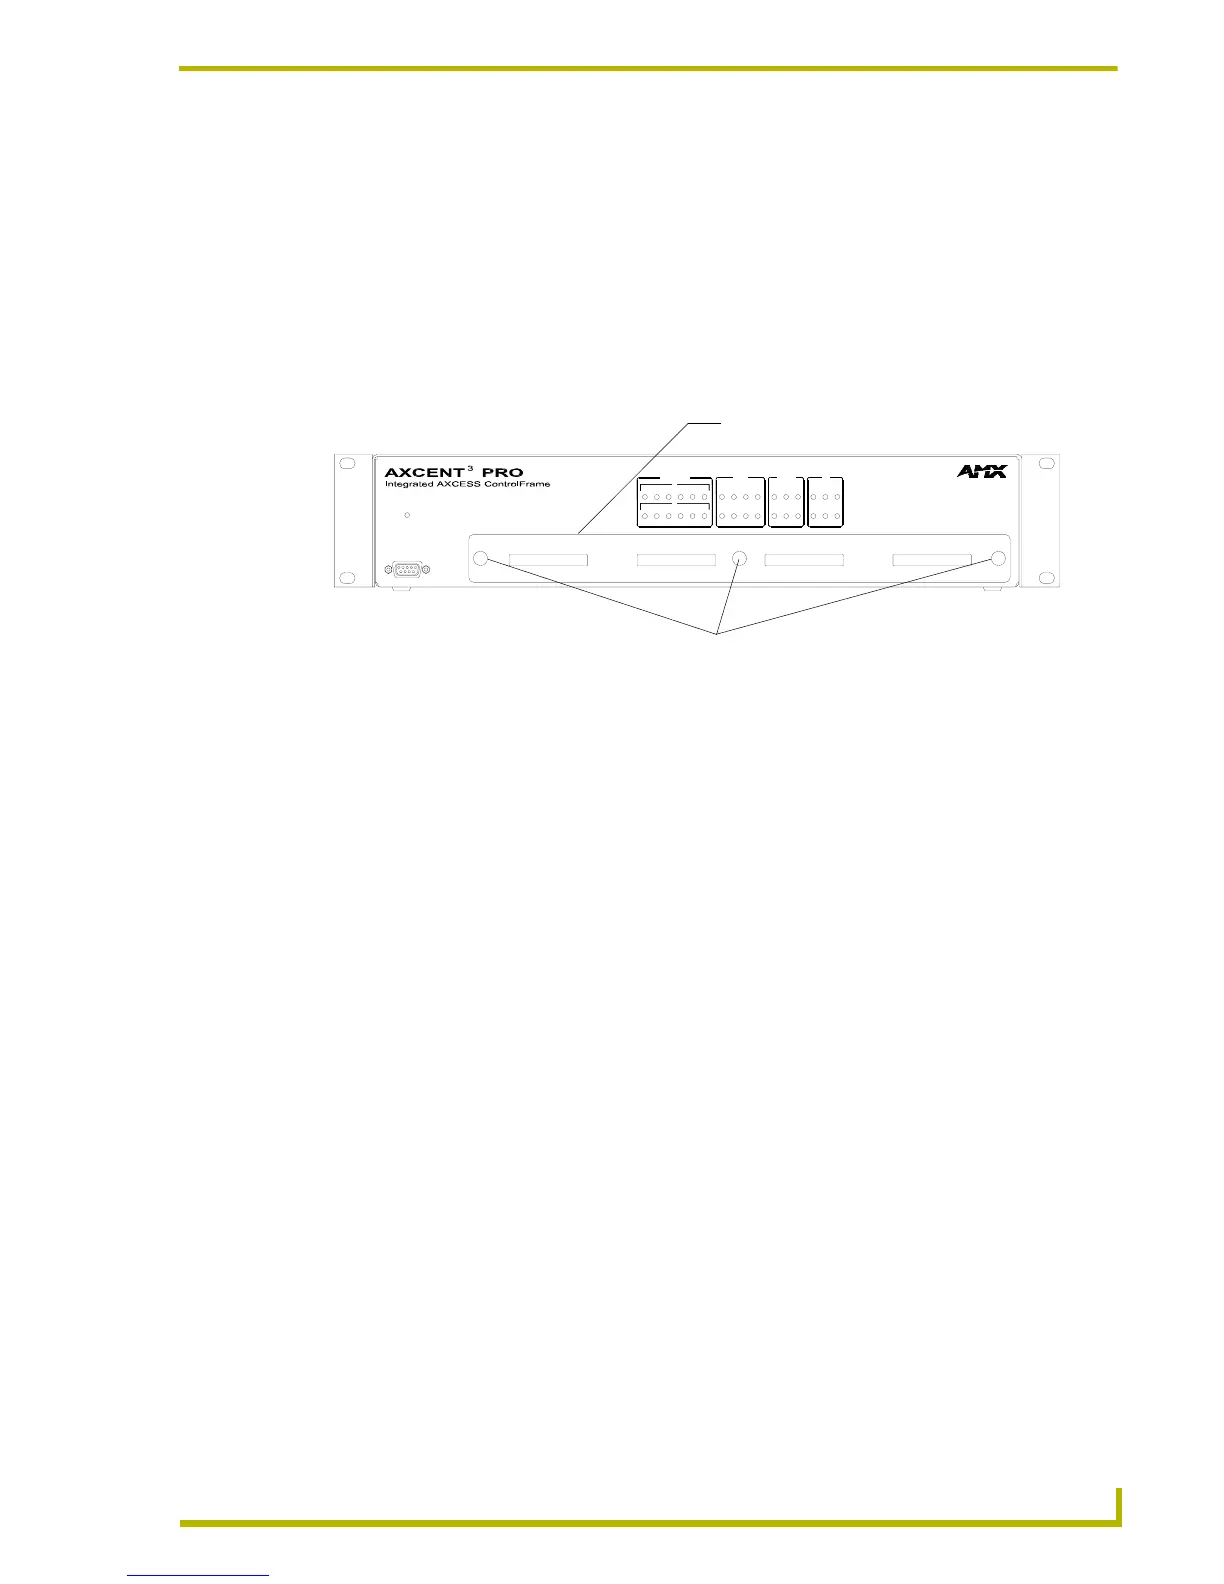
2. Remove the thumbscrews and faceplate from the front panel (FIG. 1).
3. Install up to 4 Axcess Control Cards component-side up into SLOT 1 - SLOT 4.
4. Replace the faceplate and secure with the thumbscrews.
Installing the Axcent
3
into an Equipment Rack
Use the rack-mounting brackets supplied with each controller for equipment rack installations.
Remove the mounting brackets for flat surface installations.
1. Discharge the static electricity from your body by touching a grounded object.
2. Place the controller into the equipment rack, and align the mounting bracket holes with the
mounting holes on the equipment rack. Start the mounting screws on both sides of the
controller and tighten.
3. Connect the data cables into the controller.
4. Connect the power cable to the AXLINK/PWR connector to power-up the controller.
Installing the AC-RK3 Rack Kit
Use the optional AC-RK3 Rack Kit for rear equipment rack rail installations or to place the
controller 6 inches from the front/rear of the equipment rack. You need a Phillips-head screwdriver.
1. Discharge the static electricity from your body by touching a grounded object.
2. Remove the rack-mount brackets supplied with the controller.
3. Install the AC-RK3 brackets with the supplied Phillips-head screws. Align the bracket holes
with the mounting brackets on the equipment rack. Then, start the mounting screws on both
sides of the controller and tighten (see FIG. 2).
FIG. 1 Axcent
3
Pro
PROGRAM
AXlink
1
1
RX
3254
TX
RS-232 / 422 / 485
2345
6 567
61
RELAYS
23
4865
IR / SERIAL
41
DATA
23
546
I / O
123
Thumbscrews
Removable faceplate
 Loading...