ATS4000 Installation and Quick Programming Guide 9
QUICK PROGRAMMING GUIDE
When you have finished installing the ATS system, you can then default the panel, apply power and start
programming.
1. Defaulting the panel to factory
defaults
When installed, the control panel needs to be defaulted
to factory defaults. Follow the next steps:
1. Remove all power to the control panel (mains
and battery)
2. Shorten the “KILL” jumper
3. Wait 30 seconds
4. Open the “KILL” jumper
The panel is now back to factory defaults.
2. Powering up the panel
On the initial power-up:
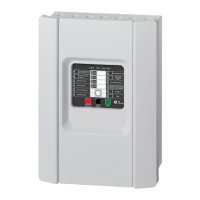
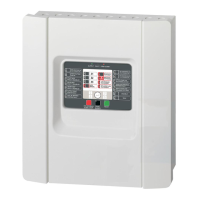
• The ATS control panel LED’s should indicate:
L1 - Slow flashing
Tx1 - Rapid flashing
Rx1 - Rapid flashing (If RAS 1 connected and
functional)
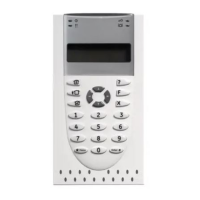
• The Master LCD Arming Station (RAS 1) should
have all area LED ON and the LCD should display
the name "Aritech Systems" followed by details of
the Arming Station software version.
A LCD RAS will also prompt you to Press the [MENU*]
key.
Press the [MENU*] key followed by [ENTER]. The
normal LCD display message shown below appears:
If there is a system condition, it is displayed on the top
line.
If the Master RAS powers up with no LED ON and there
is no LCD display, then no power has been applied to
the RAS. If the Master RAS powers up with all the LED
flashing, the LCD reads "Your System Needs Service"
and the control panel conditions as described above are
correct, then:
• The system databus cabling must be faulty, or
• The Arming Station address has been incorrectly set
(RAS 1 = All dipswitches OFF).
3. Disarming the system
You must disarm the system before you can use the
Installer Menu.
To disarm the system
Press 1 1 2 2 (Manager PIN code), [OFF] followed by 0
(select all areas) and then [ENTER].
If you are unable to disarm the system using the
Manager PIN Code and the [OFF] key, then you
might need to default the panel. See Defaulting the
panel to factory defaults.
4. Entering the ATS menu
Enter [Menu*] 1 2 7 8 and press [ENTER]. The following
display appears:
You can now enter the desired menu number.
See the programming and manager guide
5. Entering the programming menu to
program the system
To enter to the programming menu
1. Press [MENU*] 1 2 7 8 and press [ENTER] to
access the ATS menu.
2. Press 19 and [ENTER] to access the programming
menu. The following display appears:
Before programming the system, for the first time, you
must default the settings.
You can now select the option you want to program.
0-Exit, ENTER-Down, *-Up
0-Exit, Menu:
Installer Programming
0-Exit, Menu:
There Are No Alarms In This Area
Code:
 Loading...