34
XAVS 136 Dd - XAHS 146 Dd - XATS 156 Dd - XA(S) 186 Dd - XAHS 186 Dd
5.5 FUEL SYSTEM
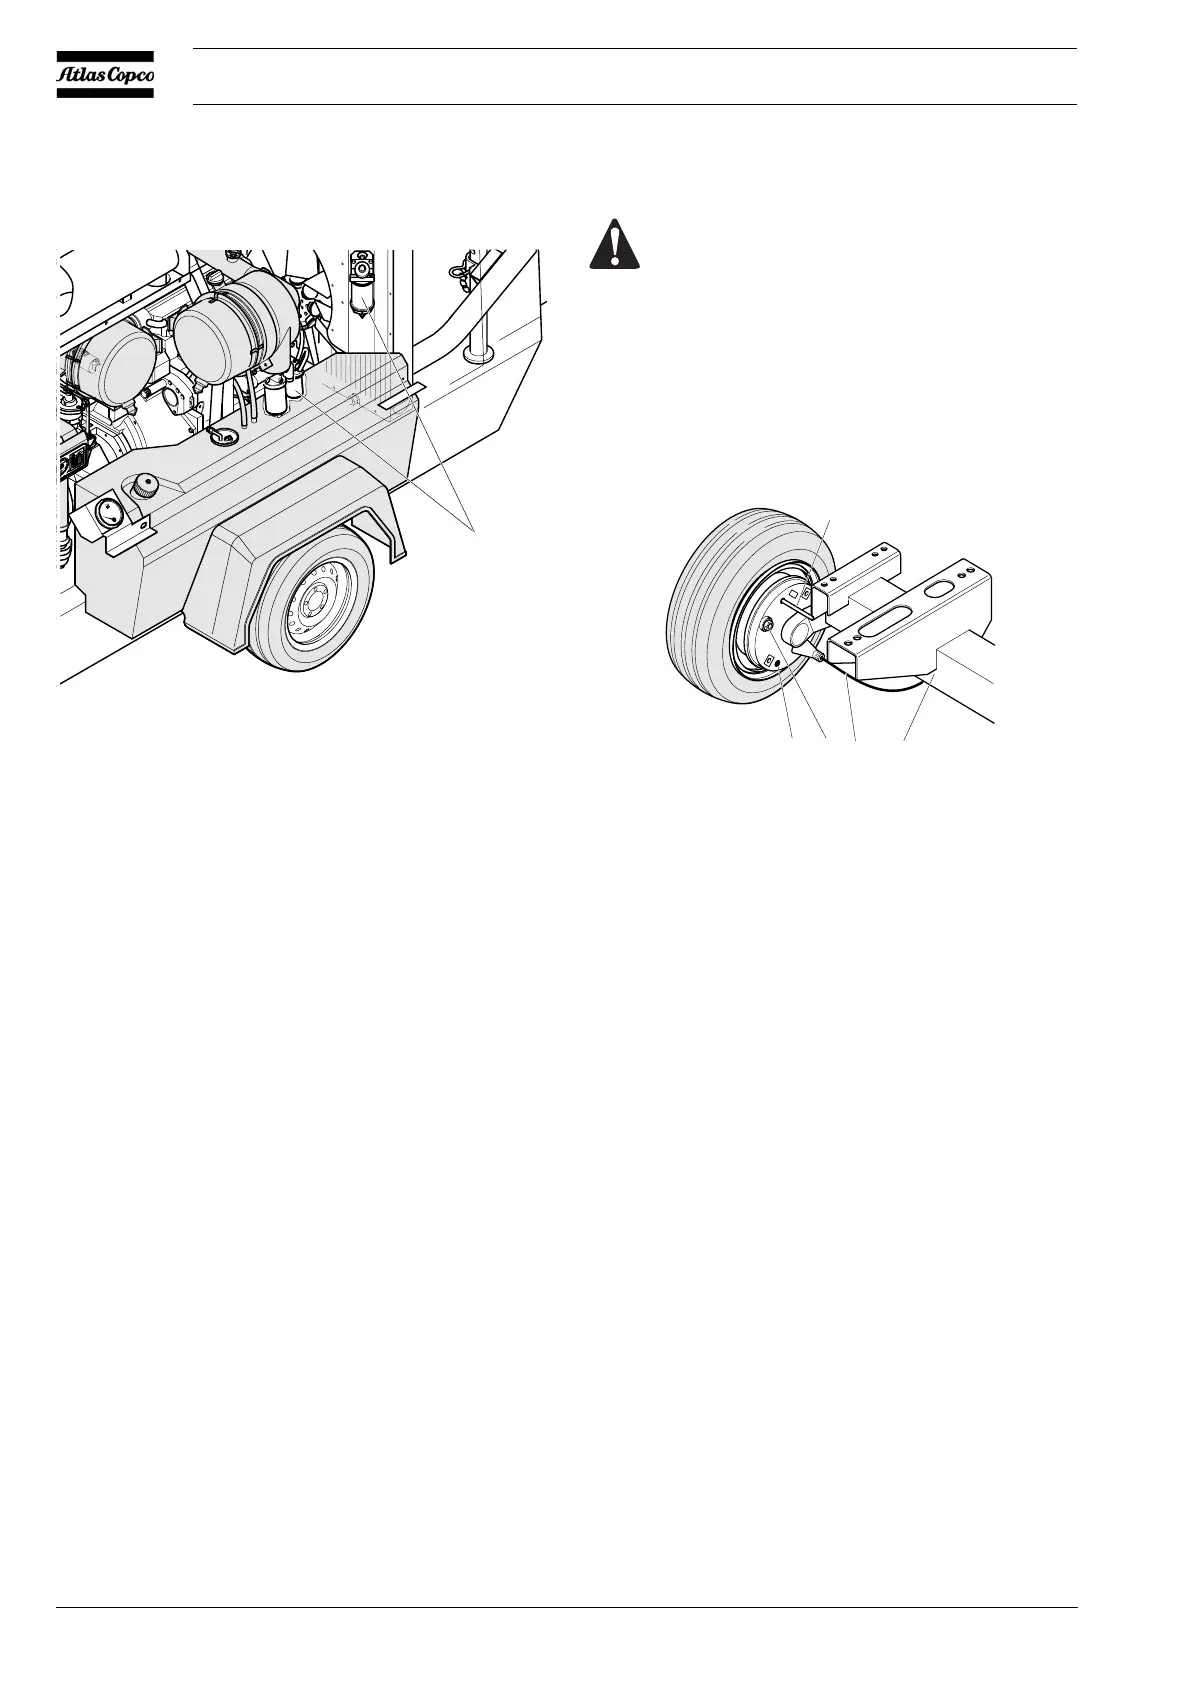
Fig. 5.4 Fuel filter
Replacing the filter element
1. Unscrew the filter element (1) from the adapter head.
2. Clean the adapter head sealing surface. Lightly oil the gasket of
the new element and screw the latter onto the header until the
gasket is properly seated, then tighten with both hands.
3. Check for fuel leaks once the engine has been restarted.
5.6 BRAKE (= OPTION) ADJUSTMENT
5.6.1 BRAKE SHOE ADJUSTMENT
Check the thickness of the brake lining. Remove both black plastic
plugs (5), one on each wheel. When the brake lining has been worn to
a thickness of 1 mm or less, the brake shoes have to be replaced. After
inspection and/or replacement re-insert both plugs.
1 Adjusting bolt
2Axle
3 Brake cable
4Pin ∅ 4 mm
5Plug
Brake shoe adjustment re-establishes the brake lining-to-drum
clearance and compensates for lining wear.
Lift and support the compressor. Make sure that all brakes are off
(overrunbrake and hand brake lever). The brake cables must be free
from tension. Lock the swivel cams of the wheel brake from the outside
by means of a pin
∅ 4 mm (4) through the hole as shown in Fig. 5.5.
Turn the adjusting bolt (1) clockwise with a wrench till the wheel locks
up. Center the brake shoes by actuating the parking brake several
times.
Turn the adjusting bolt anti-clockwise until the wheel is running free
in direction of travel (approx. 1 full turn of the adjusting bolt).
Check the position of the equalizer (Fig. 5.7, 6) with the parking brake
actuated.
Perpendicular position of equalizer = identical clearance of wheel
brakes.
Re-adjust the brake shoes, if necessary.
To test, slightly apply the parking brake and check identical brake
torque on left and right side.
Remove locking pin (Fig. 5.5, 4). Remove clearance from brake
cables.
Check all lock nuts (Fig. 5.7, 2).
(1)
Before jacking up the compressor, connect it to a
towing vehicle or attach a weight of minimum 50 kg to
the towbar.
Fig. 5.5 Brake shoe adjustment
(1)(5) (3) (2)
(4)
 Loading...