4. Lamp & Lamp House
25 Nm
5 6 7 8 9
Image 4-38
Tip: Write do wn the serial number of the xenon lamp. You will need this while updating the lam p parameters after installation
of the xenon lam p. T he serial number of the xen on lamp is engr aved in the neck of the xenon lamp.
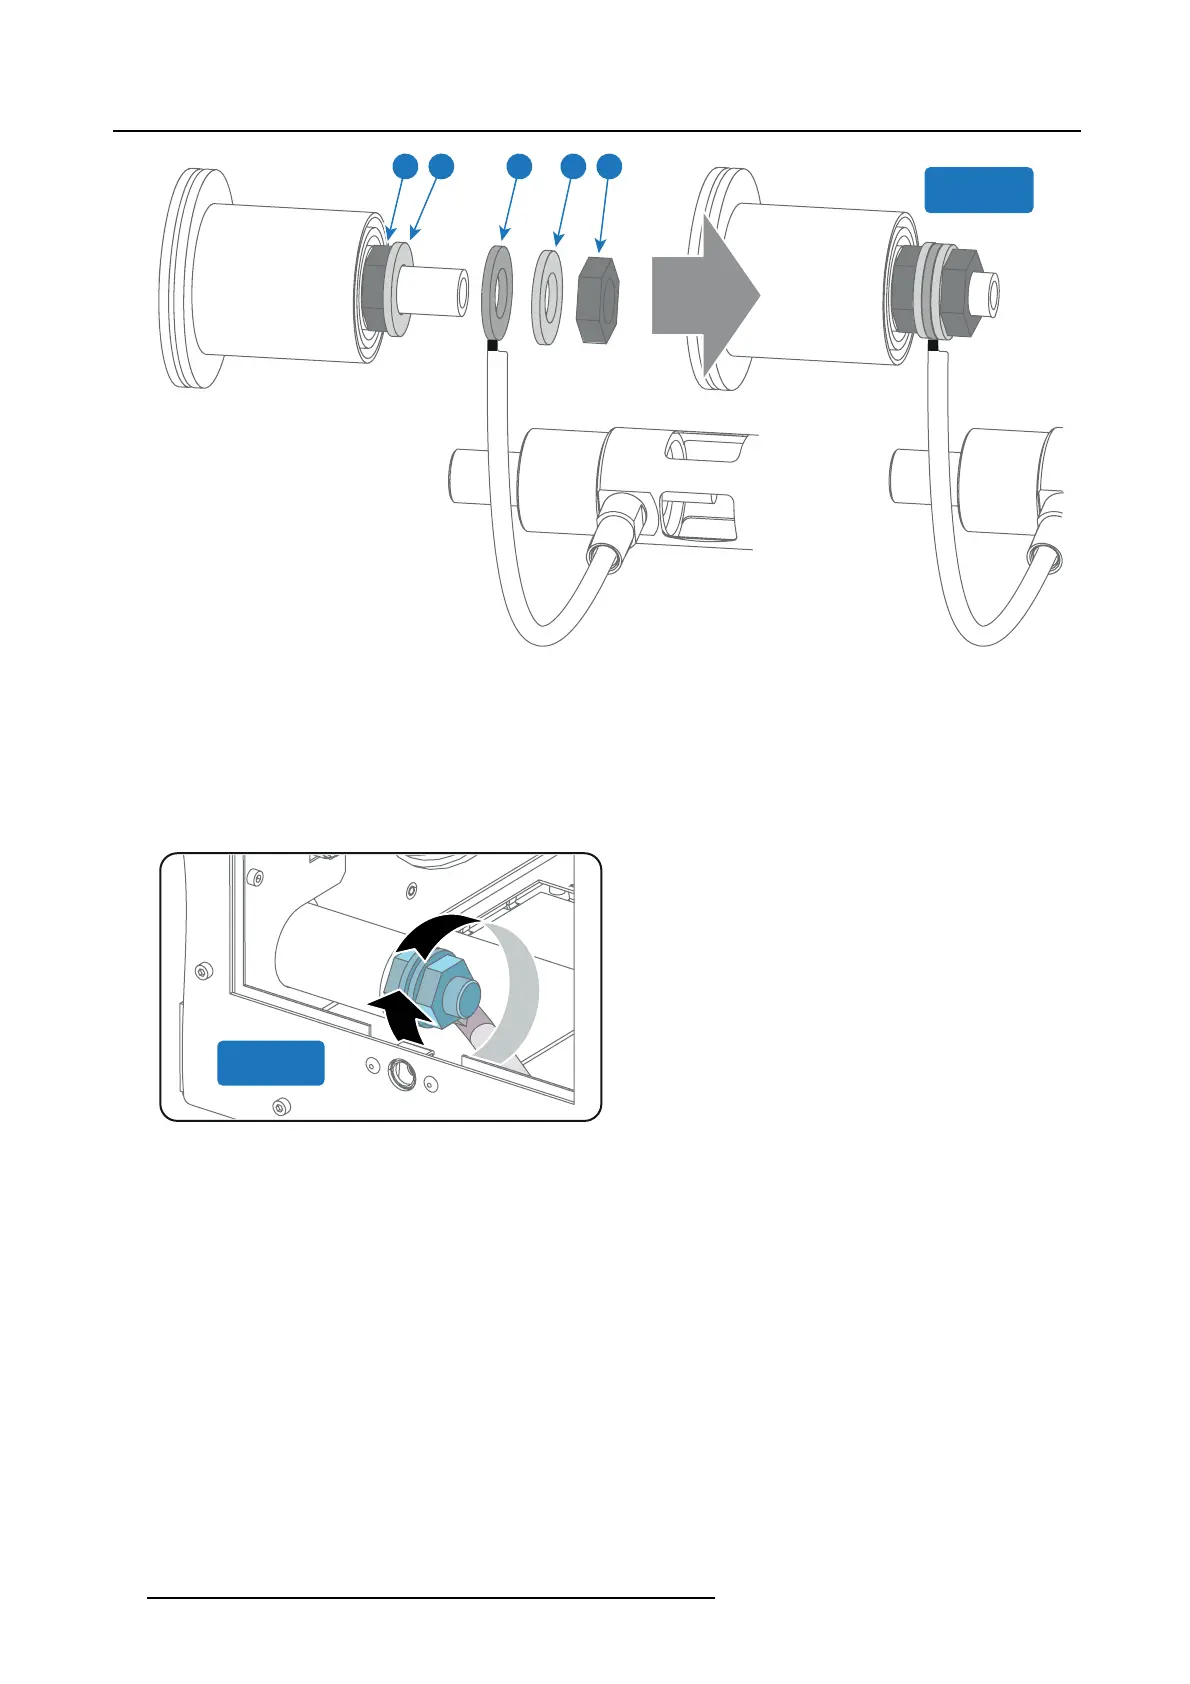
4. Check the cathode connection inside the lamp house. Use an
22 m m open-end wrench to hold the first nut while fastening the
second nut on the rod with a torque of 25Nm (18.4 lbf*ft) using a torque wrench with 22 m m hex agon soc ket. Ensure that there
is a flat washe r at both sides of the w ire lug. It’s safer to do this check be fore t he xenon lamp is installed to avoid accidental
bumping agains t the xenon lamp.
Tip: The cathode so cket can easily pulled out from the Lamp House as a whole to perform this check.
Caution: These cathode connections must be checked with every lam p change!
25 Nm
Image 4-39
5. Check the cathode connection inside the lamp house. Use an 22 m m open-end wrench to hold the first nut while fastening the
second nut on the rod with a torque of 25Nm (18.4 lbf*ft) using a torque wrench with 22 m m hex agon soc ket. Ensure that there
is a flat washer at both sides of the w ire lug.
Caution: These cathode connections must be checked with every lam p change!
6. Requires the lamp an anode adaptation bushing inside the anode support?
Tip: See supported xenon bulb lam ps to know if your lamp requires an anode adaptation bushing.
60
R5905963 PROMETHEUS SERIES 09/03/2015

 Loading...