33
HOW TO CHANGE MONITOR
Description:
As monitors become obsolete, the current monitor will have small differences and some modification
to the mounting may be needed. These instructions will walk you through replacing the monitor on
the Piano Keys Single Game.
Tools Needed:
# 2 Square bit screwdriver
Phillips Screwdriver
Instructions:
Unplug the game’s power cord from the wall.
Unlock and remove the back door of the game.
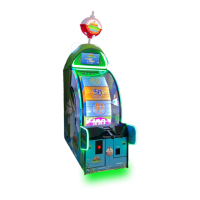
Remove the 10 black screws (5 on each side) using a # 2 Square
bit screwdriver.
Remove the plastic surround bezel and set aside for later.
Unplug monitor power from power strip and the HDMI 1 cable
from the back of the old monitor.
Remove and cable clamps to ensure the cables will come out with
the monitor as it is removed from the cabinet.
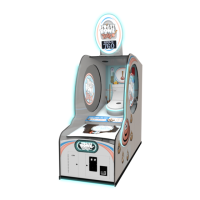
Remove 2 black bugle screws from the lower back of monitor
frame using a # 2 Square bit screwdriver.
The monitor wood frame will be attached to the monitor and the
wood will come out with the monitor as it is removed from cabinet.
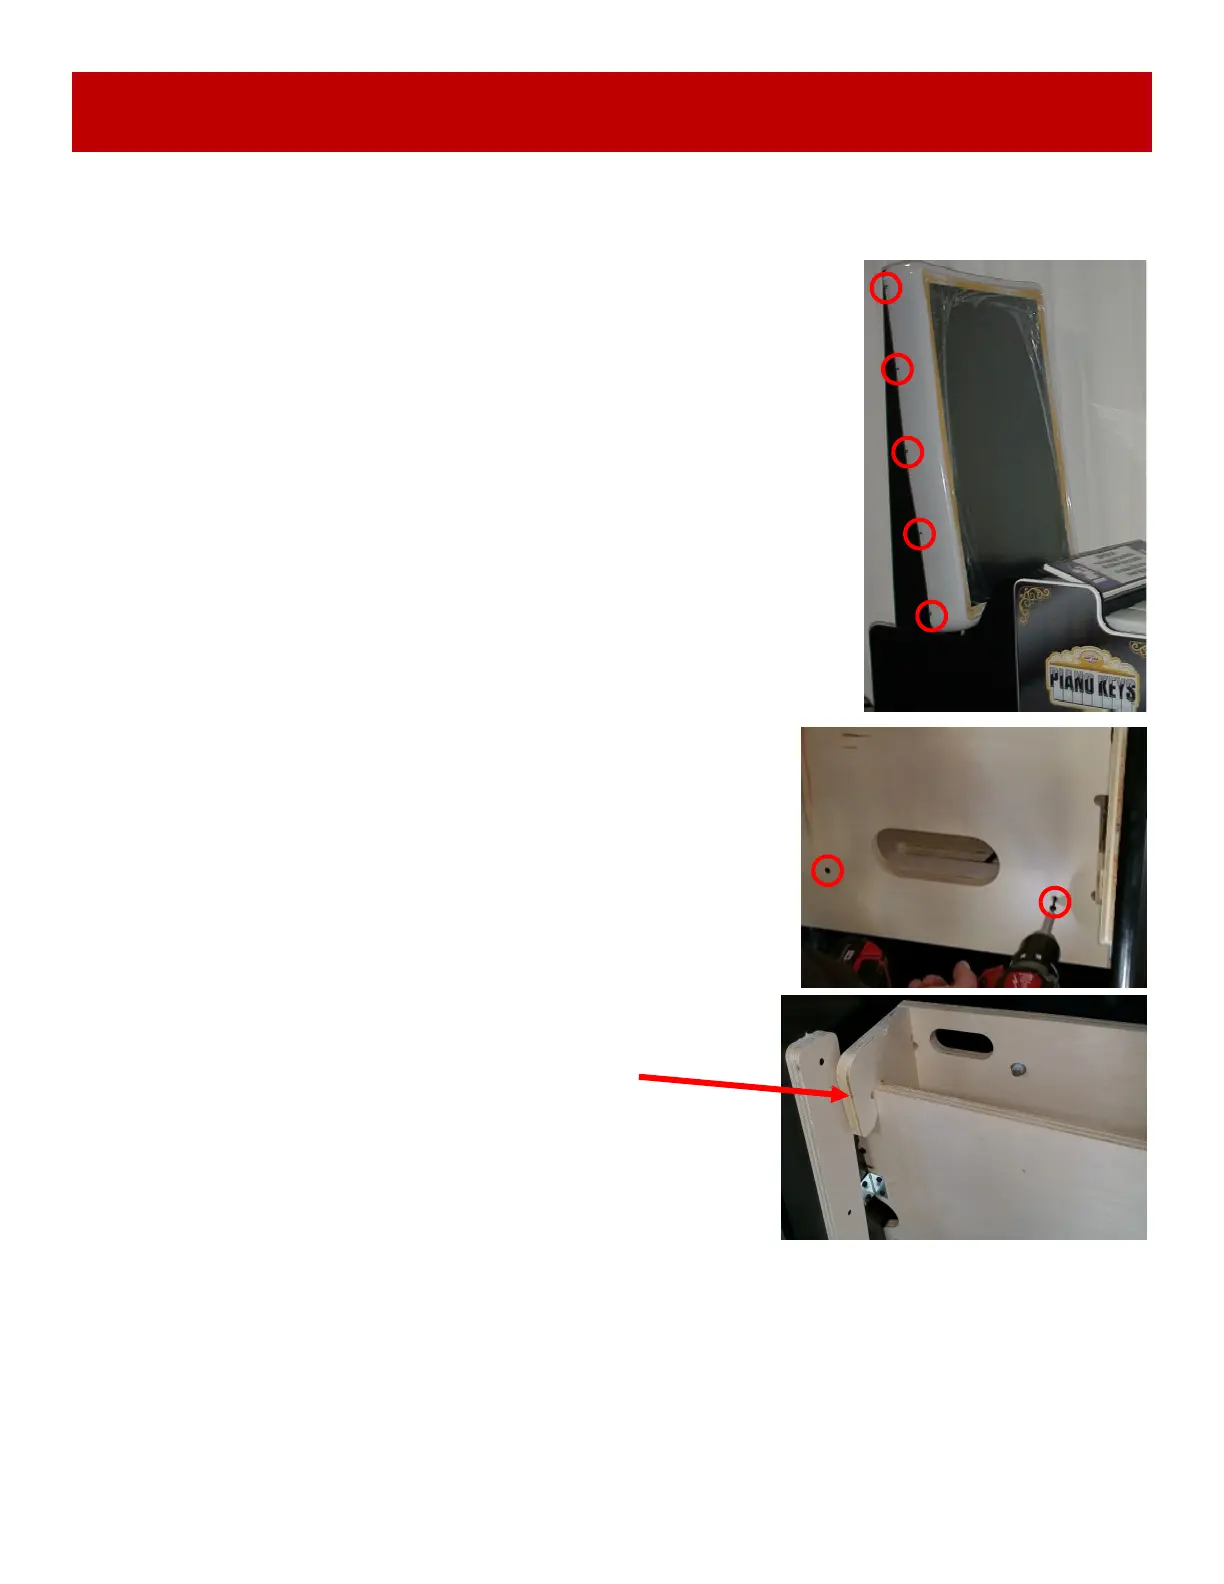
The old monitor can now be removed from the cabinet.
Lift up to disengage the locking tab.
Remove the wood from the old monitor and discard.
The new monitor will include new wood.
Unbox the new monitor and carefully lay flat on a soft surface.

 Loading...