7
7/27/11
Tapering Stitches
Use the Tapering function to taper the end of a line of stitching, create
corner accents and stitch decorative frames and boxes.
Place stabilizer behind the fabric.
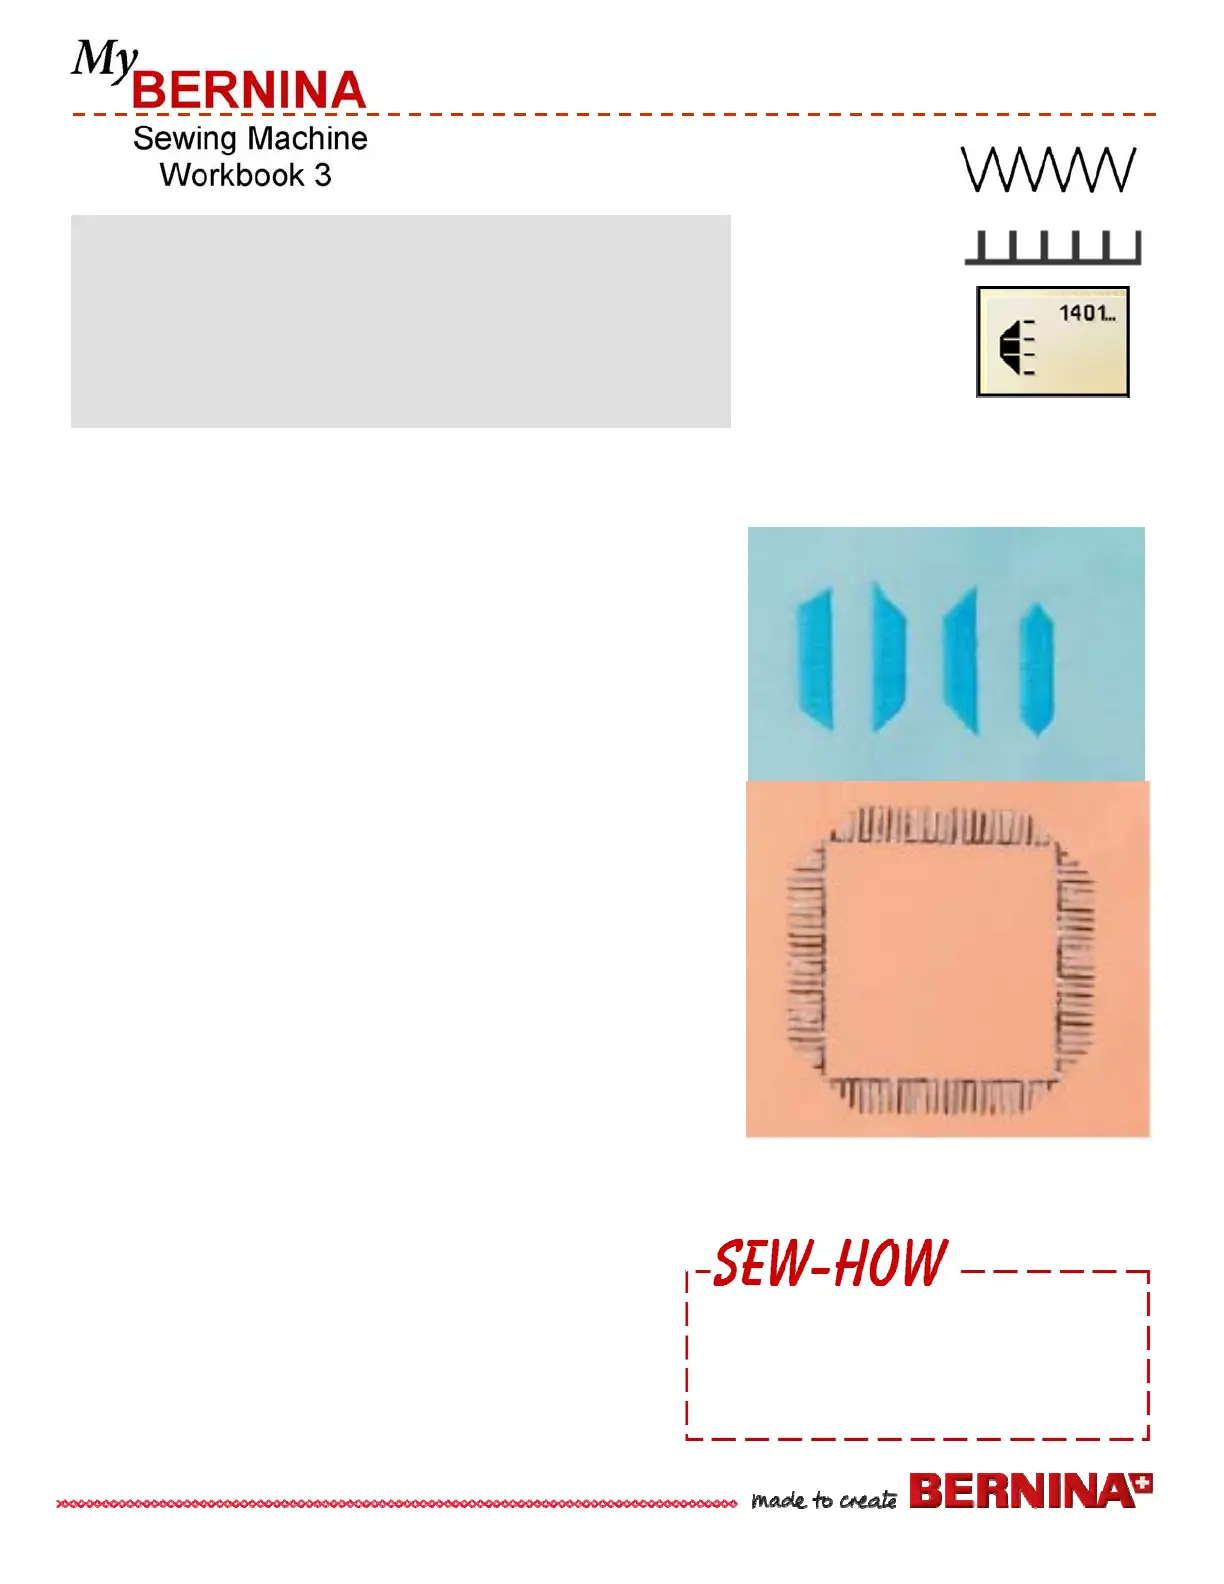
Select Tapering Decorative Stitch menu #1401.
Edge Alignments
Select the Tapering stitch #1401 (zigzag/satin stitch); adjust the
stitch width to 6mm.
Stitch four lines of tapered stitching with a different tapering
configuration for each.
Decorative Frame
Select one of the tapering stitches, then your choice of one of
the tapering configurations (sample shown is Taper stitch #1414.).
Sew one row. At the end of the first row, program the desired
length, pivot your project 90 º and sew the second row. Stitch
the following rows or sides in the same manner until your frame
is complete.
Tips
▪
Use the Needle Stop Down function for more control as you
stop and pivot at the corners.
▪
Use the Raise Presser Foot button when pivoting your
project in the corners of the design.
▪
Certain tapering stitches are more appropriate for
geometric applications.
▪
Sew a test sample before sewing your project.
Note: To leave the Tapering Configuration menu,
touch the red X.
Fabric: Firm fabric, 4” x 6” and
Heavyweight tear-away stabilizer, 4” x 6”
Needle: 80/12 Universal
Thread: 30 wt. cotton embroidery
Needle Position: center
BERNINA Presser Foot: Open Embroidery Foot #20C/20D
BERNINA 820 and 830 only
Do you know how to:
▪ Create a line of tapered stitching?
▪ Create a square with tapered corners?
 Loading...