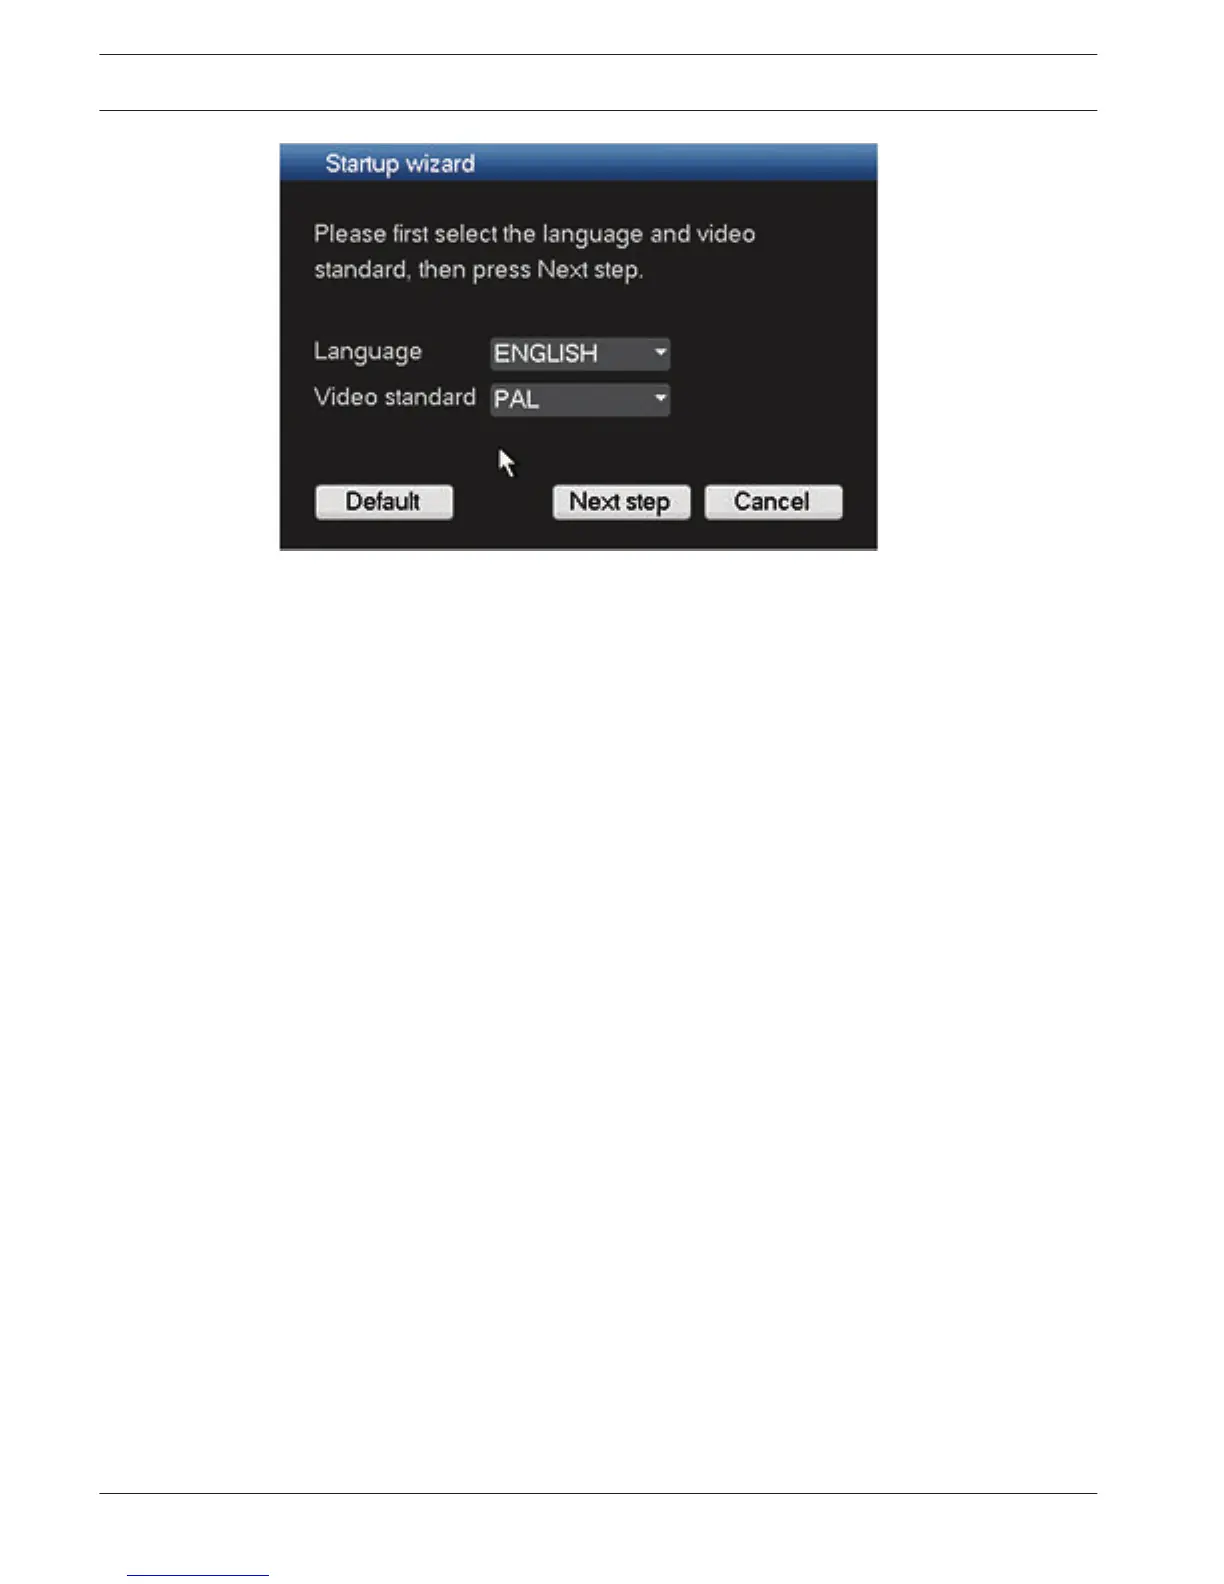
Figure 4.2: Startup wizard first screen
Assign here your preferred language and video standard from the drop-down menus and click
<Next step>. The wizard will guide you through the following steps:
1. Choose to reset the startup wizard to run after the next system restart – see Reset startup
wizard, page 23.
2. Assign General settings – see General, page 23.
3. Assign Encoder settings – see Encoder, page 24.
4. Assign Schedule settings – see Schedule, page 25.
5. Assign Record settings – see Record, page 25.
6. Assign Network settings – see Network, page 26.
7. Finish the startup by clicking <Finished>.
8. Confirm the setup by clicking <OK>.
After the Startup Wizard is finished, the unit is set in active view mode with 1 to 16 camera
images on the display. If required, this display can be changed by right-clicking the mouse to
activate a quick menu.
Use the following buttons to navigate through the wizard screens and assign your correct user
settings:
– <Cancel> exit the Startup wizard and immediately access the DIVAR user interface (this
action will automatically install all factory defaults for the remaining Startup wizard
screens)
– <Next Step> go to the next wizard screen.
– <Previous step> return to the previous Startup wizard screen
– <Default> assign the factory defaults for the current setup screen
– <Copy> copy the current screen settings for a channel to other channels
22 en | Quick install
DIVAR 3000/5000 Digital Video
Recorder
2013.05 | 1.0 | DIVAR 3000/5000 Digital Video
Recorder
Operator Manual Bosch Security Systems
 Loading...