19
Installation (only for approved contractors)
Therm 4000 S – 6 720 815 298 (2017/05)
▶ Drill the required holes (Ø 8 mm).
▶ Fasten the mounting rail to the wall using the screws and
rawl plugs supplied.
5.5 Installing the device
▶ Check that all items listed have been delivered.
▶ Remove caps from the gas and water connections.
▶ Check on the data plate the identification of the country of
destination and the suitability for the gas type provided by
the gas supplier ( page 2).
5.6 Water connection
▶ Mark the cold and hot water pipes clearly to avoid
confusion.
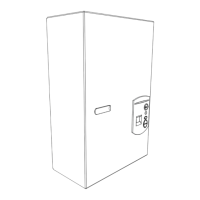
Fig. 15
[1] Water connection accessories (cold)
[2] Water connection accessories (hot)
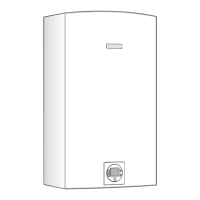
Fig. 16 Water connection
▶ The cold water (Fig. 16, [2]) and hot water (Fig. 16, [1])
connections must be made using the supplied and
recommended connection accessories.
▶ We recommend the installation of a non-return component
upstream of the instantaneous water heater to prevent
faults resulting from sudden pressure fluctuations in the
water supply.
NOTICE: Residue in the pipework can
damage the device!
▶ Rinse the pipework through
to remove residue.
NOTICE:
▶ Never rest the instantaneous water
heater on the gas or water connections.
To simplify the installation, first connect the
water, then make all other connections.
NOTICE: Damage to the device!
Damage to the water valve.
▶ When making the cold water
connection, fasten the water valve as
shown in Fig. 16.
 Loading...