Disassembly Procedure for Access to Anodes & Flue Baffles
WARNING
120 volt potential exposure. Isolate the
appliance and reconfirm power is
disconnected using a multi-meter.
Step 1. Position main power switch to “OFF”.
Step 2. Disconnect (Unplug) water heater
from 120 Volt power source.
Step 3. Un-latch & remove surround cover from top of heater.
Step 4. Disconnect wire harnesses to allow for removal of control panel.
Note: Where ever possible, rather than disconnecting at the control panel, follow wire
harness away from control panel and disconnect at control component location.
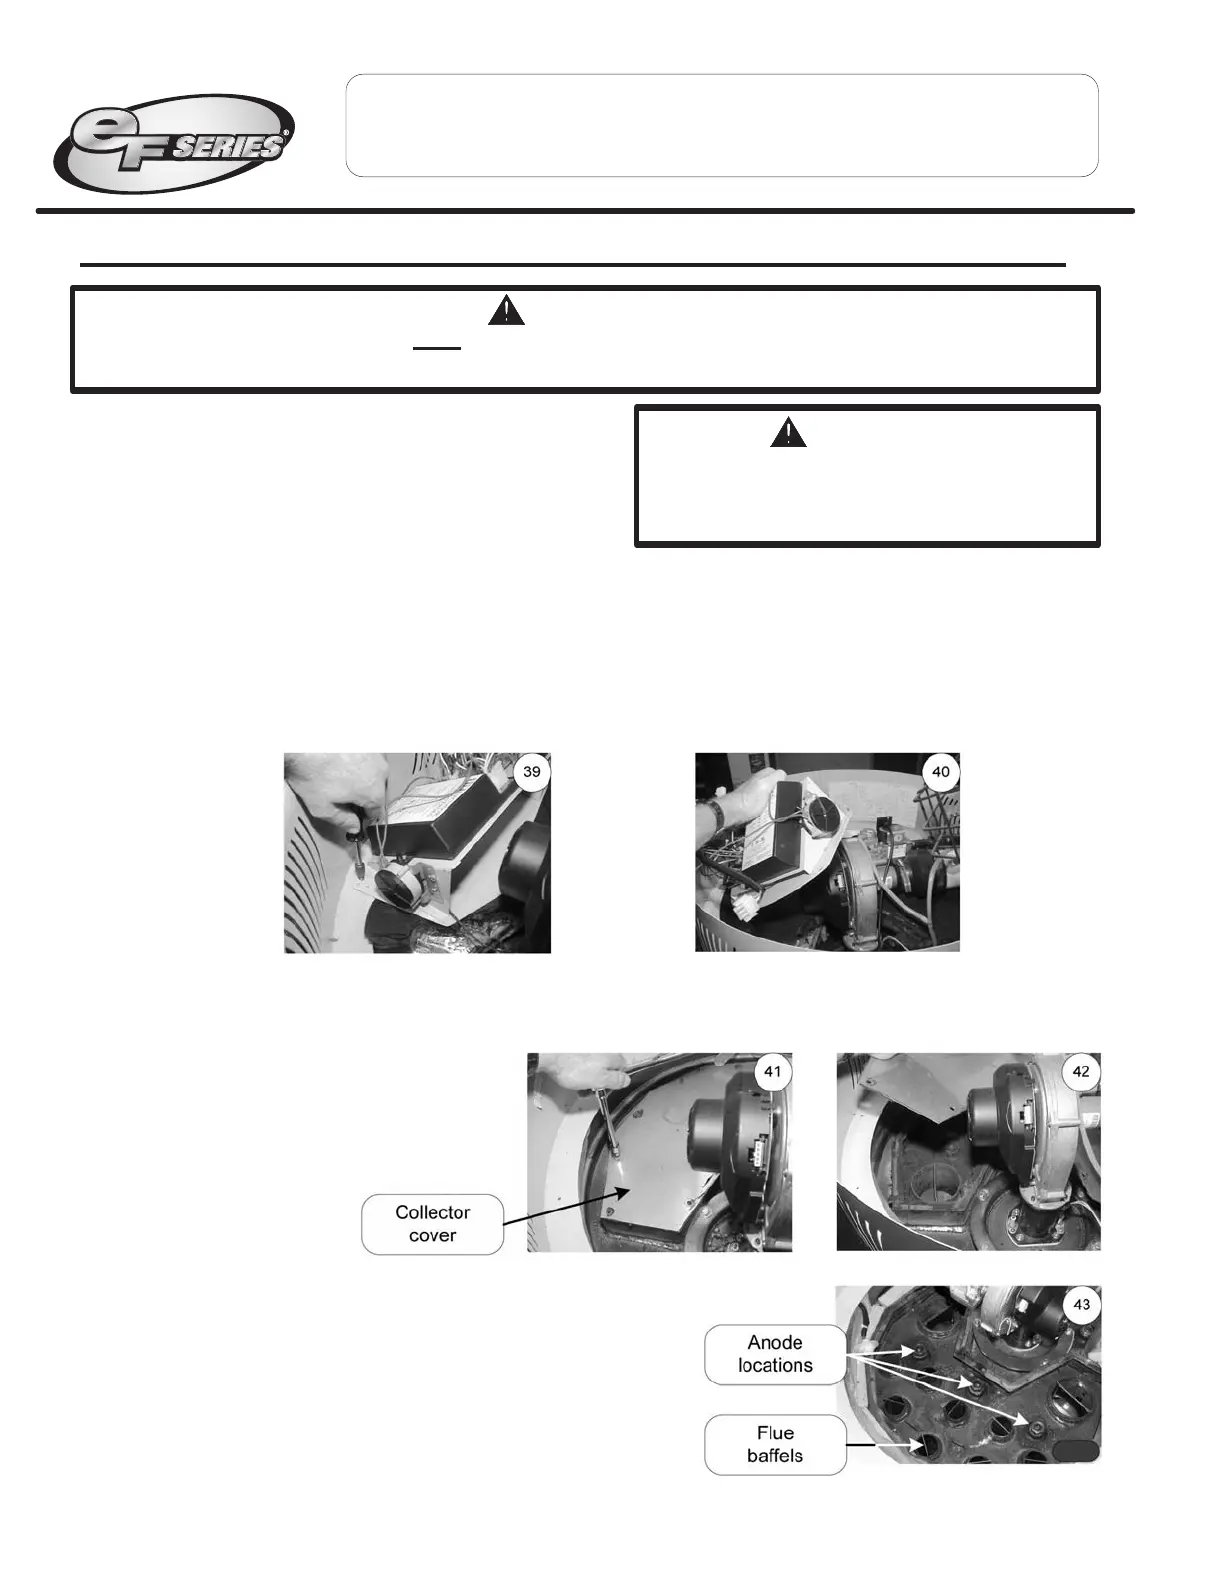
Step 5. Remove the three control panel mounting screws (¼” nut driver) and remove control
panel from appliance (see photos 39 & 40).
Step 7. Remove all collector cover
screws (5/16" socket) and
remove collector cover
(see photos 41 & 42).
39 40
41 42
Anode
locations
Step 6. Completely remove insulation (two pieces) from top of heater to expose collector cover
Step 8. Photo 43 shows heater with collector cover removed allowing
access to anode rods and flue baffles.
a) for anode Service, see page 41
b) for flue baffle service, see page 42
43
Flue
baffels
Collector
cover
Page 40
Service Procedure EF-XIII
Anode/Flue Baffle Inspection and Replacement
WARNING
Heater components may be HOT
when performing the following steps in this procedure.
Take necessary precaution to prevent personal injury.
 Loading...