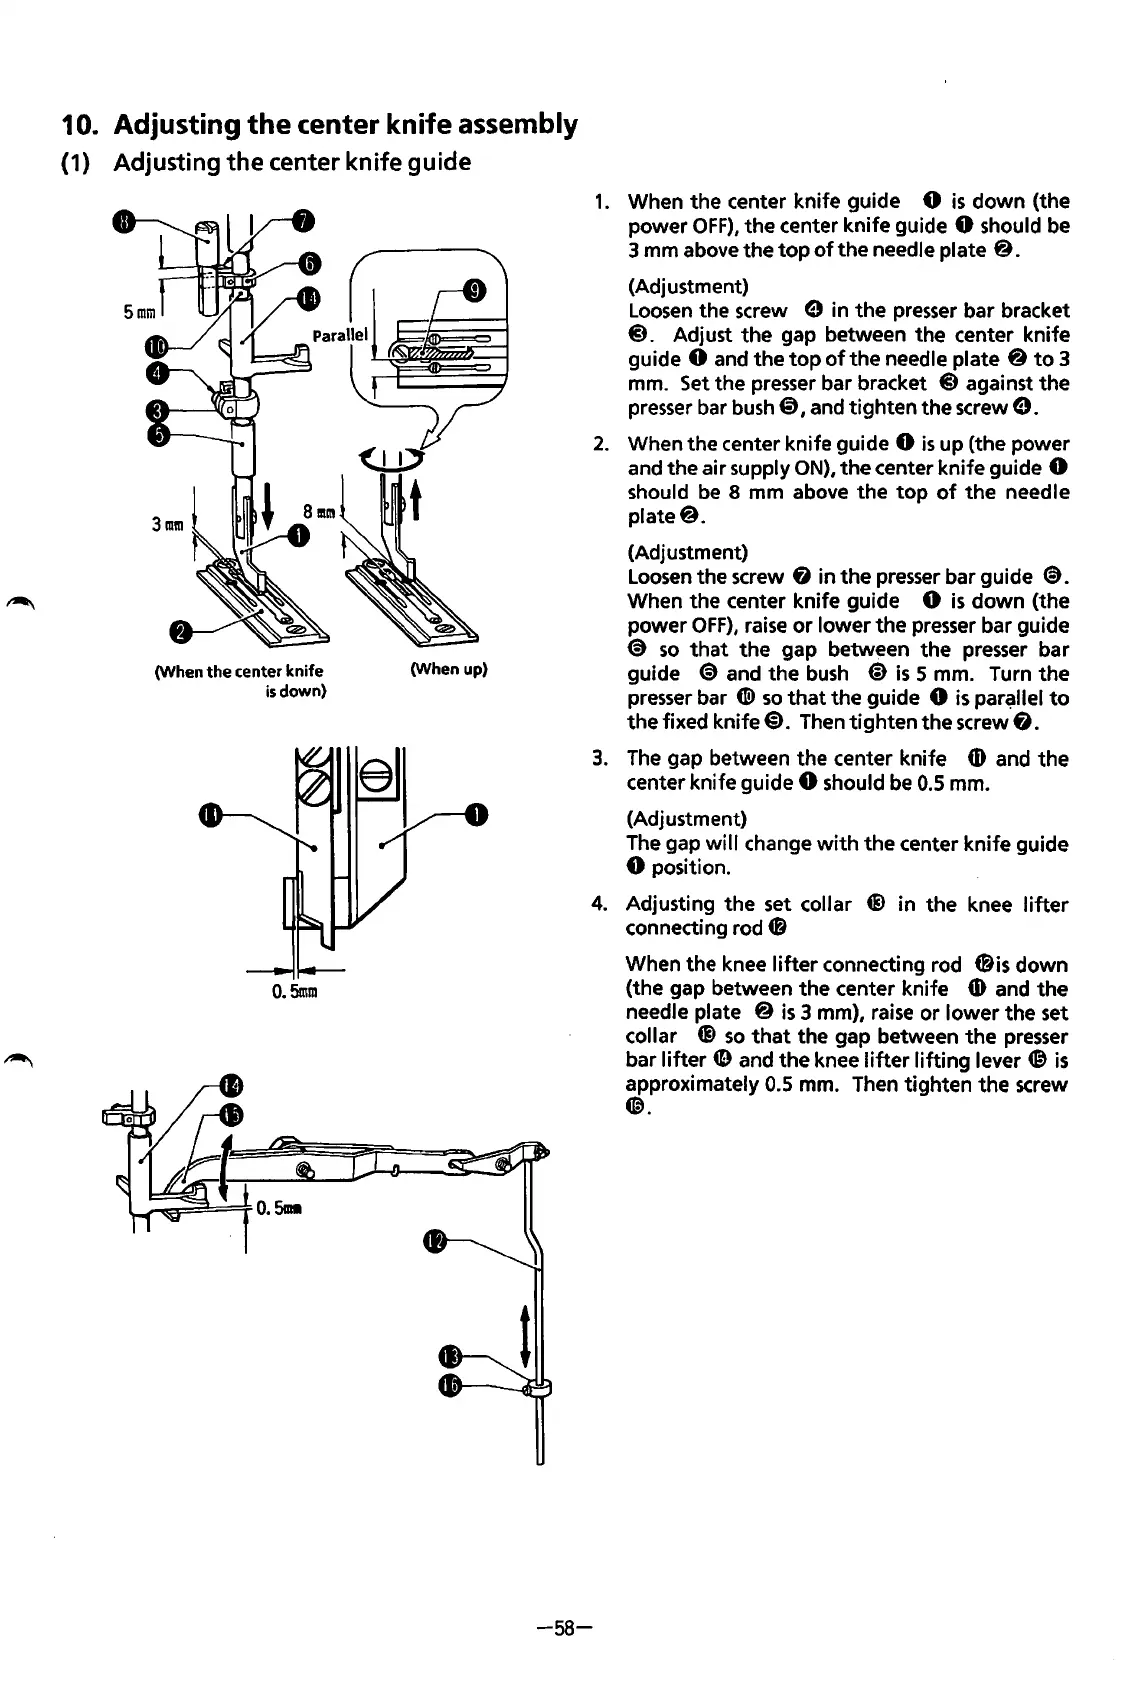
10. Adjusting
the
center knife assembly
(1) Adjusting
the
center knife guide
(When
the
center
knife
is
down)
0.5mm
(When up)
1.
When the center knife guide 0
is
down (the
power
OFF),
the center knife guide 0 should be
3 mm above the
top
of
the needle plate
@.
(Adjustment)
Loosen
the screw 9 in
the
presser
bar bracket
@.
Adjust
the
gap between the center knife
guide
0 and the
top
of
the needle plate @
to
3
mm.
Set
the presser bar bracket @against
the
presser bar
bush
@)
1 and tighten the screw e •
2.
When the center knife guide 0
is
up (the power
and the air supply
ON),
the
center knife guide 0
should
be
8 mm above
the
top
of
the
needle
plate@.
(Adjustment)
Loosen
the screw & in the
presser
bar guide
<9.
When the center knife guide 0
is
down (the
power
OFF),
raise
or
lower the
presser
bar guide
€)
so
that
the gap between the presser bar
guide
€)
and the
bush
@
is
5 mm. Turn
the
presser bar
CID
so
that
the guide 0
is
par~llel
to
the
fixed knife@).
Then
tighten the screw
fj.
3.
The
gap between the center knife
CD
and
the
center knife guide 0 should
be
0.5
mm.
(Adjustment)
The
gap
will
change
with
the
center knife guide
0 position.
4.
Adjusting
the
set collar G) in the knee
lifter
connecting rod 4i
When the knee
lifter
connecting rod
~is
down
(the gap between the center knife
CD
and
the
needle plate @
is
3 mm),
raise
or
lower
the set
collar
Q)
so
that
the gap between
the
presser
bar
lifter
tD
and the knee
lifter
lifting
lever
Ci)
is
approximately 0.5 mm. Then tighten
the
screw
C@.
-58-
From the library of: Superior Sewing Machine & Supply LLC