16
• After adjusting the stitch width,
slowly turn the handwheel toward you
(counterclockwise) and check that the needle
does not touch the presser foot� If the needle
hits the presser foot, the needle may bend or
break�
• If the stitches are bunched together, increase
the stitch length� Continuing to sew with the
stitches bunched together may result in the
needle bending or breaking�
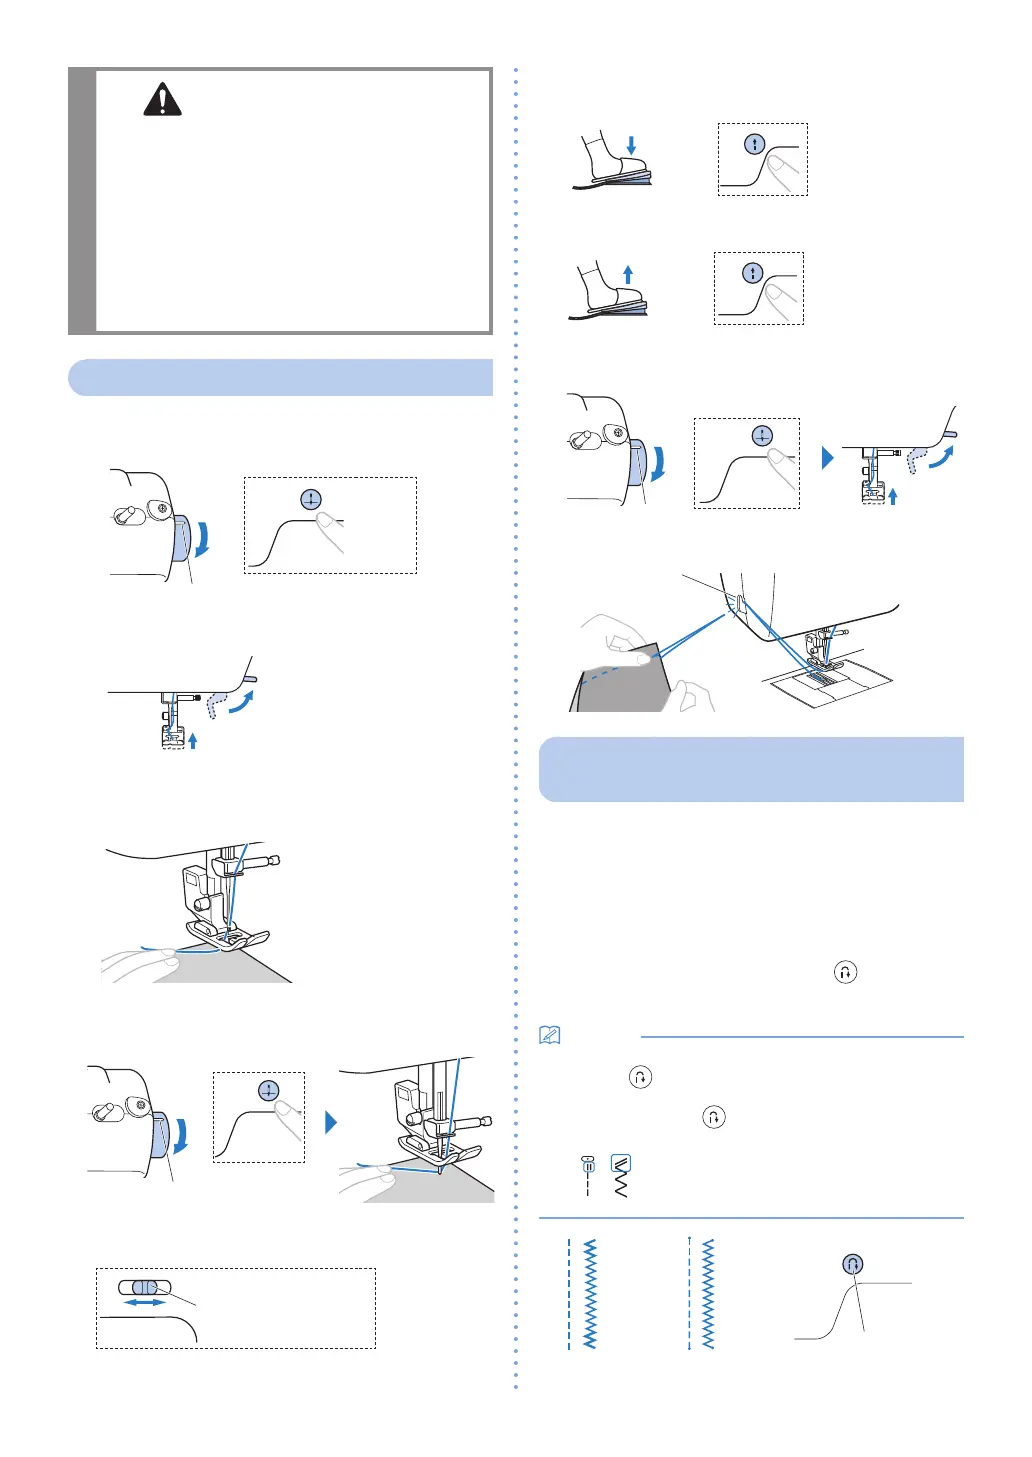
Starting to sew
Baste the fabric before starting to sew�
1
Raise the needle to its highest position�
Turn toward you so that this mark
points up to the highest position�
Press once or twice�
or
★
2
Raise the presser foot lever�
3
Set the fabric under the presser foot, and then
hold the fabric and the end of the thread with
your left hand�
4
Lower the needle to the starting point of the
stitching�
Turn toward you�
or
★
5
Lower the presser foot lever�
6
Adjust the sewing speed�
★
7
Start sewing�
*
Guide the fabric lightly by hand�
Depress�
or
★
8
Stop sewing�
Release�
or
★
9
Raise the needle, and then raise the presser foot
lever�
Turn toward you�
or
★
10
Pull the fabric and cut the threads�
Thread cutter
Sewing reverse/reinforcement
stitches
Reverse/reinforcement stitches are generally necessary
at the beginning and end of sewing�
With reinforcement stitches, 3 to 5 stitches are sewn at
the same place� With reverse stitches, the stitching is
sewn in the opposite direction�
Depending on the selected stitch, reverse or
reinforcement stitches are sewn while
(Reverse/
Reinforcement stitch button) is pressed continuously�
• When any of the reverse stitch patterns is selected,
pressing
(Reverse/Reinforcement stitch button)
will sew reverse stitches� When any other stitch is
selected, pressing
(Reverse/Reinforcement stitch
button) will sew reinforcement stitches�
Reverse stitch pattern
Reinforcement stitch
Reverse/
Reinforcement
stitch button
Reverse stitch
★: Only for some models�
 Loading...


