EasyManuals Logo
Home>Brother>All in One Printer>DCP-8250DN

Brother DCP-8250DN Service Manual

Brother DCP-8250DN
373 pages
To Next Page IconTo Next Page
To Previous Page IconTo Previous Page
Page #9 background imageLoading...
Page #9 background image
v
Confidential
10.3 T2 side cover L ................................................................................................................ 3-120
10.4 T2 side cover R................................................................................................................ 3-121
10.5 T2 front cover ASSY........................................................................................................ 3-122
10.6 T2 relay PCB ASSY......................................................................................................... 3-123
10.7 T2 clutch .......................................................................................................................... 3-124
10.8 T2 paper feed sensor PCB ASSY.................................................................................... 3-125
10.9 T2 back cover .................................................................................................................. 3-129
10.10LT connector ASSY (T2).................................................................................................. 3-130
CHAPTER 4 ADJUSTING AND UPDATING SETTINGS
AS REQUIRED AFTER PARTS REPLACEMENT
1. IF YOU REPLACE THE MAIN PCB ASSY .................................................................................. 4-1
1.1 Installing Firmware............................................................................................................... 4-2
1.1.1 Checking firmware version .................................................................................... 4-2
1.1.2 Installing firmware using USB flash memory......................................................... 4-2
1.1.3 Installing firmware using PC.................................................................................. 4-3
1.2 Setting by Country ............................................................................................................... 4-3
1.3 Initializing the EEPROM of the Main PCB ASSY................................................................. 4-3
1.4 Setting Serial Number and Entering Adjusted Value of Laser Unit...................................... 4-4
1.5 Acquiring White Level Data ................................................................................................. 4-5
1.6 Adjusting Touch Panel (Touch Panel Models Only) ............................................................ 4-5
2. IF YOU REPLACE THE LASER UNIT ......................................................................................... 4-6
2.1 Entering Adjusted Value of Laser Unit................................................................................. 4-6
3. IF YOU REPLACE THE LOW-VOLTAGE POWER SUPPLY PCB ASSY .................................. 4-8
3.1 Resetting Irregular Power Supply Detection Counter .......................................................... 4-8
4. IF YOU REPLACE THE HIGH-VOLTAGE POWER SUPPLY PCB ASSY.................................. 4-9
4.1 Initializing Pre-discharge Detection Parameters.................................................................. 4-9
5. IF YOU REPLACE ANY PERIODIC REPLACEMENT PARTS ................................................. 4-10
6. IF YOU REPLACE THE CONTROL PANEL ASSY OR TOUCH PANEL ASSY....................... 4-11
6.1 Installing Firmware (Touch Panel Models Only) ................................................................ 4-11
6.1.1 Checking firmware version .................................................................................. 4-11
6.1.2 Installing firmware using USB flash memory....................................................... 4-12
6.1.3 Installing firmware using PC................................................................................ 4-12
6.2 Adjusting Touch Panel (Touch Panel Models Only) .......................................................... 4-13
6.3 Checking LCD Operation................................................................................................... 4-13
6.4 Checking Control Panel Operation .................................................................................... 4-13
7. IF YOU REPLACE THE DOCUMENT SCANNER UNIT,
ADF UNIT (DUPLEX SCANNING MODEL), OR CIS UNIT ....................................................... 4-14
7.1 Acquiring White Level Data (function code: 55)................................................................. 4-14

Table of Contents

Other manuals for Brother DCP-8250DN

Questions and Answers:

Question and Answer IconNeed help?

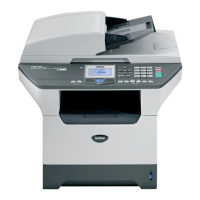
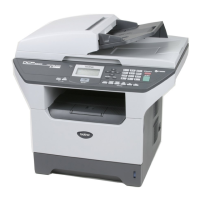
Do you have a question about the Brother DCP-8250DN and is the answer not in the manual?

Brother DCP-8250DN Specifications

General IconGeneral
Secure printingYes
Print technologyLaser
Maximum resolution1200 x 1200 DPI
Duplex printing modeAuto
Time to first page (black, normal)8.5 s
Print speed (black, normal quality, A4/US Letter)40 ppm
Duplex print speed (black, normal quality, A4/US Letter)9 ppm
PictBridgeNo
Scan speed2.68 sec/page
Dimensions (WxDxH)491 x 415 x 477 mm
All-in-one functionsCopy, Print, Scan
Networking standardsIEEE 802.11b, IEEE 802.11g
Color all-in-one functionsScan
Printing colorsBlack
Maximum duty cycle- pages per month
Recommended duty cycle1000 - 5000 pages per month
Number of print cartridges1
Page description languagesBR-Script 3, Epson FX, IBM ProPrinter, PCL 6
Copier resize25 - 400 %
Maximum copy resolution1200 x 600 DPI
Maximum number of copies99 copies
N-in-1 copy function (N=)2, 4, 9, 16, 25
Time to first copy (black, normal)10.5 s
Copy speed (black, normal quality, A4)40 cpm
Scan toE-mail, E-mail Server, File, FTP, Image, OCR, USB
Scan driversISIS, TWAIN, WIA
Scanner typeFlatbed & ADF scanner
Grayscale levels256
Input color depth48 bit
Maximum scan areaLegal (216 x 356) mm
Output color depth24 bit
Image formats supportedBMP, JPG
Maximum scan resolution19200 x 19200 DPI
Document formats supportedPDF
Paper input typePaper tray
Total input capacity500 sheets
Total output capacity150 sheets
Maximum input capacity1050 sheets
Maximum number of input trays2
Auto document feeder (ADF) input capacity50 sheets
Custom media width76.2 - 215.9 mm
Maximum print size216 x 356 mm
Custom media length127 - 355.6 mm
Paper tray media typesBond paper, Plain paper, Pre-Printed, Recycled paper, Thin paper
Paper tray media weight60 - 105 g/m²
Non-ISO print media sizesLegal
ISO A-series sizes (A0...A9)A4, A5, A6
ISO B-series sizes (B0...B9)B5, B6
Multi-purpose tray media typesBusiness cards, Envelopes, Heavyweight paper, Labels, Plain paper, Recycled paper
Maximum ISO A-series paper sizeA4
Multi-Purpose Tray media weight60 - 163 g/m²
Auto Document Feeder (ADF) media weight64 - 90 g/m²
DisplayTFT
Control typeTouch
Display diagonal4.9 \
Market positioningBusiness
Standard interfacesEthernet, USB 2.0
Security algorithms128-bit WEP, 64-bit WEP, 802.1x RADIUS, EAP, EAP-TLS, EAP-TTLS, MD5, PEAP, SSL/TLS, TKIP, WPA-AES, WPA-PSK, WPA2-PSK
Processor familyStar Sapphire
Maximum internal memory384 MB
Sound power level (standby)37 dB
Sound pressure level (printing)59 dB
Sound pressure level (quiet mode)54 dB
AC input voltage220 - 240 V
AC input frequency50 - 60 Hz
Power consumption (off)0.45 W
Power consumption (standby)9.8 W
Power consumption (PowerSave)350 W
Power consumption (average operating)694 W
Package weight21.900 g
Sustainability certificatesENERGY STAR

Related product manuals