○○○○○○○○○○○○○○○○○○○○○○○○○○○○○○○○○○○○○○○○○○○○○○○○○○○○○○○○○○○○○○○○○○○○○○○○○○○○○○○○○○○○○○○○○○○○○○○○
5
CONTENTS INDEXMAINTENANCE
KNOWING YOUR
SEWING MACHINE
STRAIGHT AND
ZIGZAG STITCHING
BUILT-IN STITCHES
BUTTONHOLE AND
BUTTON SEWING
USING ATTACHMENTS
AND APPLICATIONS
1
2
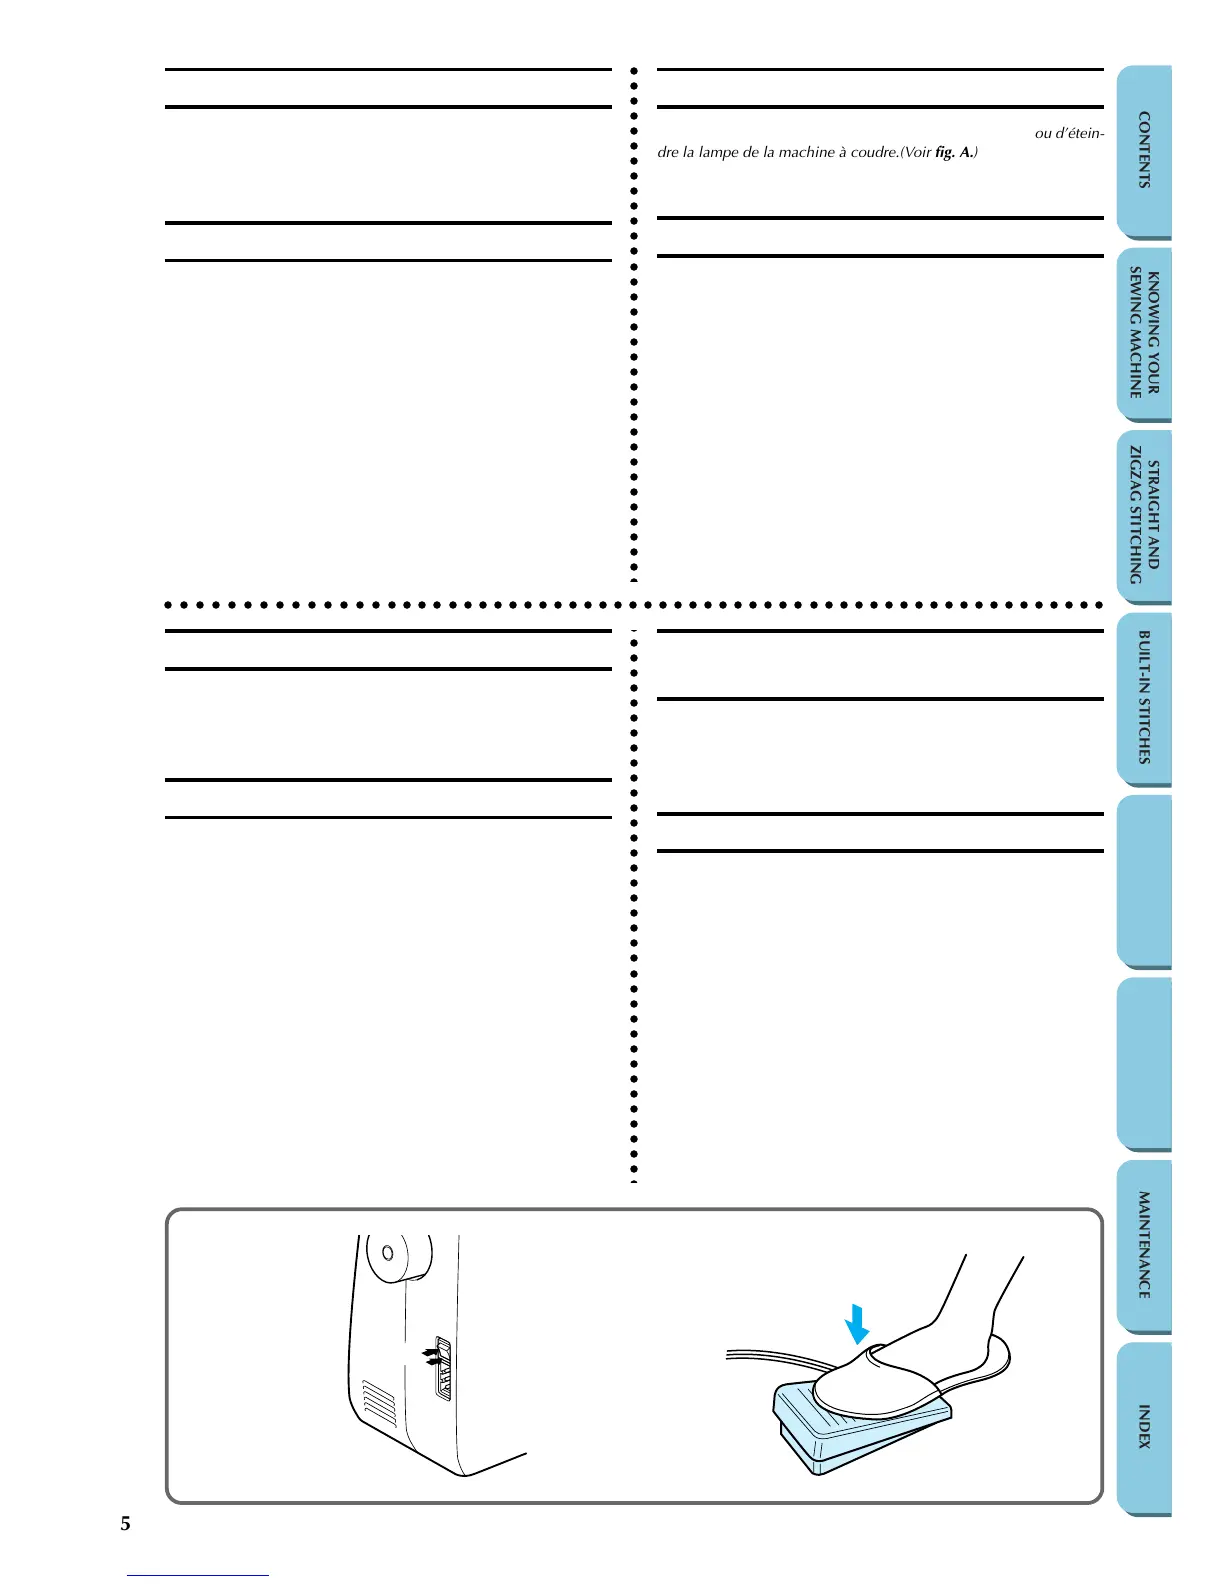
Main Power and Sewing Light Switches
This switch turns the main power and sewing light on or off. (See fig.
A.)
1 Turn on (toward the “I” mark)
2 Turn off (toward the “O” mark)
Foot Controller
When the foot controller is depressed lightly, the machine will run at a
low speed. When the pressure on the foot controller is increased, the
machine’s speed will increase. When pressure on the foot controller is
released, the machine will stop. (See fig. B.)
NOTE:
1. Be sure that nothing is placed on the foot controller when the ma-
chine is not being used.
2. A new sewing machine or one that has not been in use for a long
period of time should be oiled as described on page 45. After oil-
ing, be sure to wipe off any excess oil.
Note (For U.S.A. only):
This foot controller can be used for sewing machine model LS1217.
A B
○○○○○○○○○○○○○○○○○○○○○○○○○○○○○○○○○○○○○○○○○○○○○○○○○○○○○○○○○○○○○○
Interrupteur principal et de la lampe
Cet interrupteur permet l’alimentation secteur et d’allumer ou d’étein-
dre la lampe de la machine à coudre.(Voir fig. A.)
1
Allumer (vers le repère “I”)
2
Eteindre (vers le repère “O”)
Pédale
Lors d’une dépression légère de la pédale, la machine fonctionnera
lentement. Si l’on augmente la pression, la vitesse de la machine aug-
mentera. Lorsque la pédale est relâchée, la machine s’arrête. (Voir fig.
B.)
REMARQUE:
1. S’assurer de ne rien placer sur la pédale lorsque la machine n’est
pas utilisée.
2. Il est nécessaire d’huiler une nouvelle machine ou une machine
n’ayant pas été utilisée pendant une longue période de temps se-
lon les instructions page 45. Après l’avoir huilée, essuyer tout ex-
cédent d’huile.
REMARQUE (Uniquement pour les Etats-Unis) :
Cette pédale peut être utilisée avec les modèle de machines à coudre
LS1217.
Interruptor principal y de luz
Este interruptor permite apagar y encender la máquina y la luz. (Ver
fig. A.)
1 Encender (hacia la marca “I”)
2 Apagar (hacia la marca “O”)
Pedal
Al presionar ligeramente el pedal, la máquina funcionará a baja ve-
locidad. Al aumentar la presión, se incrementa también la velocidad
de la máquina. Al soltar el pedal, la máquina se para. (Ver fig. B.)
NOTA:
1. Asegúrese siempre de no dejar ningún objeto sobre el pedal cuan-
do la máquina no está utilizada.
2. Una nueva máquina de coser o que no haya sido utilizada por
mucho tiempo debe ser lubricada tal como se indica en la página
45. Después de la lubricación, asegúrese siempre de limpiar todo
el excedente de aceite.
Nota (Sólo para EE.UU.):
Este pedal puede usarse para los modelo de máquina de coser
LS1217.
Interruptor de Força Principal e da Luz
de Costura
Este interruptor permite ligar e desligar a força principal e a luz de costura.
(Veja fig. A.)
1 Ligar (posicionar na marca “I”)
1 Desligar (posicionar na marca “O”)
Reostato
Quando o reostato for pressionado levemente, a máquina funcionará a bai-
xa velocidade. Quando a pressão no reostato for aumentada, a velocidade
da máquina também aumentará. Quando a pressão no reostato for liberada,
a máquina irá parar. (Veja fig. B.)
NOTA:
1. Certifique-se de que nada seja colocado sobre o reostato quando a má-
quina não estiver em funcionamento.
2. Uma máquina de costura nova ou que não tenha sido usada por um
longo intervalo de tempo deverá ser lubrificada conforme descrito na
página 45. Após a lubrificação, certifique-se de remover qualquer ex-
cesso de óleo.
Nota (Somente para os E.U.A.):
Este reostato pode ser usado nos modelo de máquina de costura LS1217.

 Loading...