15
Windows
®
USB
Windows
®
Macintosh
USB
20
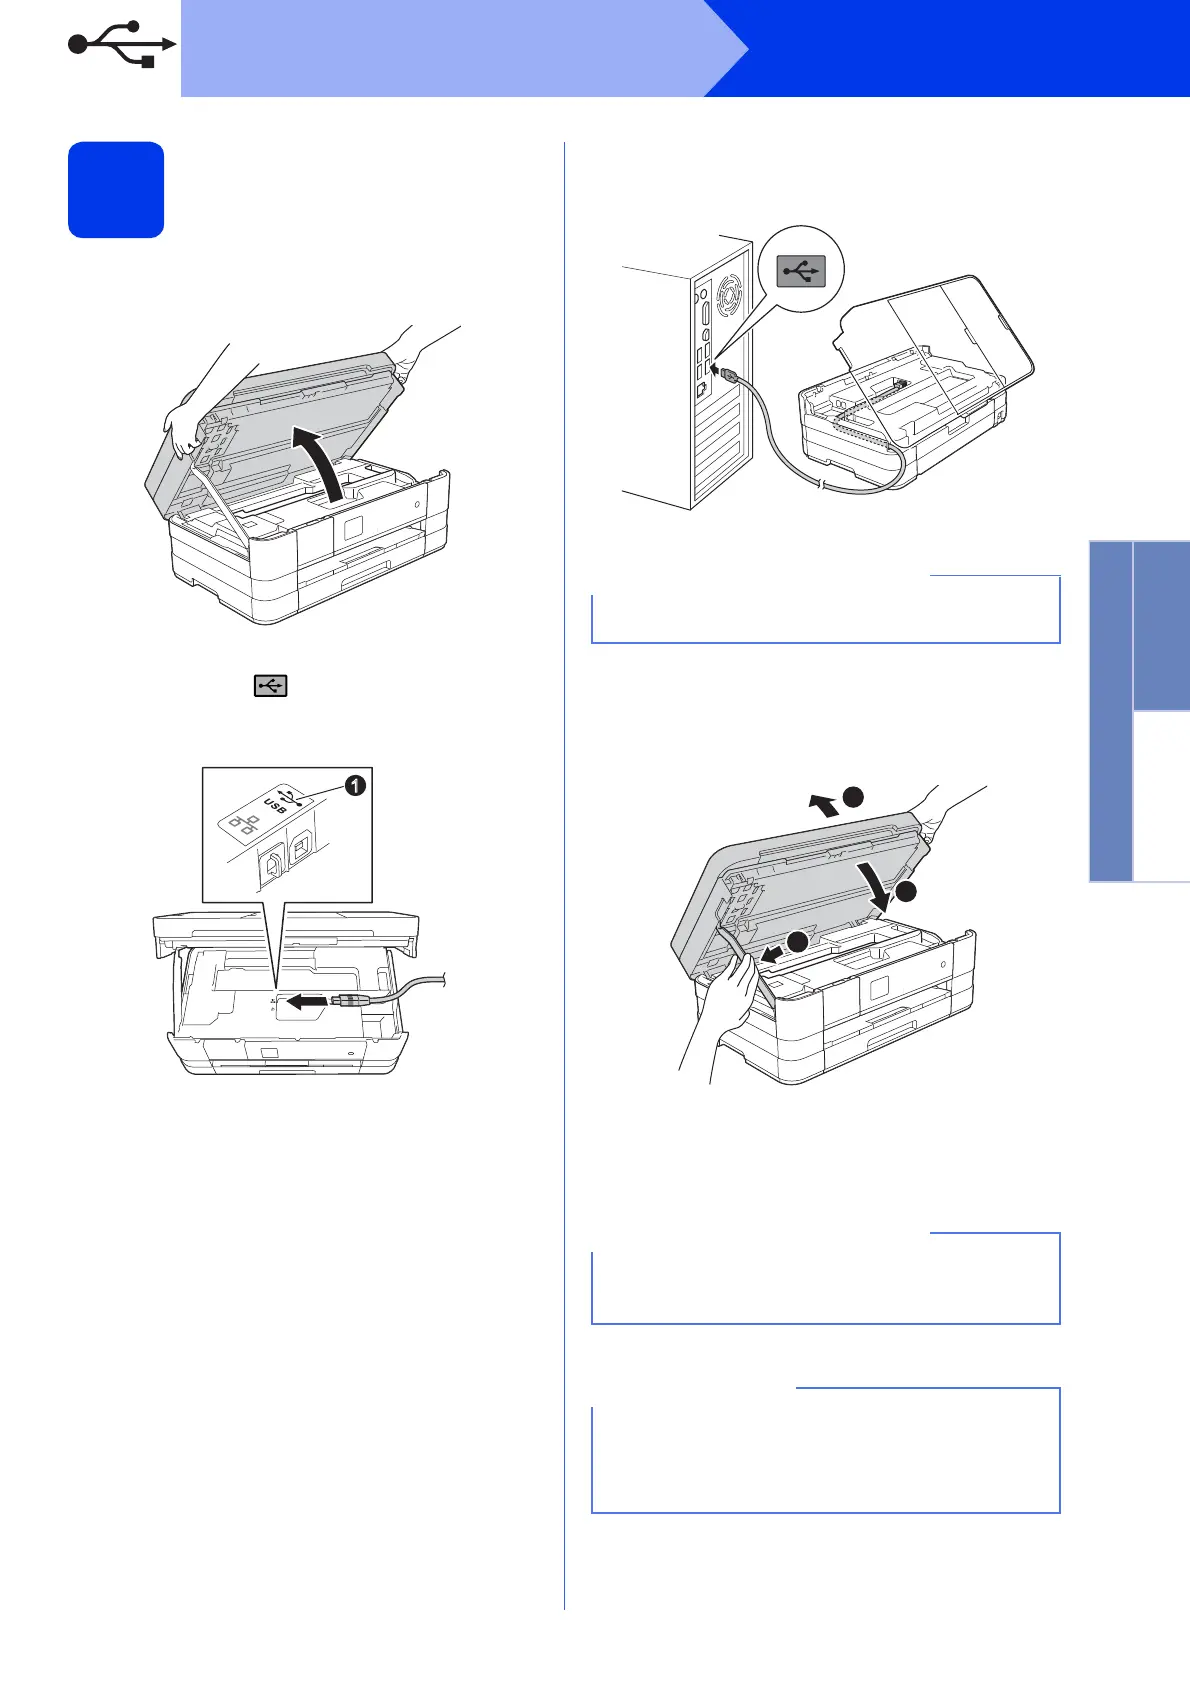
Connect the USB cable
a Lift the scanner cover until it locks securely into
the open position.
b Connect the USB cable to the USB port
marked with a symbol a. You will find the
USB port inside the machine on the right, as
shown in the callout below.
c Carefully guide the USB cable into the cable
channel and out the back of the machine.
Connect the cable to your computer.
d Lift the scanner cover to release the lock a.
Gently push the scanner cover support
down b and close the scanner cover c using
both hands.
e The installation will continue automatically.
The installation screens appear one after
another.
1
Make sure that the cable does not restrict the
cover from closing, or an error may occur.
DO NOT cancel any of the screens during the
installation. It may take a few seconds for all
screens to appear.
For Windows Vista
®
and Windows
®
7, when the
Windows
®
Security screen appears, click the
check box and click Install to complete the
installation correctly.
1
2
3
 Loading...