8
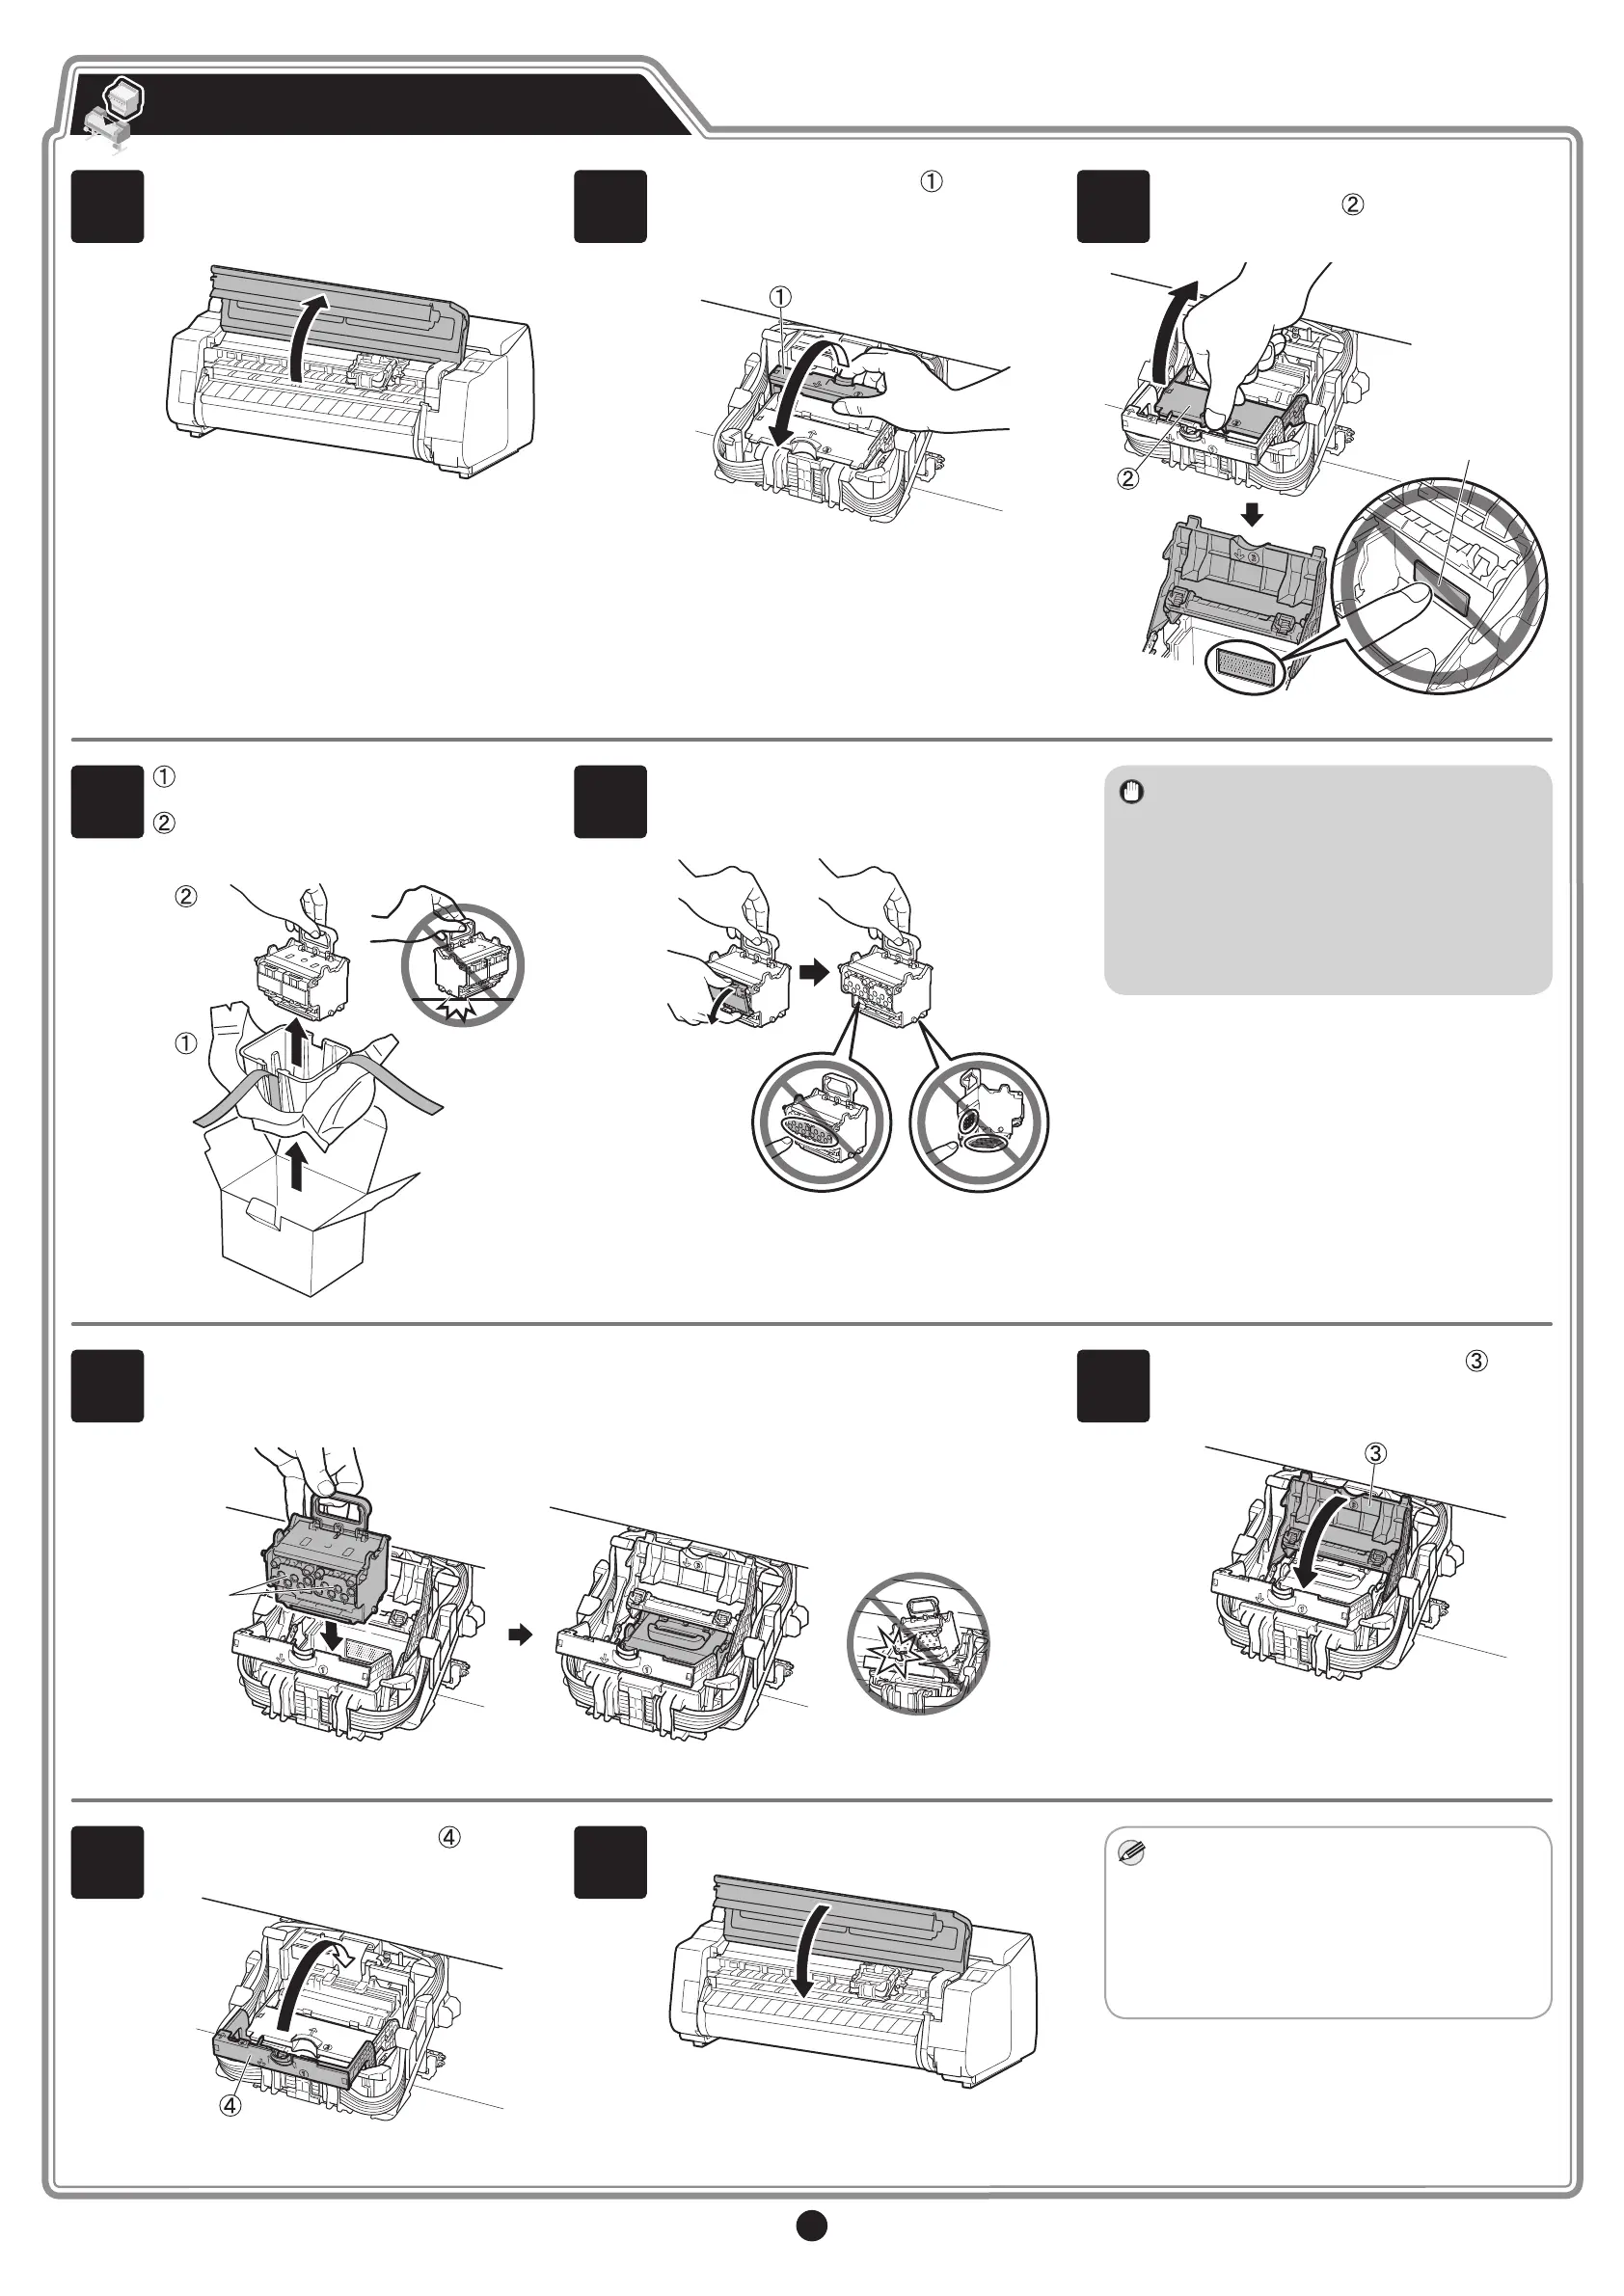
1
When the instruction to open the top
cover appears on the screen, open the
top cover.
Instructions are now shown on the screen
regarding print head installation.
2
Tilt the print head lock lever towards
you while pressing the button in the
middle. Remove the protective sheet if
there is one attached.
3
Grasp the grip in the center of the print
head locking cover
and open it. Do not
touch the contacts (A) on the carriage.
A
4
Remove the print head from the box
and bag, and peel off the xing tape.
Grasp the blue handle and remove the
print head.
5
Remove the orange protective caps (2
pieces).
Important
• Do not touch any part other than the
handle or put down the unit.
• The print head contains ink, so be
careful not to spill it once the protective
caps are removed.
• Do not reattach the protective caps
after removing them. Dispose of them
according to local regulations.
6
Insert the print head into the carriage with the ink holes (A) on the upper side and facing
towards you as shown in the gure. Carefully push the print head rmly into the carriage,
ensuring that the part covered by the protective caps does not touch the carriage.
A
7
Pull the print head locking cover down
toward the front to lock the print head in
place.
8
Push the print head lock lever all the
way in until it makes a click sound.
9
Close the top cover.
Note
• If the roll unit is installed, the roll unit
calibration starts automatically after the
print head is attached.
If the roll holder is mounted on the roll
unit at this time, calibration cannot be
executed. Do not mount the roll holder
on the roll unit until the setup has
nished.
Install the Print Head
 Loading...