42VQV
GB - 7
ENGLISH
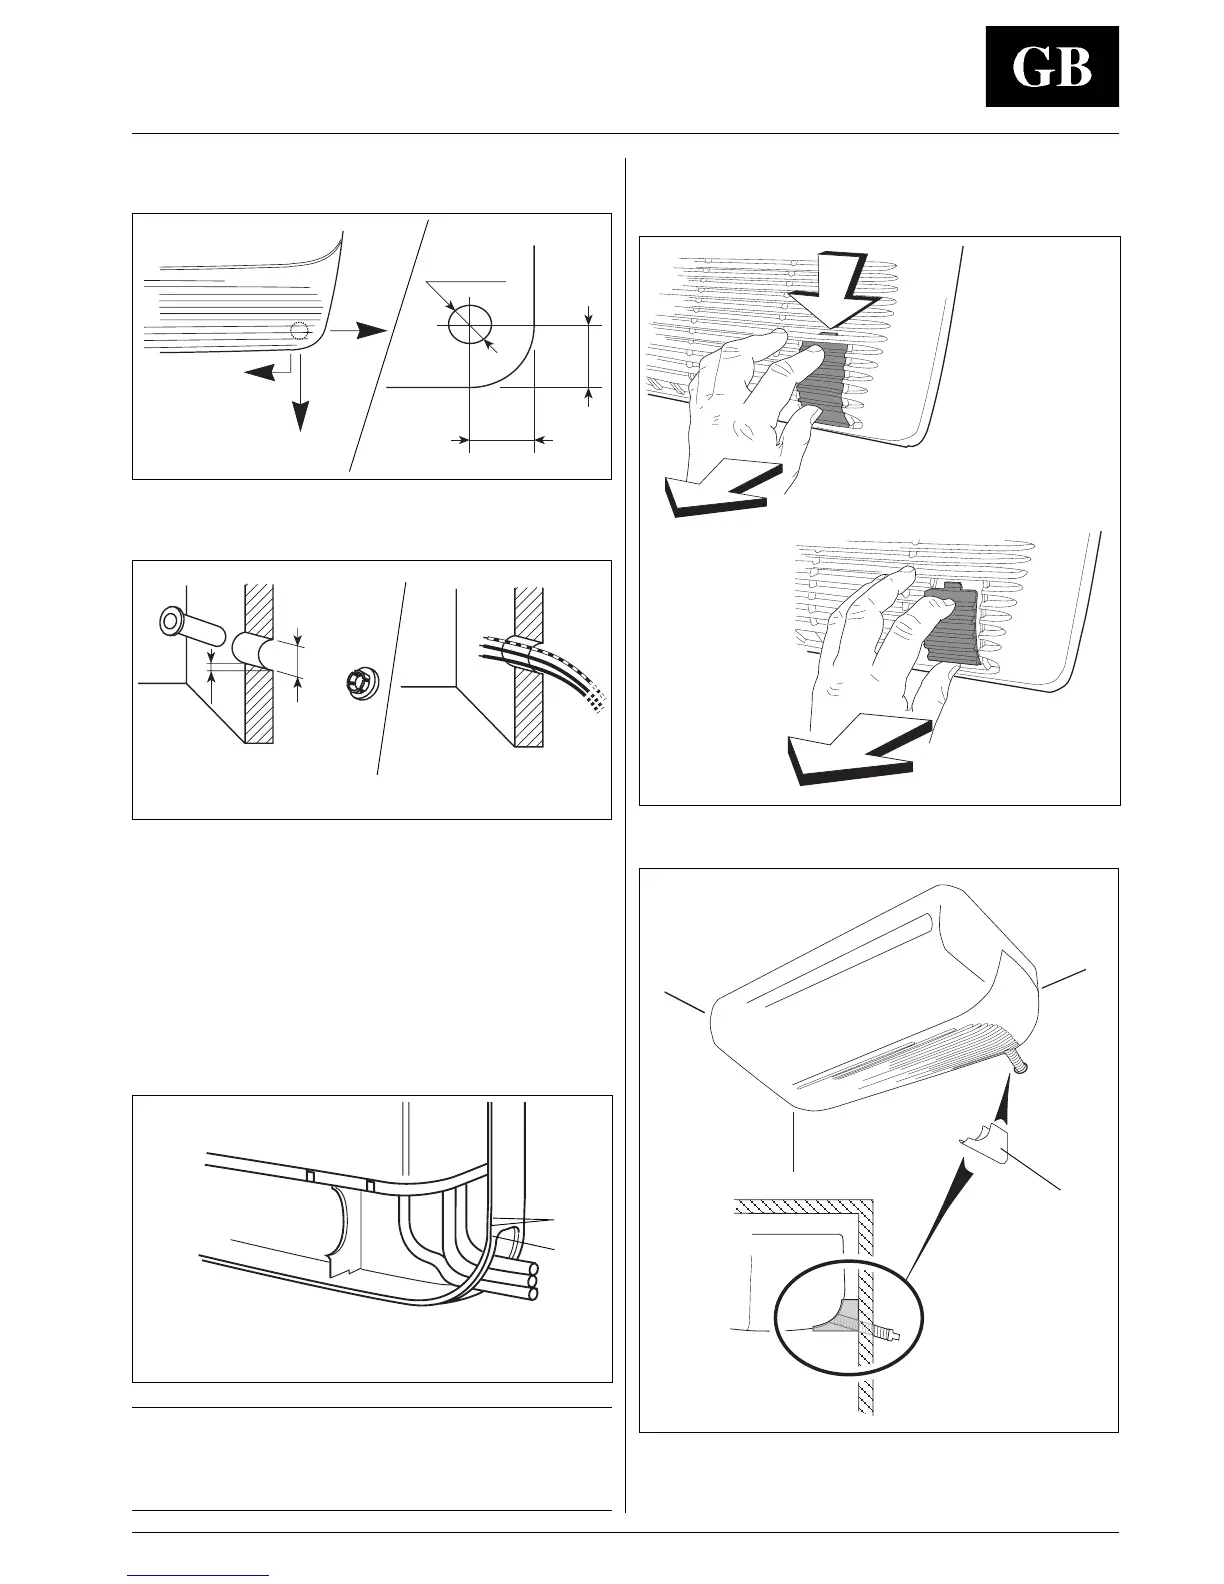
For horizontal installation
To allow the condensate drain pipe to correctly come out of the
unit, proceed as follows:
• Remove from suction grille, the part of grille fixed tonguing,
pressing it until tabs is unhooked.
Mount condensate drain pipe cover 햷 supplied, fitting it as
necessary. In the event of condensate discharge pump is used
(accessory), the condensate drain pipe can exit together with
the refrigerant pipes.
Drilling the hole in the wall for the
connection of the pipes
The pipes can exit the unit to three different directions (see
illustration). For exit to the rear, the wall hole must be made in the
position shown in the illustration.
Drill a 70 or 80 mm diameter hole.
The hole must have a 5-10 mm downward slope towards the
outside. Insert the plastic conduit provided.
Pass the electrical connecting wires through the conduit (see
electrical connections).
Condensate drain pipe
For vertical installation
Connect the PVC pipe to the connection on the drain pan.
IMPORTANT:
The outdoor unit is designed to operate without the use of
condensate water to cool the condenser coil.
It is necessary to discharge the condensate directly into
the sewer system, downpipes or to disperse it outside.
Installation: 42VQV 050 - 080
햷
Ø 80 mm
50 mm
75 mm
Ø 70 / 80 mm
햲
햳
5-10 mm
햲 Indoors
햳 Outdoors
A
B
A Refrigerant connections
B Condensate drain pipe
 Loading...


