23
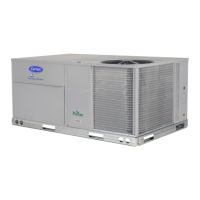
Fig. 17 — Alternative Condensate Drain Hole
Positions
Step 7 — Convert to Horizontal and Connect
Ductwork (When Required)
SIZES 07-14
Unit is shipped in the vertical duct configuration. Unit without
factory-installed economizer or return-air smoke detector option
may be field-converted to horizontal ducted configuration. To
convert to horizontal configuration, remove screws from side duct
opening covers (see Fig. 18) and remove covers. Use the screws to
install the covers on vertical duct openings with the insulation-side
down. The panels must be inserted into the notches on the basepan
to properly seal. The notches are covered by the tape used to
secure the insulation to the basepan and are not easily seen. See
Fig. 19 for position of the notches in the basepan. Seals around
duct openings must be tight. Secure with screws as shown in
Fig. 20. Cover seams with foil duct tape.
Field-supplied flanges should be attached to horizontal duct open-
ings and all ductwork should be secured to the flanges. Insulate
and weatherproof all external ductwork, joints, and roof or build-
ing openings with counter flashing and mastic in accordance with
applicable codes.
Do not cover or obscure visibility to the unit’s informative data
plate when insulating horizontal ductwork.
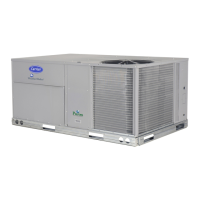
Fig. 18 — Horizontal Conversion Panels
Fig. 19 — Location of Notches
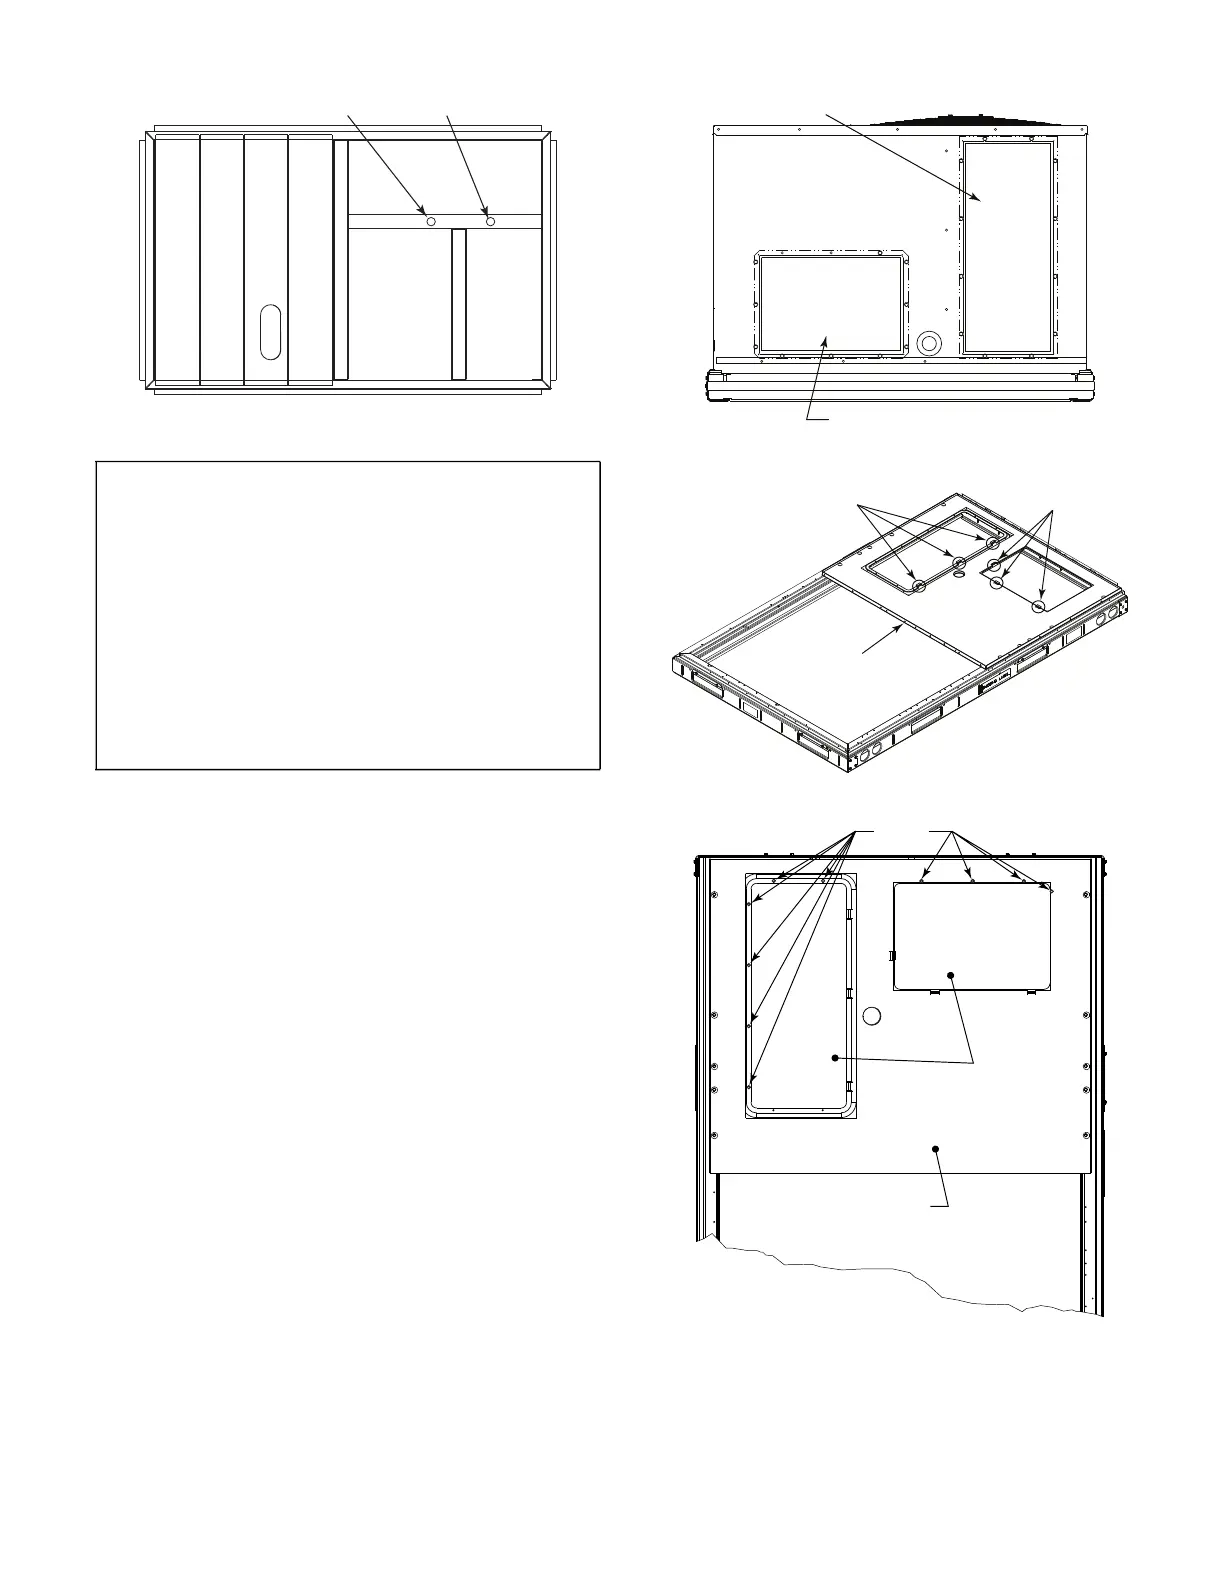
Fig. 20 — Horizontal Duct Panels In Place
IMPORTANT: If the unit has the factory-installed thru-
the-base option, make sure to complete installation of the
option before placing the unit on the roof curb.
See the following sections:
Factory-Option Thru-Base Connections
(Gas Connection) on page 27 for sizes 07-14 and page 28
for size 16
Factory-Option Thru-Base Connections
(Electrical Connections) on page 35 for sizes 07-14 and
page 36 for size 16
NOTE: If gas and/or electrical connections are not going
to occur at this time, tape or otherwise cover the fittings so
that moisture does not get into the building or conduit in
the interim.
ORIGINAL
POSITION
NEW POSITION
(MOVED 12.5 in.)
REMOVABLE HORIZONTAL
SUPPLY DUCT OPENING COVER
REMOVABLE HORIZONTAL
RETURN DUCT OPENING COVER
BASEPAN
NOTCHES
NOTCHES
SCREWS
DUCT COVERS
SHEET METAL
FACE UP
BASEPAN
 Loading...