— 14 —
DIAGNOSTIC PROGRAM
Initial Setup
1. Connect an AC adaptor.
2. Connect a pedal cord.
3. "Main" volume: MAX.
NOTE: If there is no pedal or MIDI cable, pedal or MIDI check can be skipped.
How to start diagnostic program
1. Turn on the “POWER” button while the “FUNCTION” and the “TRACK1/TRACK2” buttons are depressed.
2. Release the “FUNCTION” and the “TRACK1/TRACK2” buttons.
ALL the LEDs flash and the test mode boots.
Diagnostic program
1. Automatic Test
1 CPU RAM check
2 DSP RAM check
3 ROM check
While performing 1 ~ 3, TONE1, TONE2, TONE3, or START/STOP lights when an error is found in
ROM. If no error is found, the confirmation chord C6 sounds.
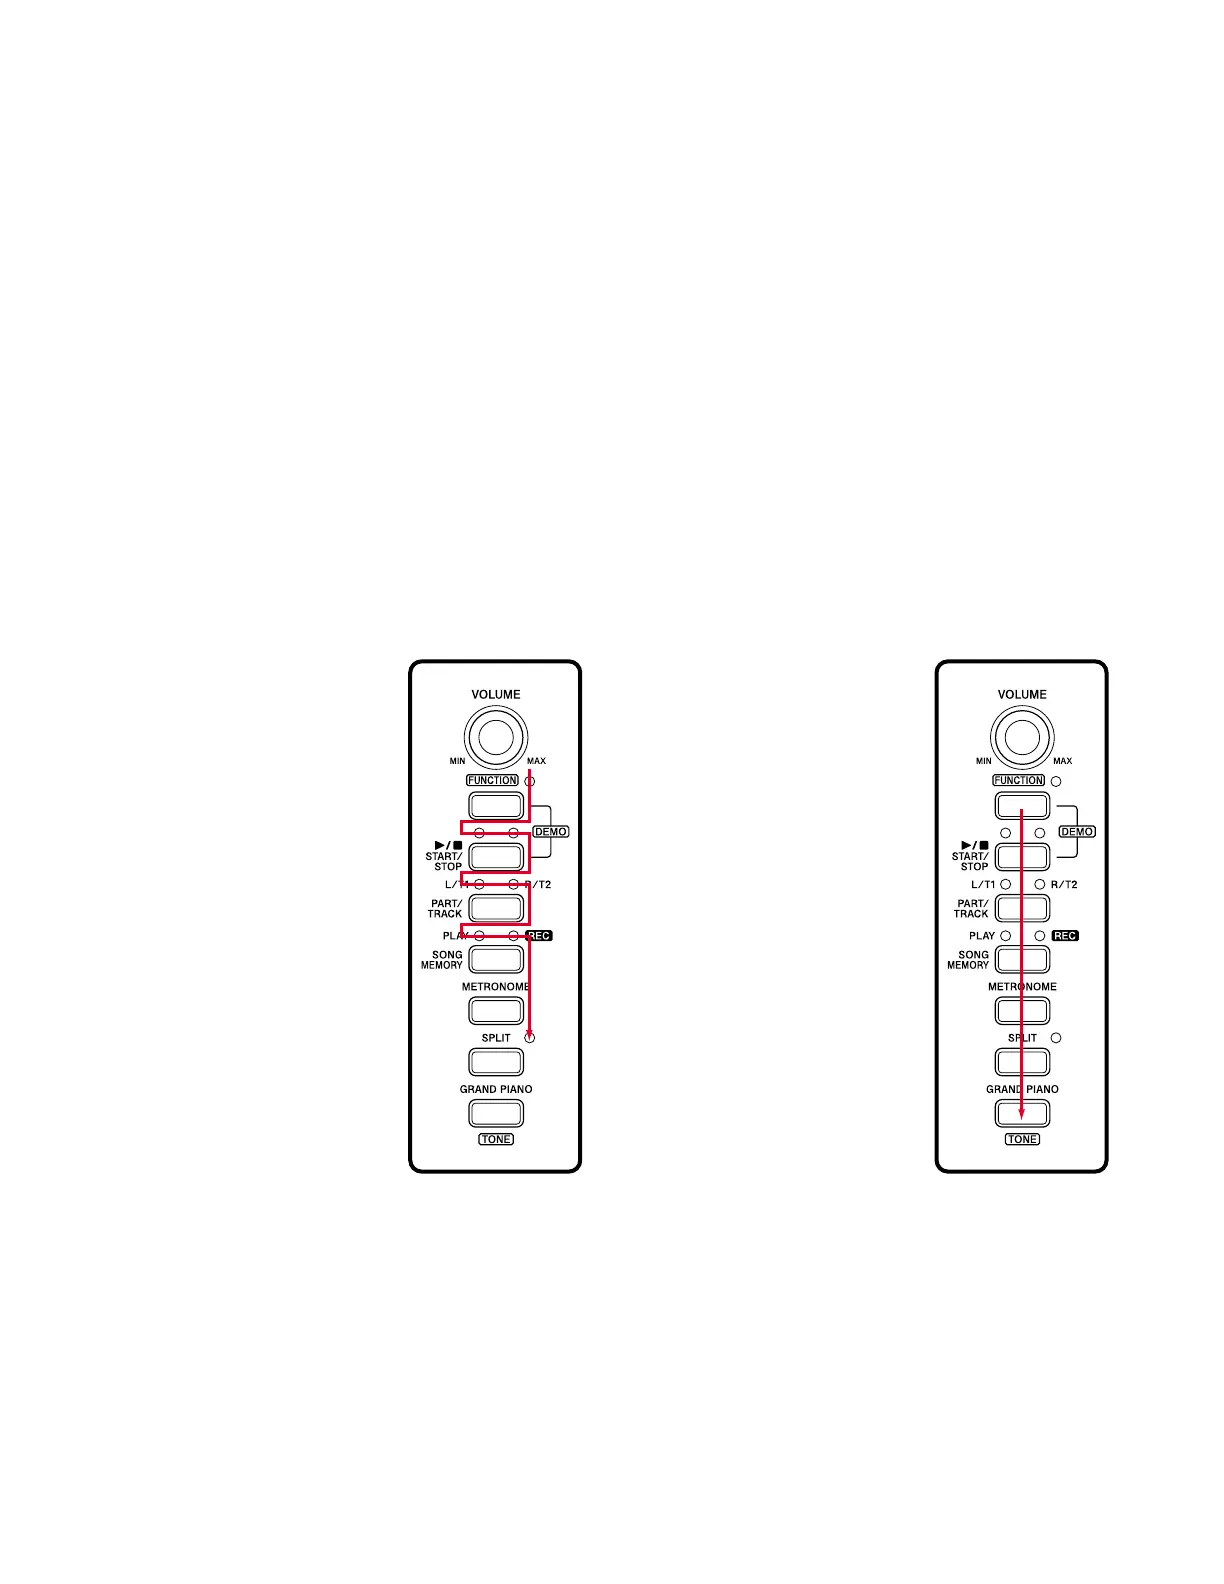
3. BUTTON check
1 Press the “FUNCTION”
button to perform
“BUTTON check.”
The confirmation chord C6
sounds.
2 Press buttons in the order
following.
NG tone sounds when an
error is found in the
buttons or when the
buttons are pressed in a
wrong order.
This test cannot be
aborted.
4. Pedal check (If there is no Pedal, this check can be skipped.)
1 Press the “FUNCTION” button to perform the “Pedal check.”
2 Press the “SOFT” pedal.
The confirmation chord C4 sounds and “LEFT/TRACK1” LED lights.
3 Press the “SOSTENUTO” pedal.
The confirmation chord E4 sounds and “RIGHT/TRACK2” LED lights.
4 Press the “DAMPER” pedal. (ON HALF)
The confirmation chord G4 sounds and “REC” LED lights.
5 Press the “DAMPER” pedal. (ON FULL)
The confirmation chord G4 sounds and “REC” and “PLAY” LEDs lights.
2. LED check
1 The LEDs light in the
sequence shown below
when the “FUNCTION”
button is pressed.
LED check repeats if the
“PLAY/RED” is pressed.

 Loading...