Slight gap that
may be present
when the RSP
card is fully
seated in the
backplane and
captive
installation
screws are fully
tightened
3Fully parallel
position of
ejector levers
when the RSP
card is fully
seated in the
backplane and
captive
installation
screws are fully
tightened
2Slightly loose
position of
ejector levers
when the RSP
card is fully
seated in the
backplane, but
the captive
installation
screws are not
fully tightened
1
Step 3 Tighten the captive screws at the top and bottom of the front panel to a torque of 10 +/–1 in-lb.
Step 4 Repeat Step 1 through Step 3 to install the second RSP card into slot RSP1.
Even when the RSP card is fully seated with installation screws fully tightened, there may be a
slight gap between the card and the chassis (item 3 in the above figure).
Note
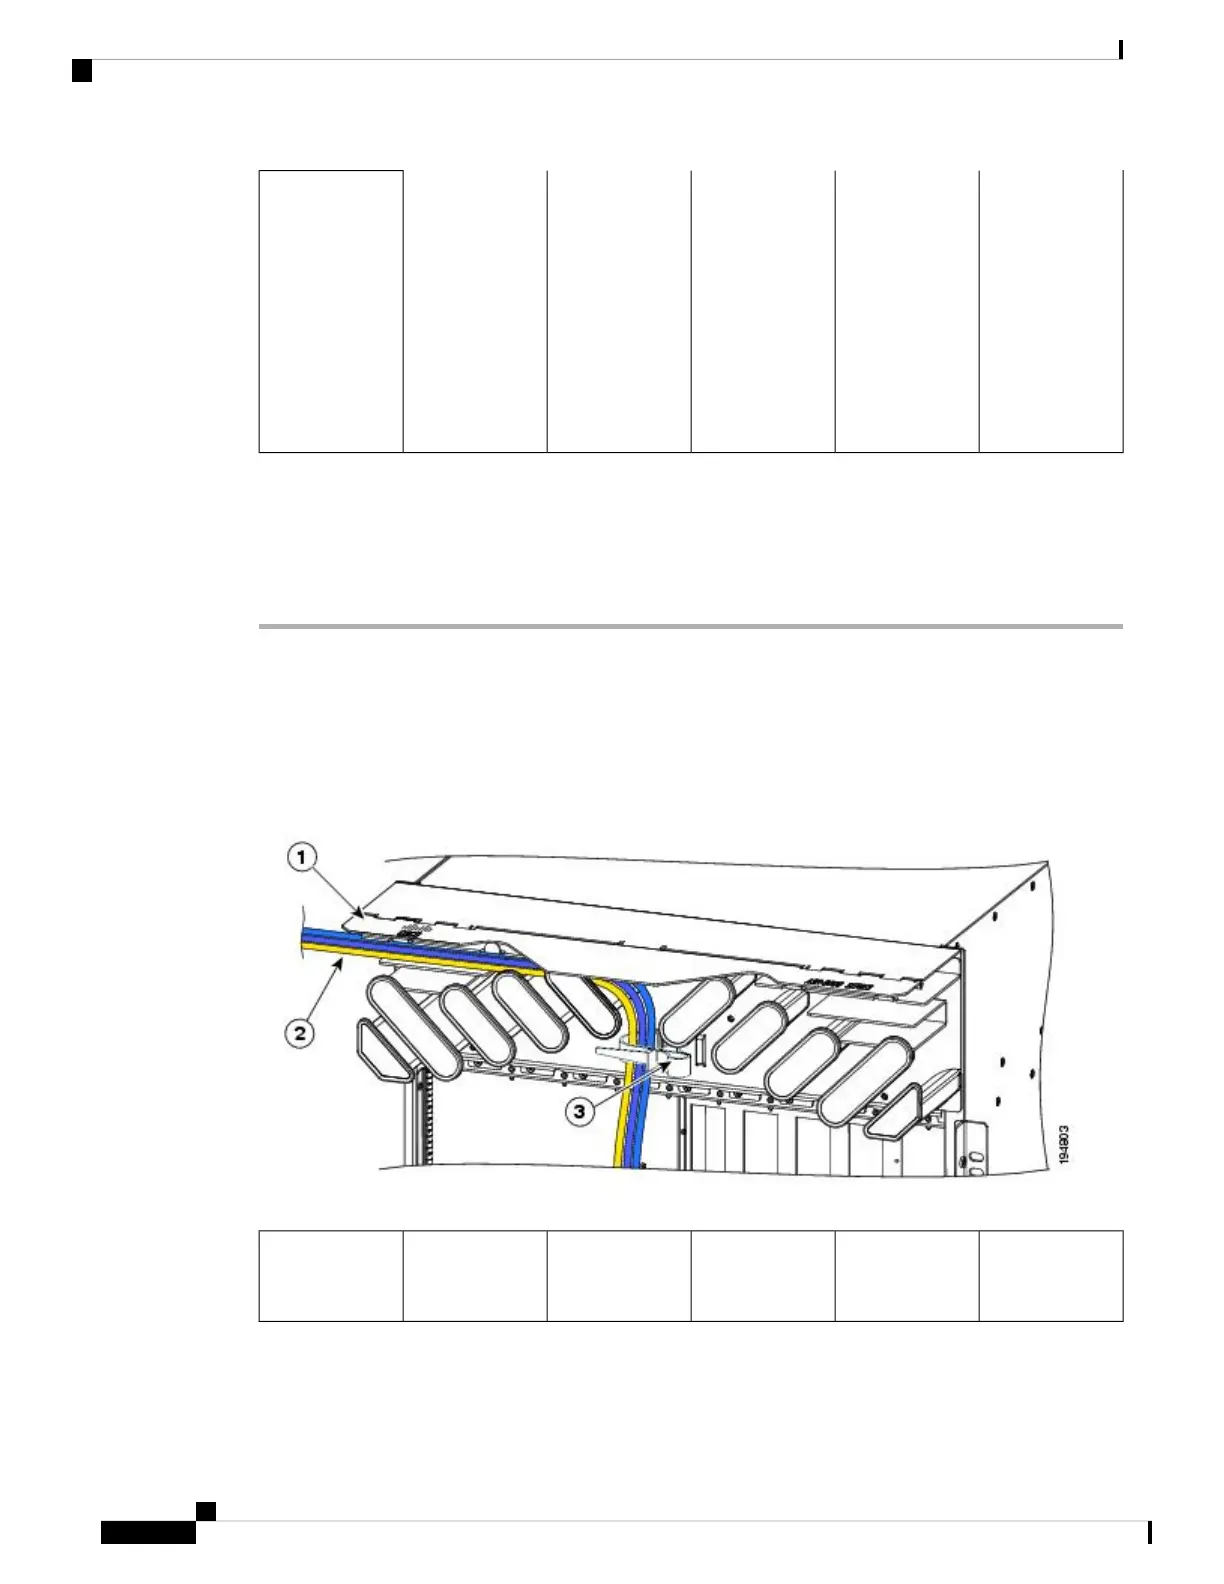
RSP Cable Management Ties
The Cisco ASR 9010 Router has cable management ties on the front of the cable management tray assembly.
Cables to the RSP cards can be routed as shown in the figure below to separate them from line card cabling.
Figure 172: RSP Cable Management Ties
RSP cable
management tie
3RSP cable
bundle routed
through the tray
2Hinged cover
(shown in the
raised position)
1
Cisco ASR 9000 Series Aggregation Services Router Hardware Installation Guide
166
Installing Cards and Modules in the Chassis
RSP Cable Management Ties

 Loading...