3-34
Cisco ISA 3000 Industrial Security Appliance Hardware Installation Guide
Chapter 3 Connecting the ISA 3000
Connecting a PC to the ISA 3000 For Configuration
Connecting a PC to the ISA 3000 For Configuration
There are two methods of connecting to the ISA 3000 and configuring the device:
• Connect a PC to the console connector of the Cisco ISA 3000 and launch a console terminal to use
the CLI. ASA has a full CLI set, however, FTD only supports a setup script plus a few commands.
• Connect the PC to the Cisco ISA 3000 management sub-network which will then receive an IP
address through DHCP.
Note This section describes connecting to the console port. Refer to documentation that is provided for your
operating system for connecting through the management port.
To connect a PC to the console port on the Cisco ISA 3000 and access the CLI, follow these steps:
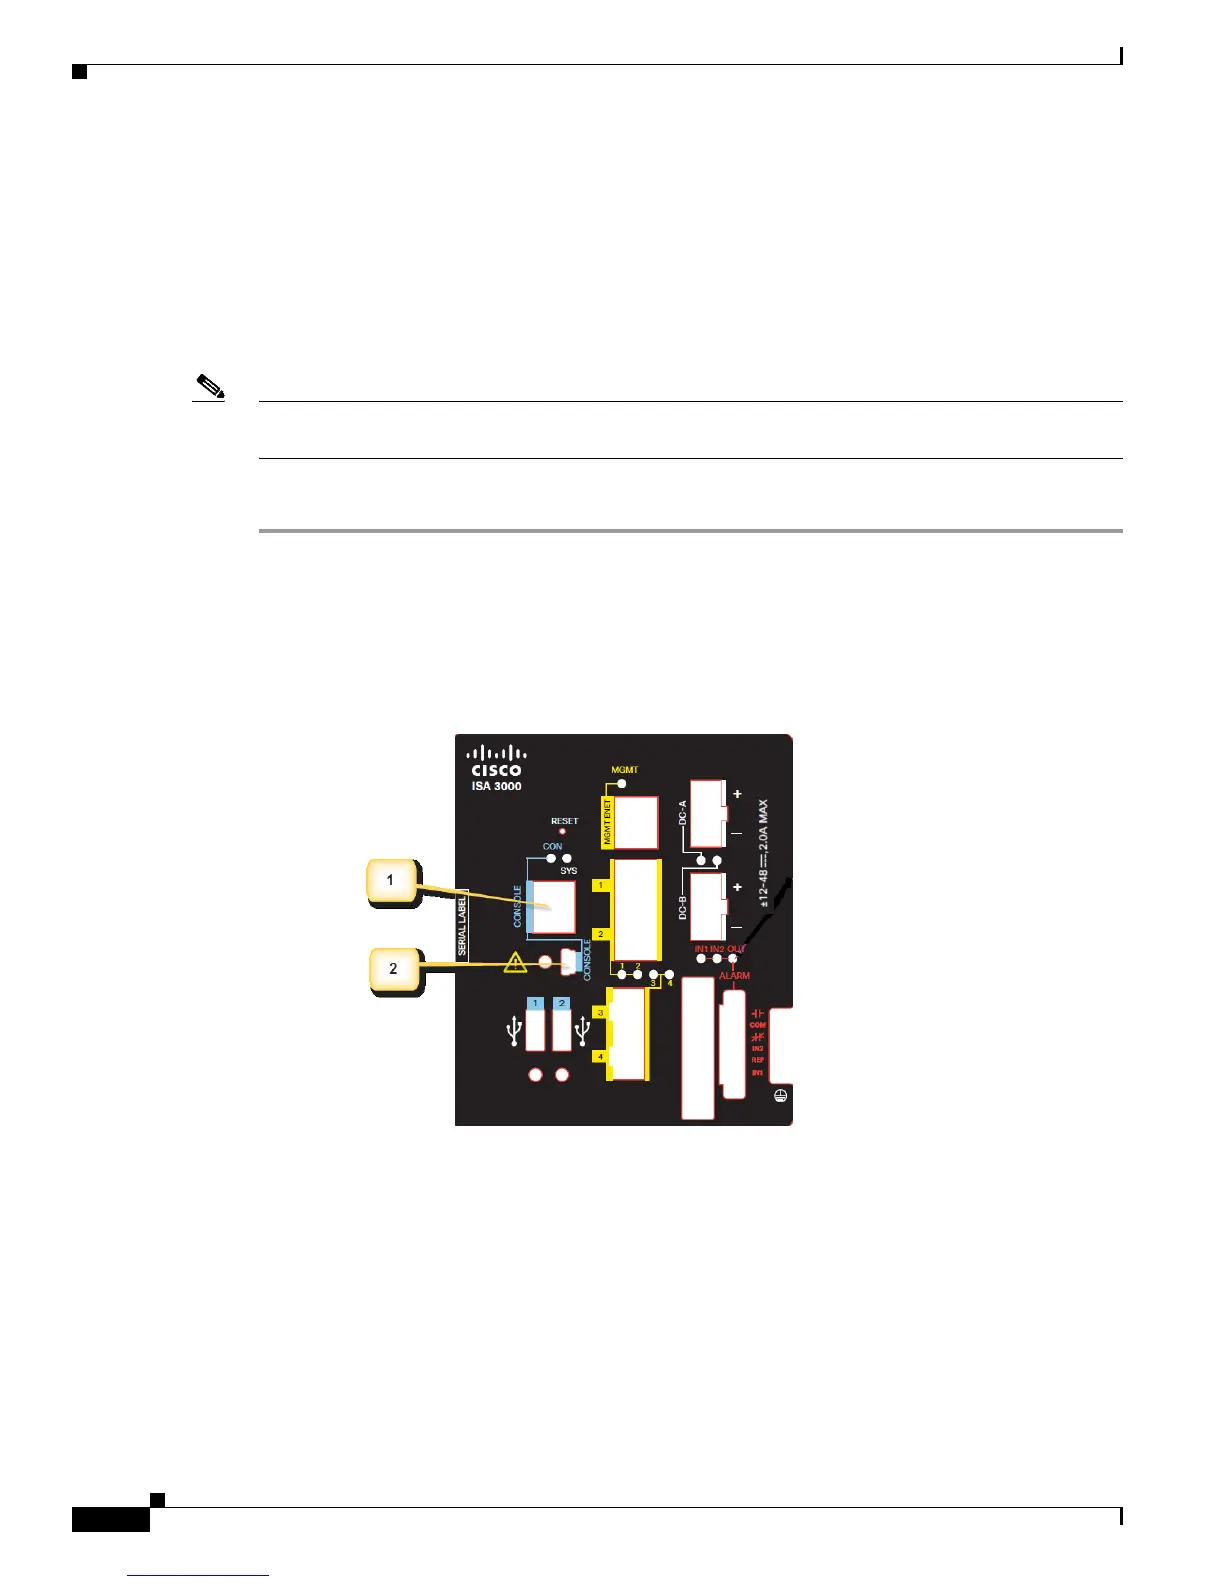
Step 1 Choose which console connection will be used. In Figure 3-1, Item 1 is the RJ-45 console connector, and
item 2 is the mini-USB connector.
Figure 3-1 Console Connection Ports
Step 2
If the mini-USB connector is being used, the protective cover will need to be removed first. The red
arrow in Figure 3-2 shows the location of the cover. Remove the cover with a Phillips screw driver and
set it aside to be reinstalled after completing the configuration.
 Loading...