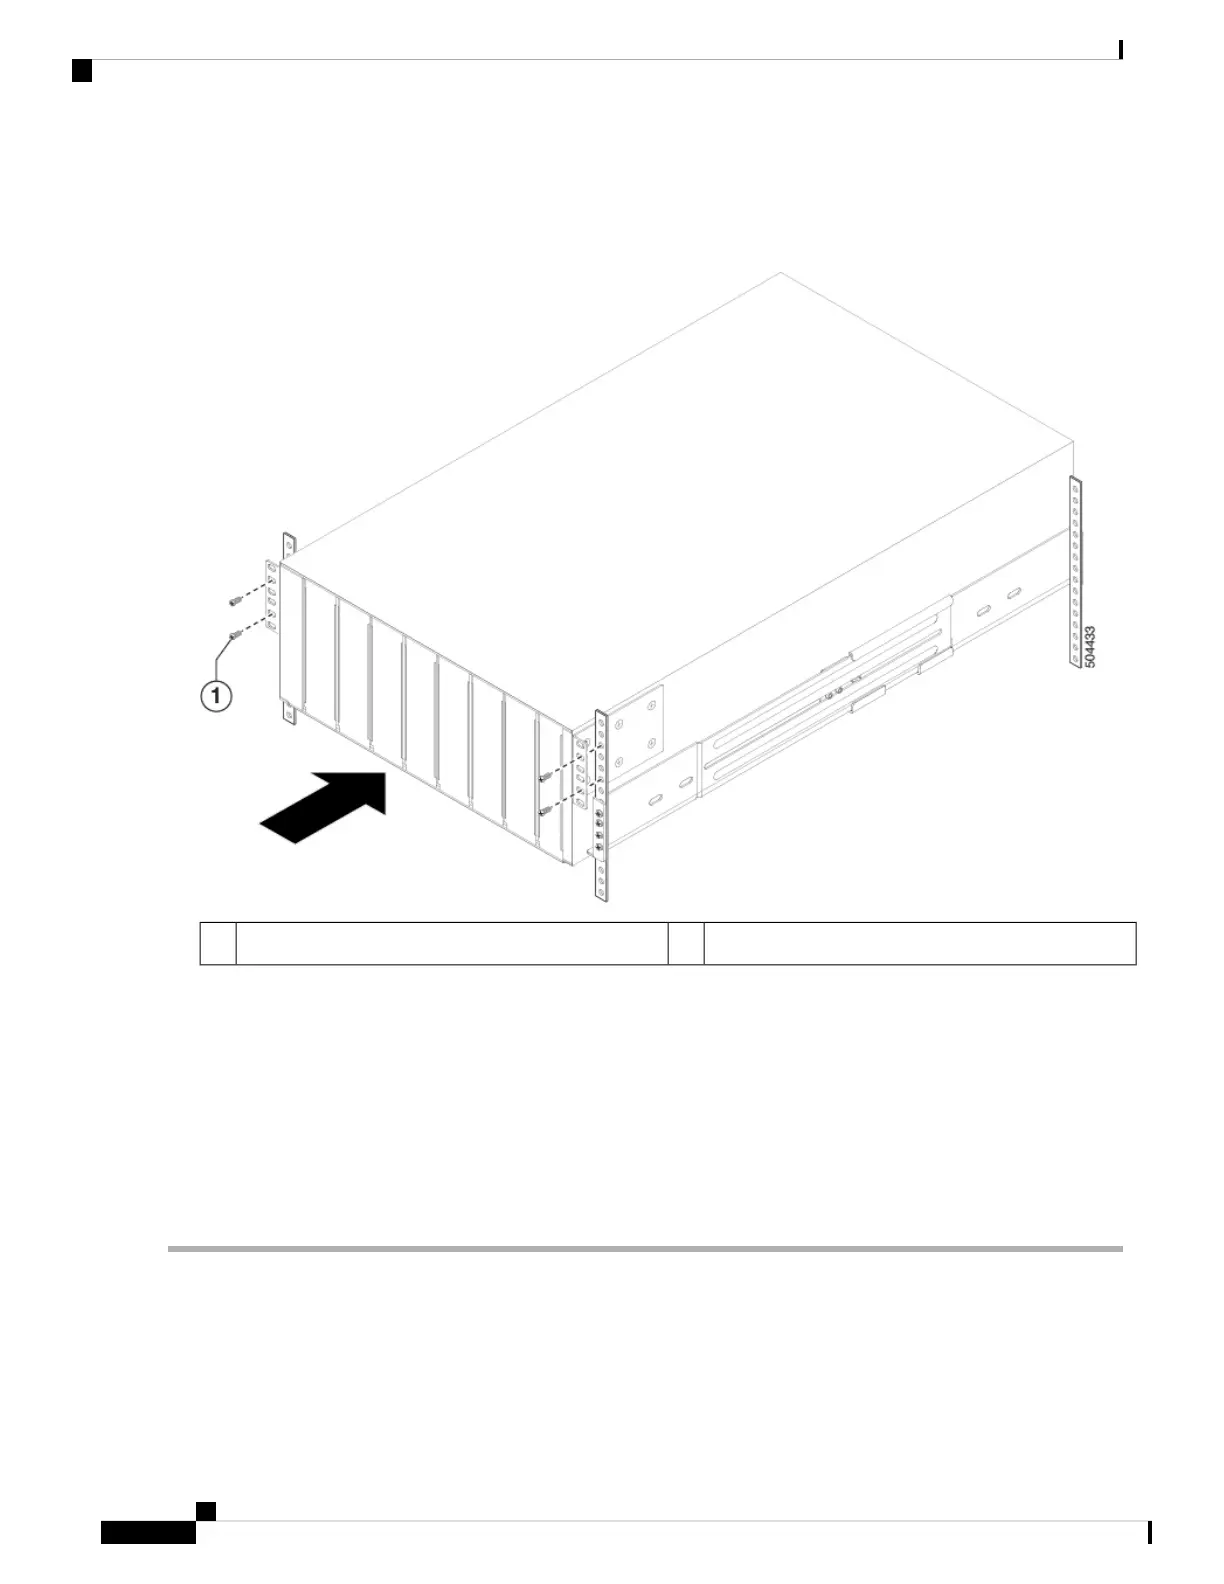
When you have fully pushed the chassis all the way onto the bottom-support rails, the chassis stops when the
front-mount brackets touch the front vertical mounting rack.
Figure 4: Sliding the Chassis onto the Bottom-Support Rails
Rack-mount screw1
b) Use screws that are appropriate for the rack to attach the front-mount brackets to the rack.
Typically, you use one of the following types of screws and the associated torque settings when tightening them:
• M4 screws—Use 12 in-lb (1.36 N·m) of torque.
• M6 screws—Use 40 in-lb (4.5 N·m) of torque.
• 10-32 screws— Use 20 in-lb (2.26 N·m) of torque.
If the rack requires another type of screw, use the appropriate torque setting for that type of screw.
Grounding the Chassis
The switch chassis is automatically grounded when you properly install the switch in a grounded rack with
metal-to-metal connections between the switch and rack.
Installing the Chassis
12
Installing the Chassis
Grounding the Chassis
 Loading...