Cisco WAP125 Quick Start Guide 5
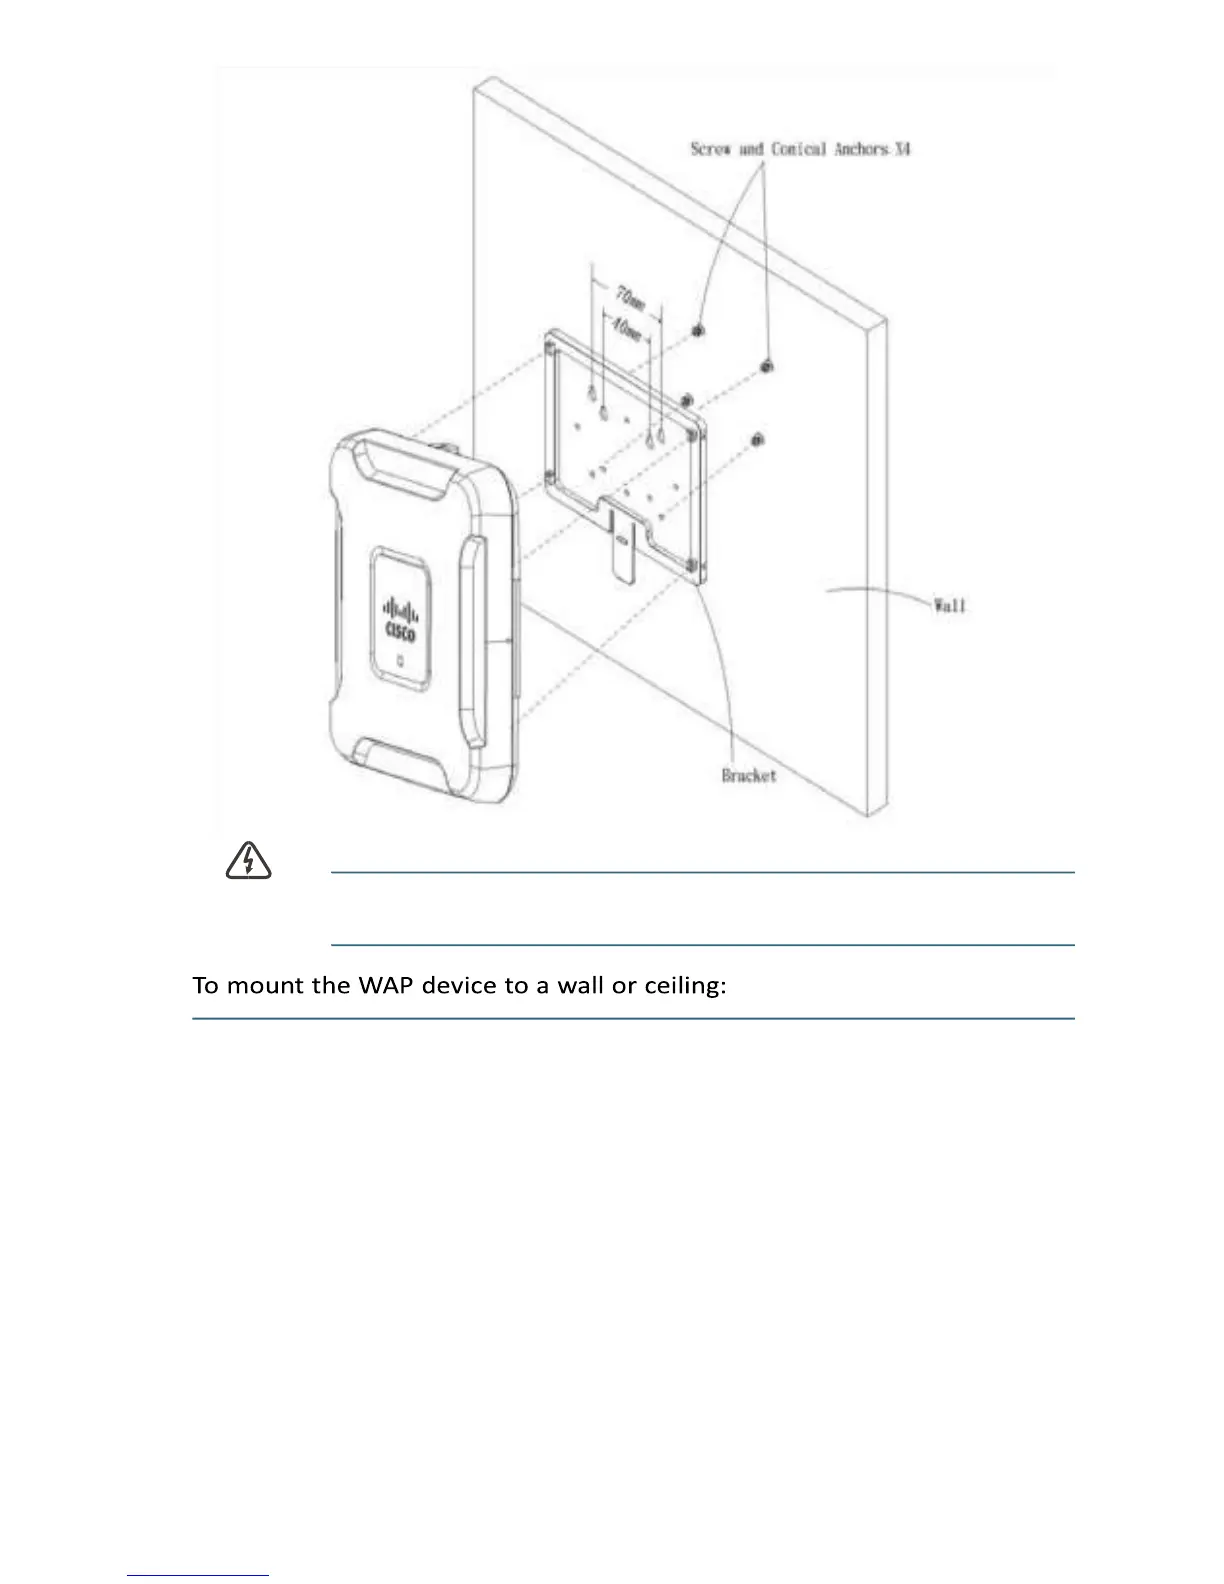
WARNING Insecure mounting might damage the device or cause injury. Cisco is not
responsible for damages incurred by insecure wall or ceiling mounting.
STEP 1 Determine where you want to mount the device. Verify that the surface is
smooth, flat, dry, and sturdy.
STEP 2 Drill two pilot holes into the surface 2.75 inches (70 mm) apart for your Cisco
WAP device.
STEP 3 Insert a screw into each hole, leaving a gap between the surface and the base
of the screw head.
STEP 4 Place the upper slots of the bracket over the screws, adjust the screws
accordingly, and slide the bracket down until the screws fit snugly into the
slots.
STEP 5 Using the bracket as a template, drill two more holes for the lower screws.
STEP 6 Insert a screw into each lower hole.
 Loading...