Disassembly
2 - 12 Removing the Processor
2.Disassembly
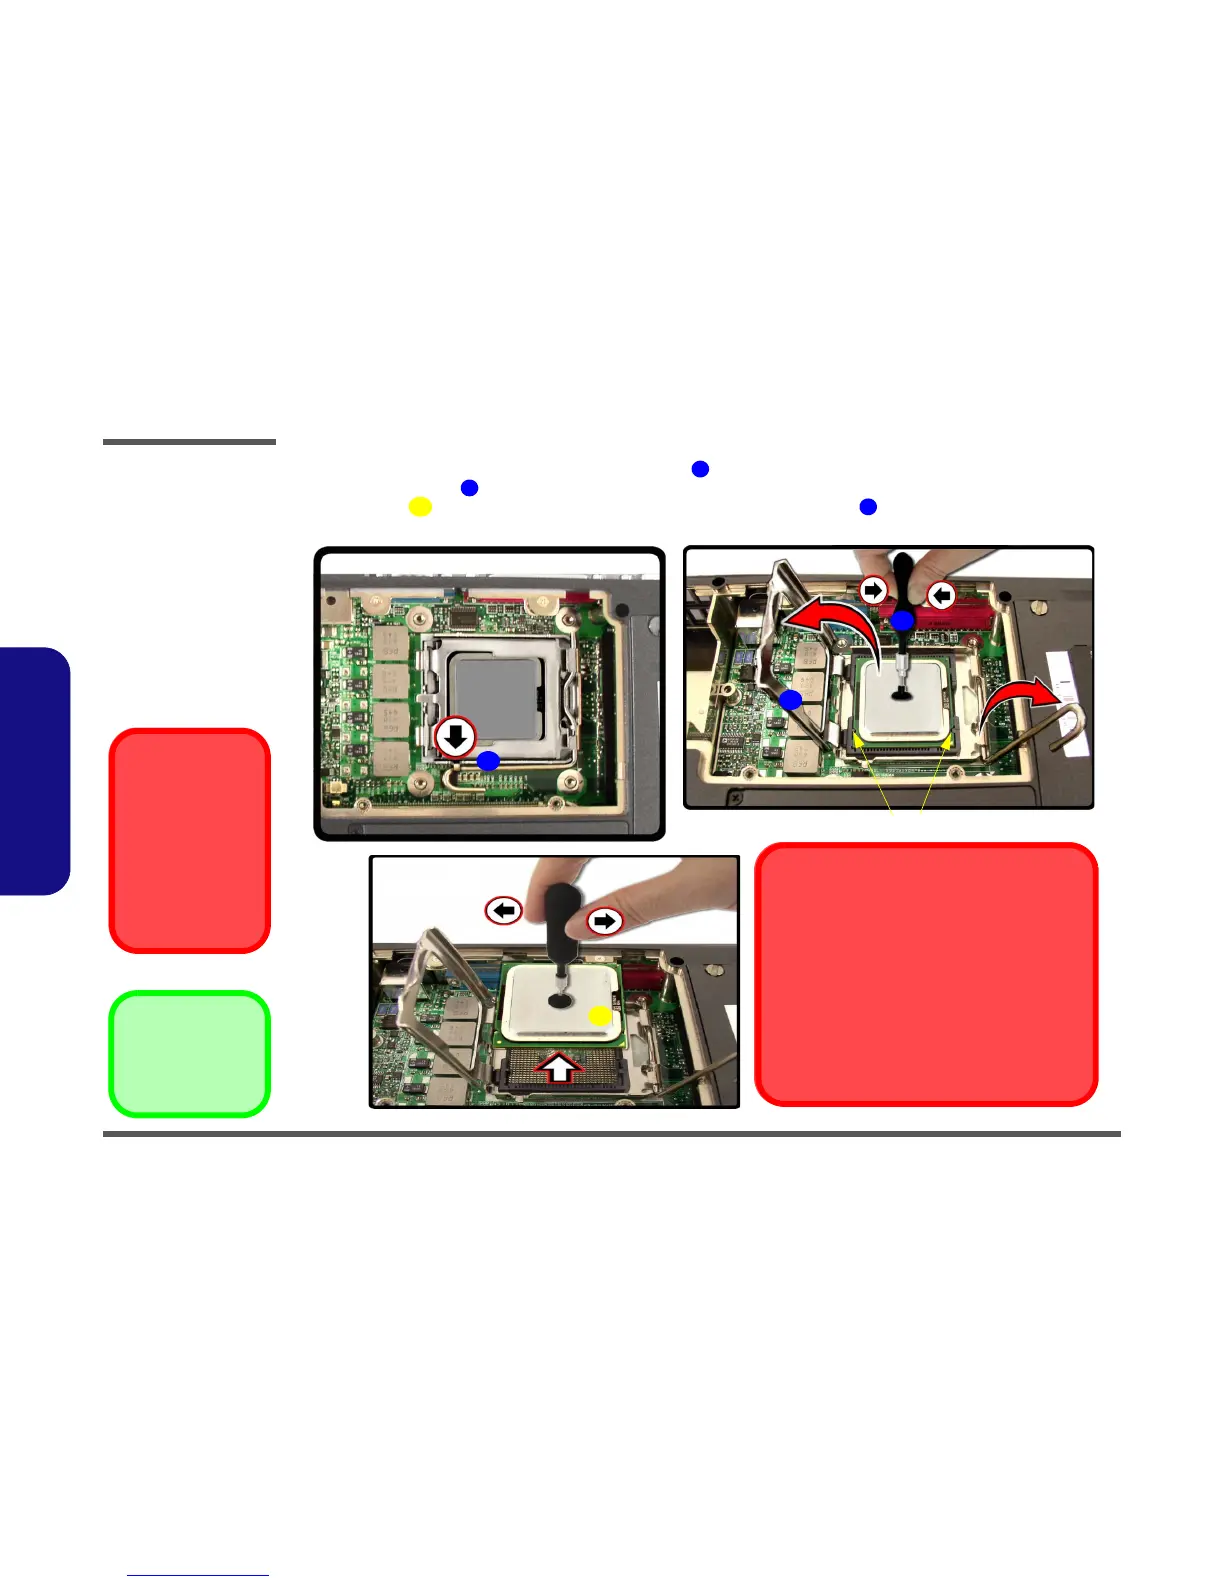
6. Unlock the processor by sliding out and raising lever in the direction indicated by the arrow.
7. Raise the CPU lock .
8. Lift the CPU off the computer using a vacuum handling tool (as pictured ).
13
14
16
15
Figure 2 - 8
Processor Removal
(cont’d)
a. Raise the lever to unlock
the CPU.
b. Raise the CPU lock.
c. Lift the CPU off the sock-
et with a vacuum han-
dling tool.
Caution
The heat sink, and
CPU area in general,
contains parts which
are subject to high
temperatures. Allow
the area time to cool
before removing these
parts.
a. b.
c.
Re-Insering a CPU
When re-inserting the CPU make sure you use the
vacuum handling tool to lift it up, and to place in the
socket.
Place the CPU in the socket carefully and line up the
indents on the side of the CPU with the appropriate
postions on the socket. The CPU’s pin alignment
and indents will allow it to only fit one way. Make sure
the CPU is seated as far into the slot as it will go. DO
NOT FORCE the CPU; it should fit without much
pressure.
13
14
16
15
Line up the indents when replacing the CPU
16. CPU