10
HOWTOUSEYOURAIRCOMPRESSOR
See gures 5 - 6.
Do not allow familiarity with tools to make
you careless. Remember that a careless fraction of a second
is sufcient to inict serious injury.
Always wear safety goggles or safety
glasses with side shields when operating power tools. Failure
to do so could result in objects being thrown into your eyes
resulting in possible serious injury.
Do not use in an environment that is dusty or
otherwise contaminated. Using the air compressor in this type
of environment may cause damage to the unit.
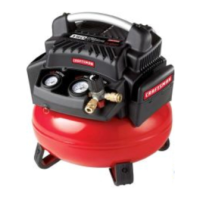
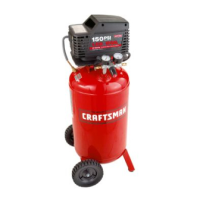
Ensure the tank drain valve is closed (see g. 5).
Ensure the ON/OFF switch is in the OFF(O) position and the
air compressor is unplugged (see g. 5).
Ensure the pressure regulator knob is turned fully
counterclockwise (see g. 5).
Always ensure the switch is in the OFF
(O) position and the regulator pressure gauge reads zero
before changing air tools or disconnecting the hose from the
air outlet. Failure to do so could result in possible serious
personal injury.
Connect the power cord to the power supply.
Turn the ON/OFF switch to the ON(I) position.
Rotate the pressure regulator knob to the desired line
pressure. Turning the knob clockwise increases air pressure
at the outlet; turning the knob counterclockwise reduces air
pressure at the outlet.
NOTE: Before connecting or disconnecting air tools, turn the
regulator knob counterclockwise to stop the ow of air.
Following all safety precautions in this manual and the
manufacturer’s instructions in the air tool manual. You may
now use your air-powered tool.
If using an ination accessory with a quick-connect tting,
control the amount of air ow with the pressure regulator knob.
Turning the knob fully counterclockwise will completely stop
the ow of air.
NOTE: Always use the minimum amount of pressure
necessary for your application. Using a higher pressure than
needed will drain air from the tank more rapidly and cause the
unit to cycle on more frequently.
When nished, always drain the tank and unplug the unit.
Never leave the unit plugged in and/or running unattended.
Check the air tool manual to insure the
correct air pressure regulator setting for optimum operation of
your air tools. If you are using an air tool not originally included
with the air tool kit supplied with this air compressor, your tool
may require more air consumption than this air compressor is
designed to supply.
Always read your air tool owner’s manual to match the correct
air supply to your air tool to avoid damage to the tool or risk of
personal injury.
NOTE: Do not exceed 50% duty cycle - 5 minutes ON and 5
minutes OFF.
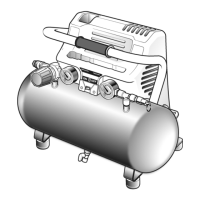
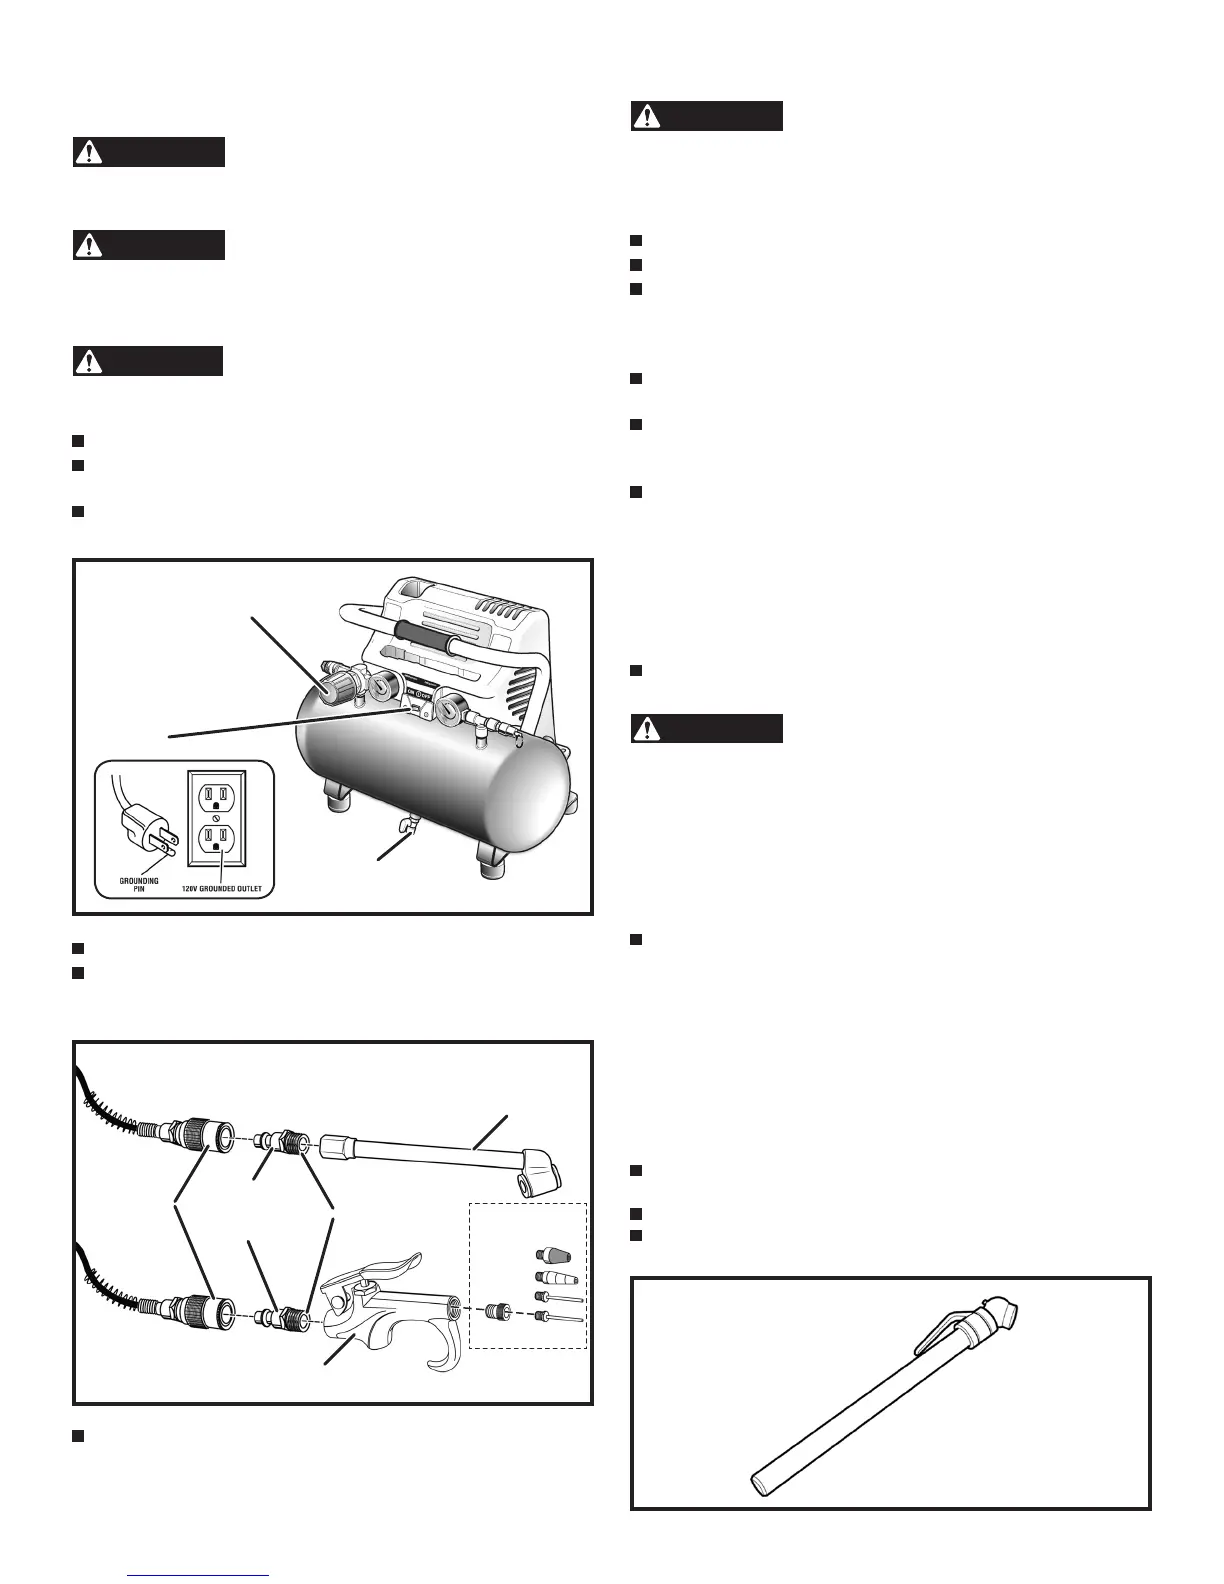
If not already installed, attach the hose to the compressor.
Apply thread sealing tape to male threaded end of the male
connector tting. Attach 1/4 in. NPT male connector tting to
accessory or tool you intend to use (see g. 6).
Drain
valve
Pressure
regulatorknob
On/Off
switch
Fig. 5
Coil hose
withquick
coupler
attached
1/4in.male
connector
fitting
Blow gun
Thread
sealing
tape
Longination
chuck
Fig. 6
Inflation
accessories
Connect the air powered tools to the air hose by inserting the
male quick-connect plug to the quick-coupler at the end of the
hose (see g. 6).
TIREGAUGE(see gure 7)
Operating instructions:
1. Press gauge rmly onto valve stem.
2. Read PSI on indicator bar.
3. Adjust pressure to manufacturer’s specications.
4. Push indicator bar back into gauge.
Always keep your tires inated to manufacturer’s
recommended pressure.
Check pressure when tire is cold.
Proper ination helps prevent blowouts, increases gas mileage
and prolongs tire life.
Fig. 7
 Loading...