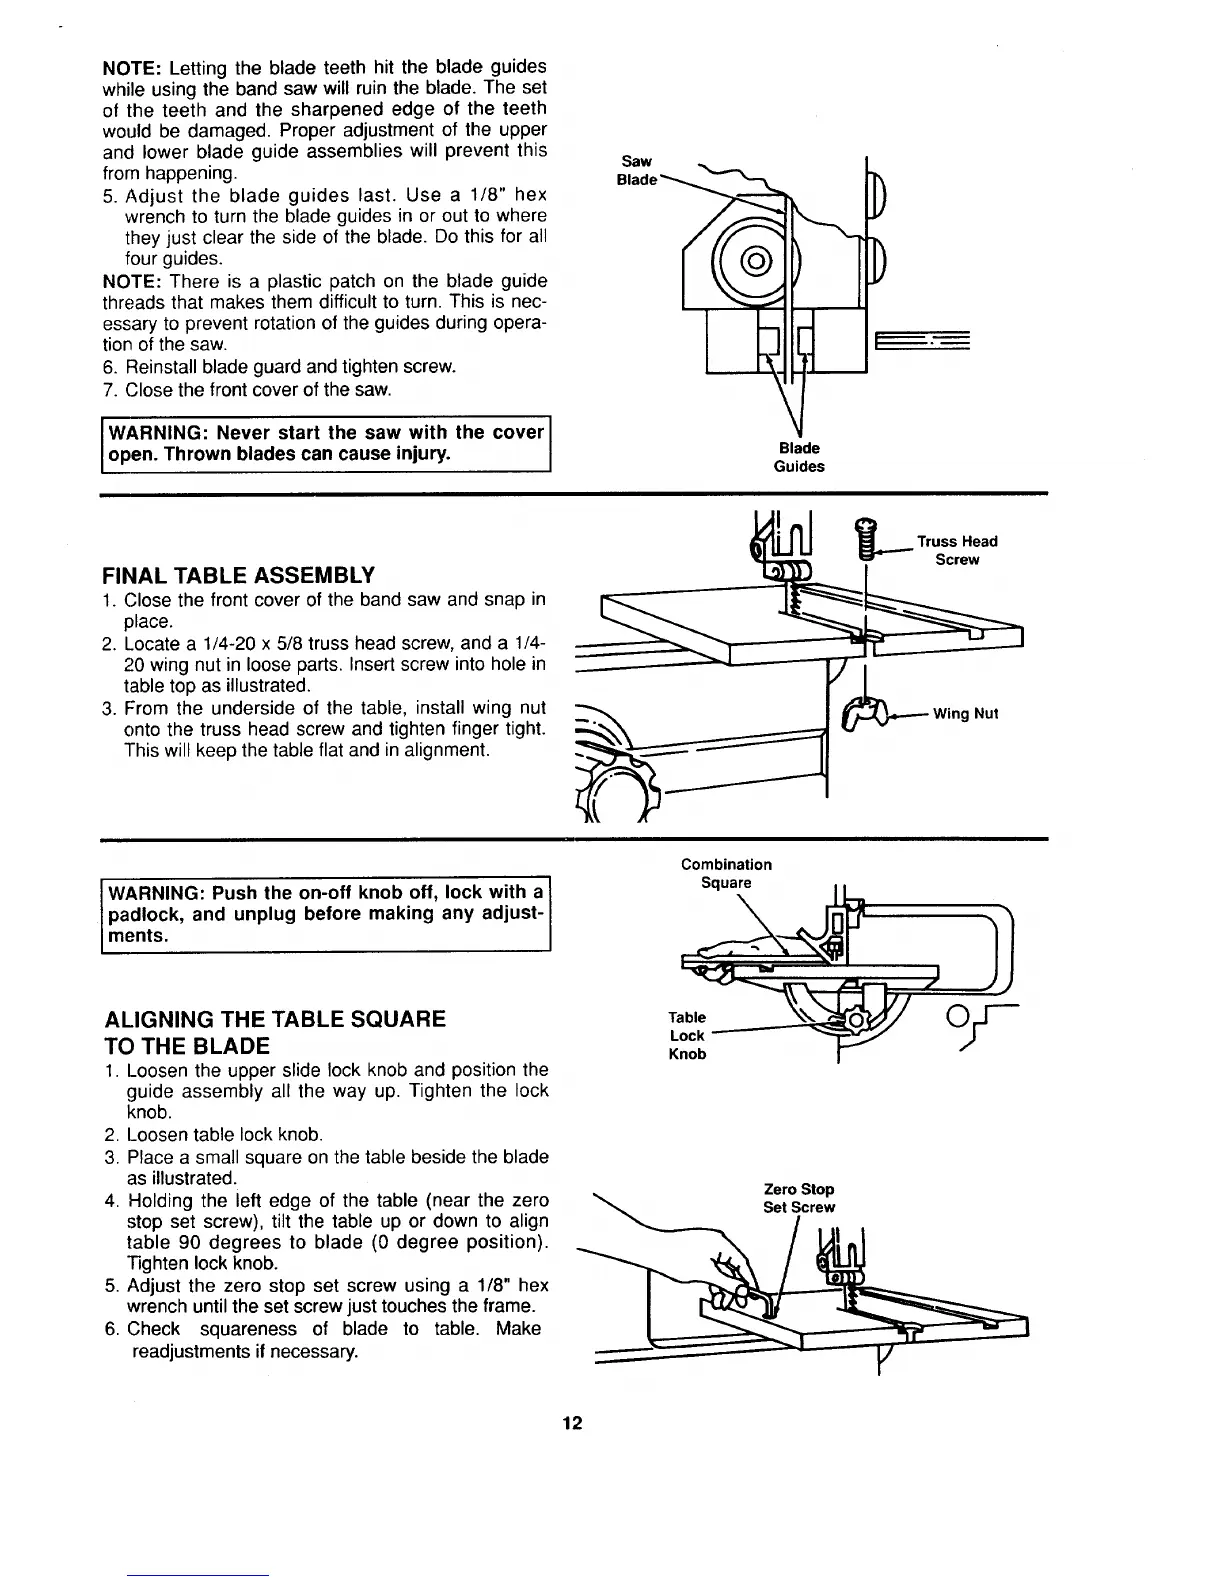
NOTE: Letting the blade teeth hit the blade guides
while using the band saw will ruin the blade. The set
of the teeth and the sharpened edge of the teeth
would be damaged. Proper adjustment of the upper
and lower blade guide assemblies will prevent this
from happening.
5. Adjust the blade guides last. Use a 1/8" hex
wrench to turn the blade guides in or out to where
they just clear the side of the blade. Do this for all
four guides.
NOTE: There is a plastic patch on the blade guide
threads that makes them difficult to turn. This is nec-
essary to prevent rotation of the guides during opera-
tion of the saw.
6. Reinstall blade guard and tighten screw.
7. Close the front cover of the saw.
IWARNING: Never start the saw with the cover l
open. Thrown blades can cause injury.
I
Saw
Blade
Guides
FINAL TABLE ASSEMBLY
1. Close the front cover of the band saw and snap in
place.
2. Locate a 1/4-20 x 5/8 truss head screw, and a 1/4-
20 wing nut in loose parts. Insert screw into hole in
table top as illustrated.
3. From the underside of the table, install wing nut
onto the truss head screw and tighten finger tight.
This will keep the table flat and in alignment.
Truss Head
Screw
Nut
WARNING: Push the on-off knob off, lock with a I
padlock, and unplug before making any adjust-
I
ments.
Combination
Square
\
ALIGNING THE TABLE SQUARE
TO THE BLADE
1. Loosen the upper slide lock knob and position the
guide assembly all the way up. Tighten the lock
knob.
2. Loosen table lock knob.
3. Place a small square on the table beside the blade
as illustrated.
4. Holding the left edge of the table (near the zero
stop set screw), tilt the table up or down to align
table 90 degrees to blade (0 degree position).
Tighten lock knob.
5. Adjust the zero stop set screw using a 1/8" hex
wrench until the set screw just touches the frame.
6. Check squareness of blade to table. Make
readjustments if necessary.
Table
Lock
Knob
Zero Stop
Set Screw
12
 Loading...