11
ENGLISH
raised far enough to access the blade screw
24
. Lower
guard will remain raised due to the position of the
guard bracketscrew.
4. Depress the spindle lock button
25
while carefully
rotating the saw blade
26
by hand until the
lockengages.
5. Keeping the button depressed, use the other hand and
the 1/4" hex side of the wrench
18
provided to loosen
the blade screw
24
. (Turn clockwise, left-hand threads.)
6. Remove the blade screw
24
using the 1/4" hex side of
the wrench provided, the outer clamp washer
27
and
blade
26
. The inner clamp washer
28
may be left on
the spindle
29
.
Installing a Blade (Fig. A, E–G)
1. Remove battery pack
13
from thesaw.
2. With the arm raised, the lower guard
4
held open and
the guard bracket
23
raised, place the blade
26
on
the spindle
29
and against the inner clamp washer
28
with the teeth on the blade pointing in the direction of
rotation as marked on thesaw.
3. Assemble the outer clamp washer
27
onto the
spindle
29
.
4. Install the blade screw
24
and, engaging the spindle
lock button
25
, tighten the blade screw
24
firmly
with wrench
18
provided (turn counterclockwise, left-
handthreads).
5. Return the guard bracket
23
to its original full down
position and firmly tighten the guard bracket screw
21
to hold bracket inplace.
WARNING: The guard bracket must be returned
to its original full down position and the guard
bracket screw tightened before activating the
saw. Failure to do so may prevent the guard
from closing or may allow the guard to contact
the spinning saw blade resulting in damage to
the saw and severe personalinjury.
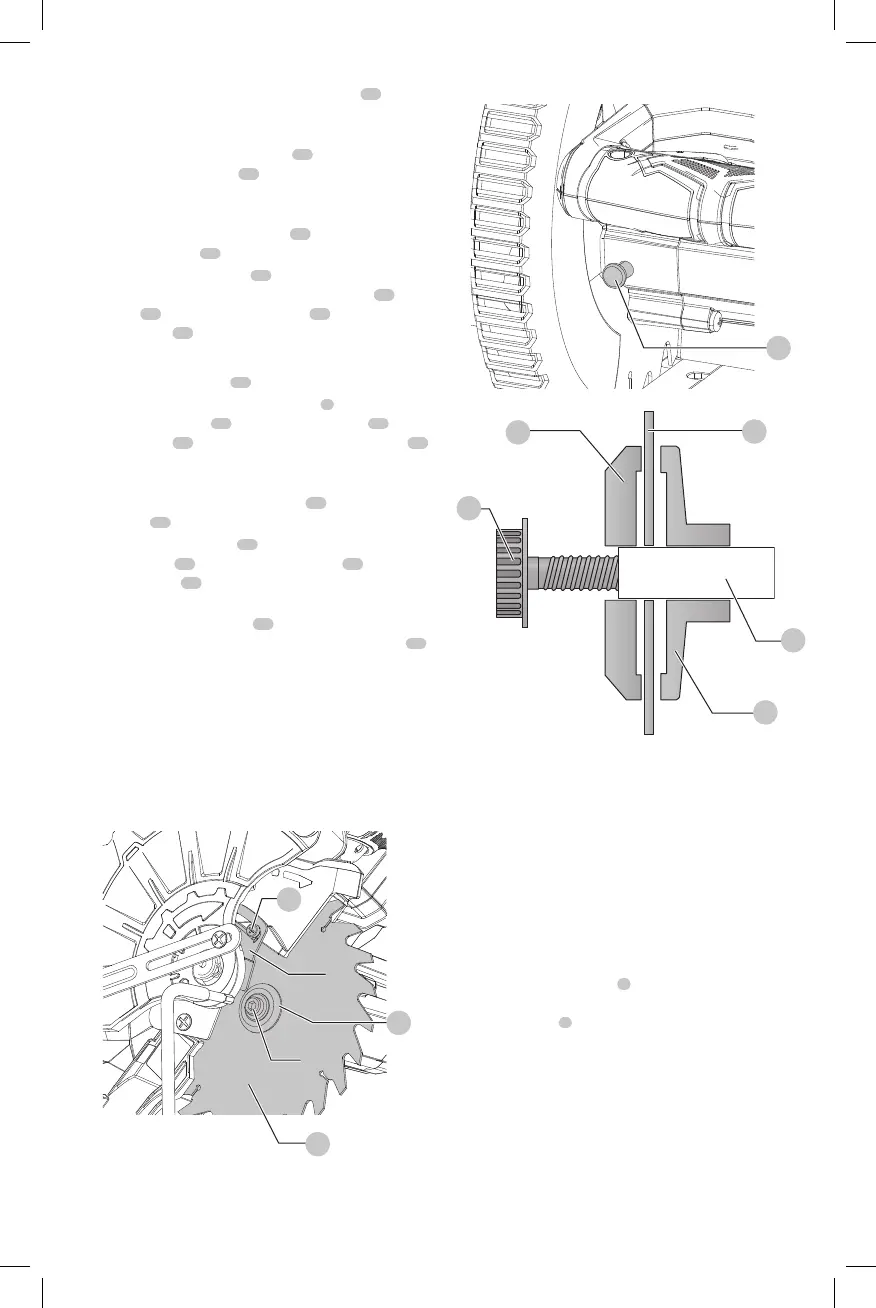
Fig. E
24
21
26
27
23
25
Fig. F
26
24
27
28
29
Fig. G
Transporting the Saw (Fig. A)
WARNING: To reduce the risk of serious personal
injury, turn tool off and remove the battery pack
before transporting, making any adjustments or
removing/installing attachments or accessories.
An accidental start-up can causeinjury.
WARNING: To reduce the risk of serious personal
injury, ALWAYS lock the rail lock knob, miter lock
handle, bevel lock handle and lock down pin, and
remove the battery before transportingsaw.
In order to conveniently carry the miter saw from place
to place, hand indentations
8
have been placed in the
base, as shown in FigureA. Do not lift or carry by the
operatinghandle
2
.
FEATURES AND CONTROLS
WARNING: To reduce the risk of serious personal
injury, turn tool off and remove the battery pack
before transporting, making any adjustments or
removing/installing attachments or accessories.
An accidental start-up can causeinjury.
 Loading...