ENGLISH
14
Fig. L1
42
12
Fig. L2
45
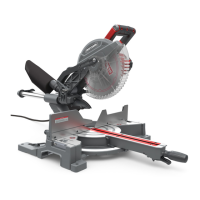
Cutting with Your Saw (Fig. A)
If the slide feature is not used, ensure the saw head is
pushed back as far as possible and the rail lock knob
16
is
tightened. This will prevent the saw from sliding along its
rails as the workpiece isengaged.
NOTE: DO NOT CUT METALS OR MASONRY WITH THIS
SAW. Do not use any abrasiveblades.
NOTE: Refer to Guard Actuation and Visibility in the
Adjustments section for important information about the
lower guard beforecutting.
Crosscuts (Fig. A, M)
A crosscut is made by cutting wood across the grain at any
angle. A straight crosscut is made with the miter arm at the
zero degree position. Set and lock the miter arm at zero,
hold the wood firmly on the table and against the fence.
With the rail lock knob
16
tightened, turn on the saw by
squeezing the trigger switch
1
shown in FigureA.
When the saw comes up to speed (about 1 second) lower
the arm smoothly and slowly to cut through the wood. Let
the blade come to a full stop before raisingarm.
When cutting anything larger than a 2" x 4" (51 mm x
102mm), use an out-down-back motion with the rail lock
knob
16
loosened. Pull the saw out, toward you, lower the
saw head down toward the workpiece, and slowly push the
saw back to complete the cut. Do not allow the saw blade
to contact the top of the workpiece while pulling out. The
saw may run toward you, possibly causing personal injury or
damage to theworkpiece.
WARNING: Always use a work clamp to maintain
control and reduce the risk of workpiece damage and
personal injury, if your hands are required to be within
4" (100 mm) of the blade during thecut.
NOTE: The rail lock knob
16
shown in FigureA must be
loose to allow the saw to slide along itsrails.
Miter crosscuts are made with the miter arm at some angle
other than zero. This angle is often 45º for making corners,
but can be set anywhere from zero to 48º left or 48° right.
Make the cut as describedabove.
When performing a miter cut on workpieces wider than a
2"x 6" (51 mm x 152mm) that are shorter in length, always
place the longer side against the fence (Fig.M).
To cut through an existing pencil line on a piece of wood,
match the angle as close as possible. Cut the wood a little
too long and measure from the pencil line to the cut edge
to determine which direction to adjust the miter angle and
recut. This will take some practice, but it is a commonly
usedtechnique.
Fig. M
Bevel Cuts (Fig. A)
A bevel cut is a crosscut made with the saw blade leaning
at an angle to the wood. In order to set the bevel, loosen
the bevel lock knob
10
, and move the saw to the left as
desired. Once the desired bevel angle has been set, tighten
the bevel lock firmly. Refer to the Features and Controls
section for detailed instructions on the bevelsystem.
Bevel angles can be set from 3º right to 48ºleft.
Quality of Cut
The smoothness of any cut depends on a number of
variables. Things like material being cut, blade type, blade
sharpness and rate of cut all contribute to the quality of
thecut.
 Loading...
