Series 1000 and 1500
17
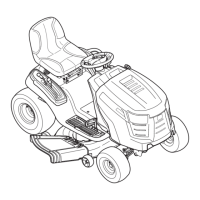
12.4. Disconnect the deck lift assist spring that
extends from the deck lift shaft to the transaxle
torque bracket using a length of starter rope or a
spring tool.
See Figure 12.4.
12.5. Remove the E-clip that holds each shouldered
hex bushing into the tractor frame. Replace one
bushing at a time.
12.6. Pry the worn bushing out of the hole.
12.7. Clean any dirt or corrosion from the surface of
the lift shaft that contacts the bushing.
NOTE: Because of the dusty environment that
many mowers operate in, grease applied to this
bushing may accelerate wear rather than pre
-
vent it. If any lubricant is used between the shaft
and the bushing, it should be a dry graphite or
PTFE based lube.
12.8. Insert the new bushings, and secure them with
the E-clips.
12.9. Check deck levelness, and make any necessary
adjustments before returning the tractor to ser
-
vice.
13. DECK LIFT CABLES AND PULLEYS
NOTE: The deck lift cables and pulleys can be
replaced without removing the rear fenders.
13.1. To remove the deck lift cables, remove the cut-
ting deck.
13.2. Lift and safely support the rear of the tractor.
Figure 12.4
Deck Lift Assist Spring
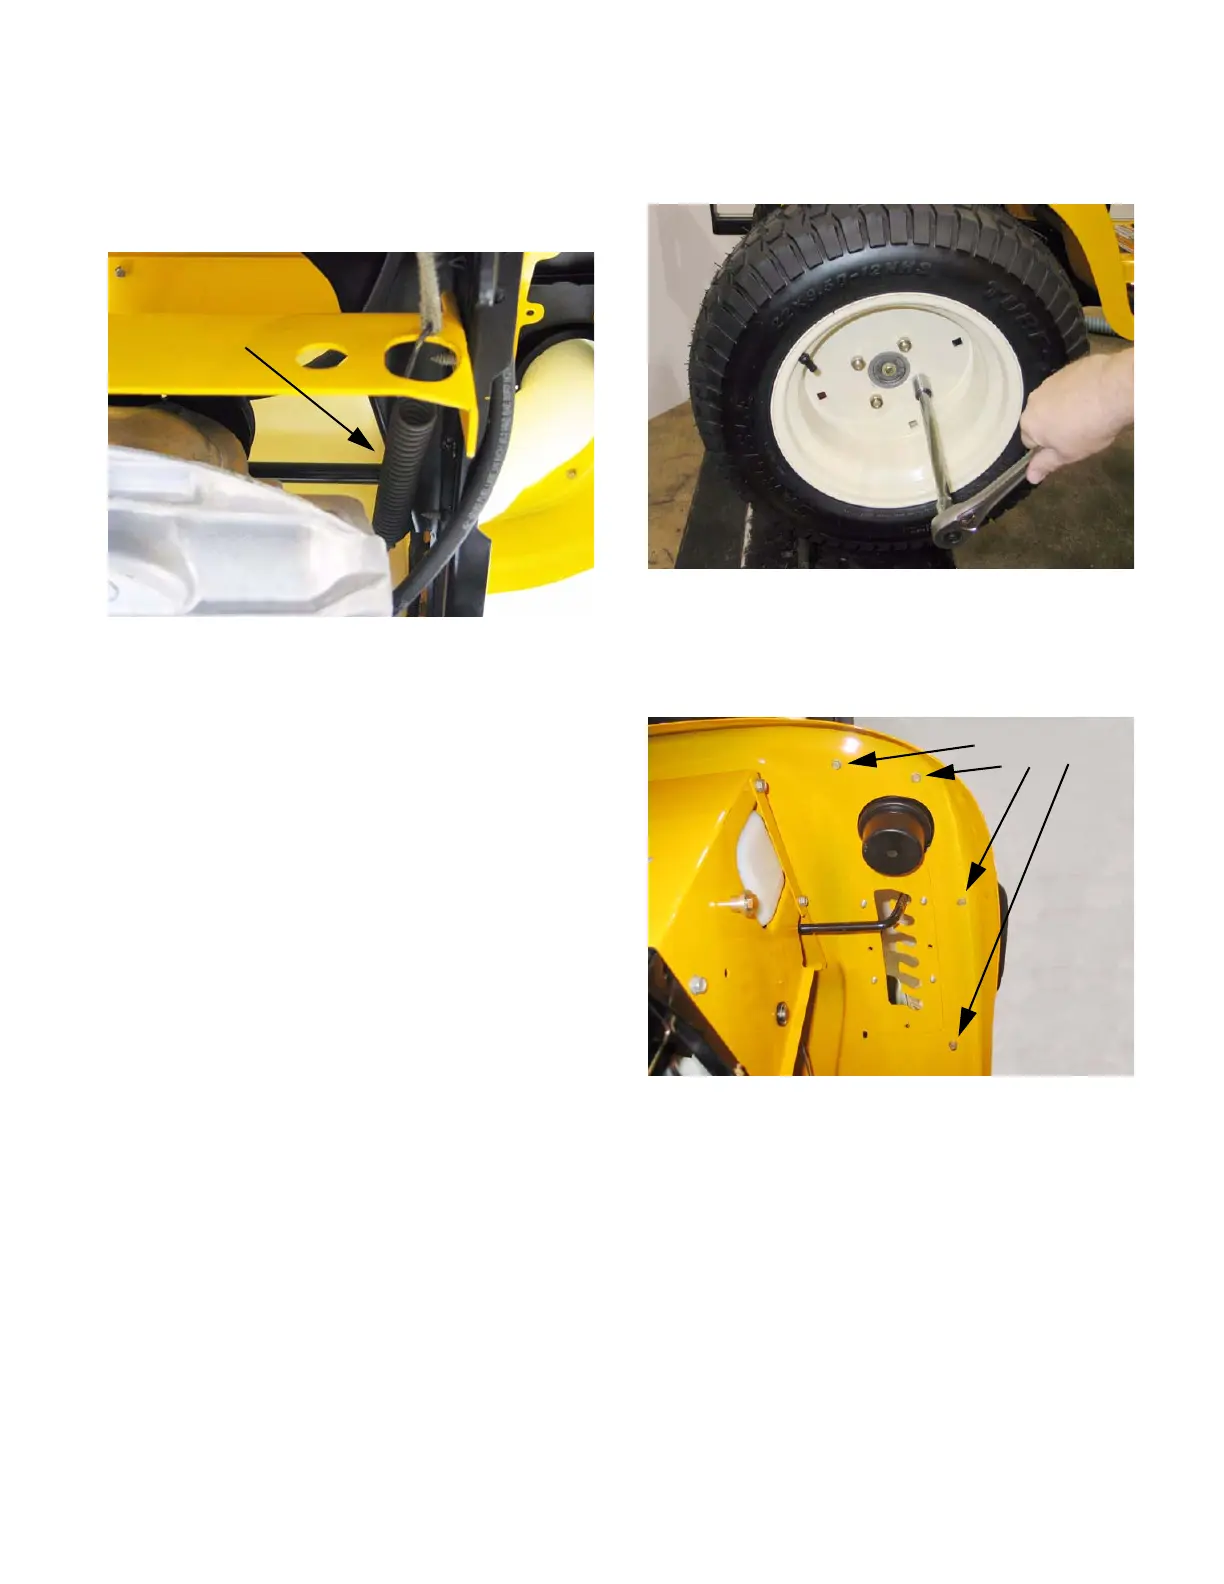
13.3. Remove the rear tires using a 3/4” wrench.
See Figure 13.3.
13.4. Remove the handle from the rear fenders using
a 3/8” wrench. The screws are accessible from
inside the rear fender.
See Figure 13.4.
Figure 13.3
Figure 13.4
Handle Screws
 Loading...