21D-Link DCS-5010L User Manual
Section 2 - Installation
Mounting Instructions
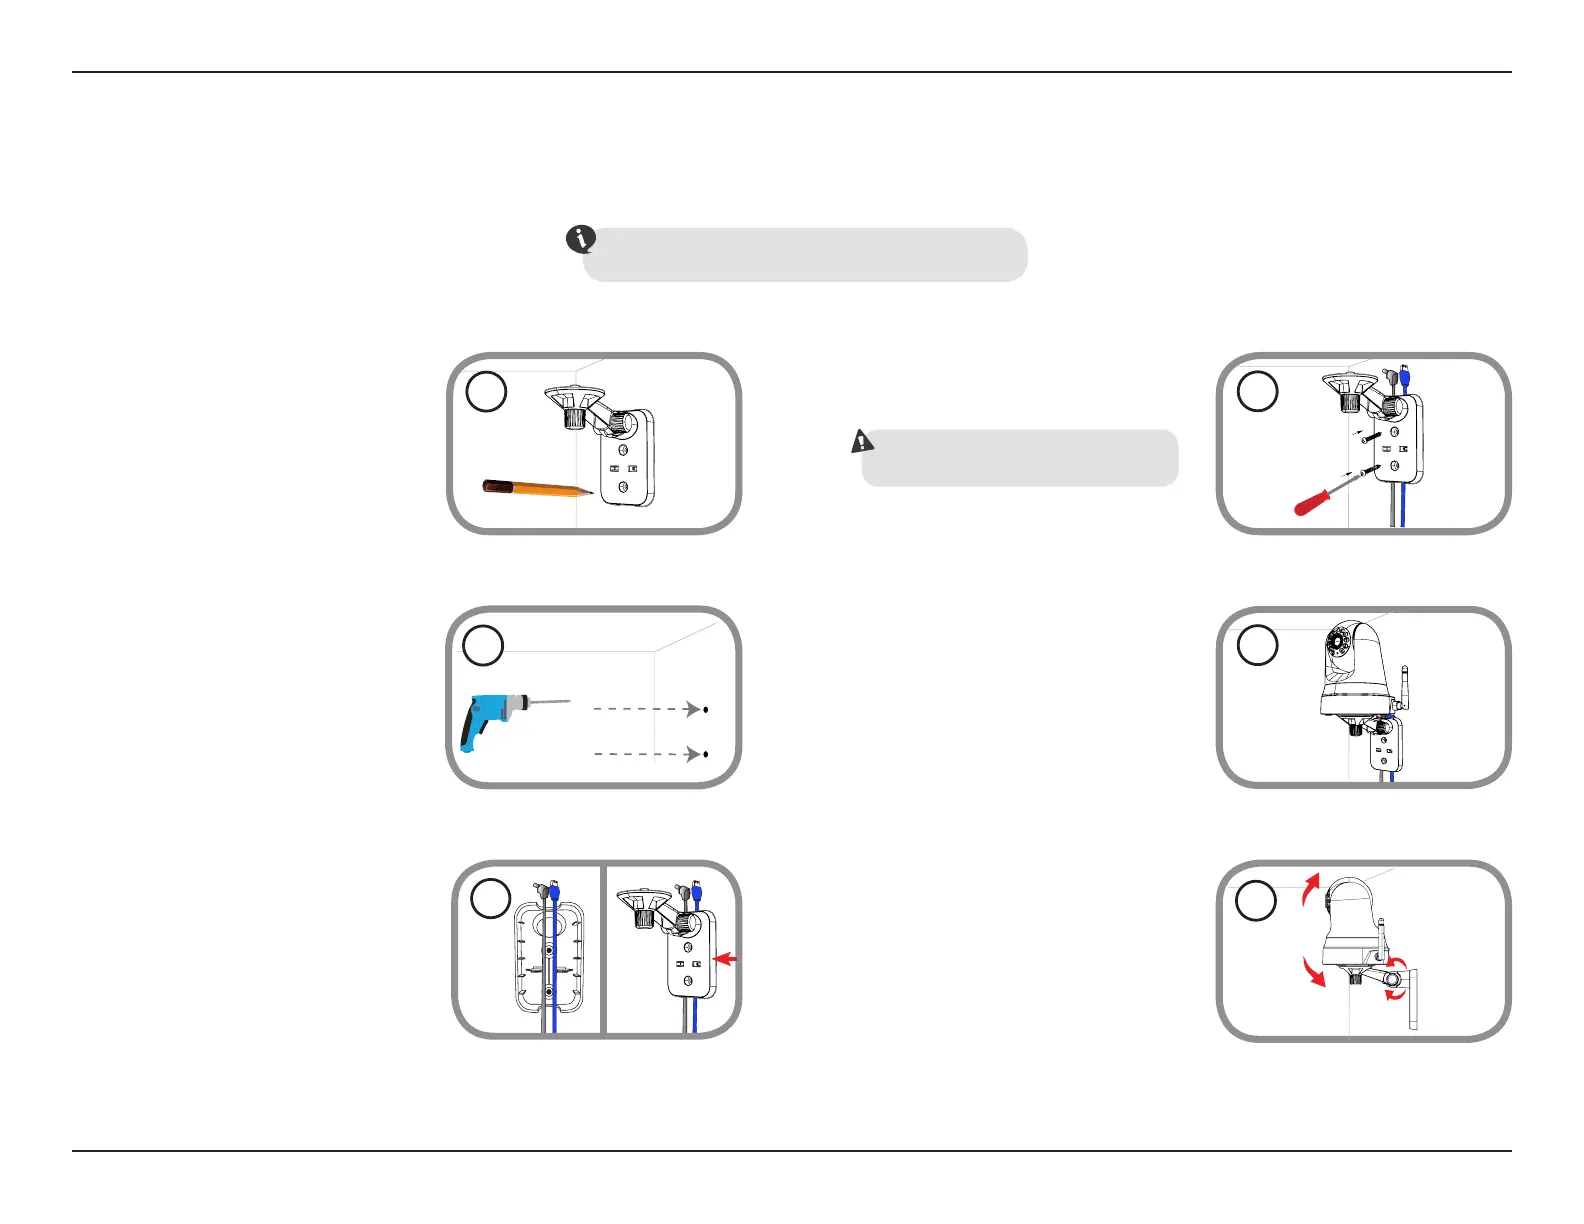
To mount your camera on a wall or ceiling, please follow the steps below.
We suggest that you congure the camera before mounting.
Place the mounting bracket where you want
to position the camera and use a pencil to
mark the points where you will drill the holes.
Depending on the material of the wall or
ceiling, use a 6mm drill bit to drill two holes
where you marked. If the wall is made of
concrete, after drilling the holes, insert the
plastic anchors and then insert the screws.
2
The power and Ethernet cables can be
concealed behind the mounting bracket.
Run the cables through the back of the
mounting bracket, securing them with the
built-in guides. Be sure to leave enough
cable length protruding from the top to
connect the cables to the camera.
3
1
Using the supplied thumbscrew, fasten the
camera to the mounting bracket. Connect
the power and Ethernet cables to the
camera.
5
Adjust the angle of the arm on the
mounting bracket as required. Tighten the
thumbscrew to lock the arm in place.
6
Fasten the mounting bracket to the wall
using the screws provided.
4
Do not overtighten the screws as this may crack the
mounting bracket.
 Loading...