6 Installation
Installer reference guide
15
AZAS71~140M_V1+Y1
Sky Air Active-series
4P486048-1A – 2017.08
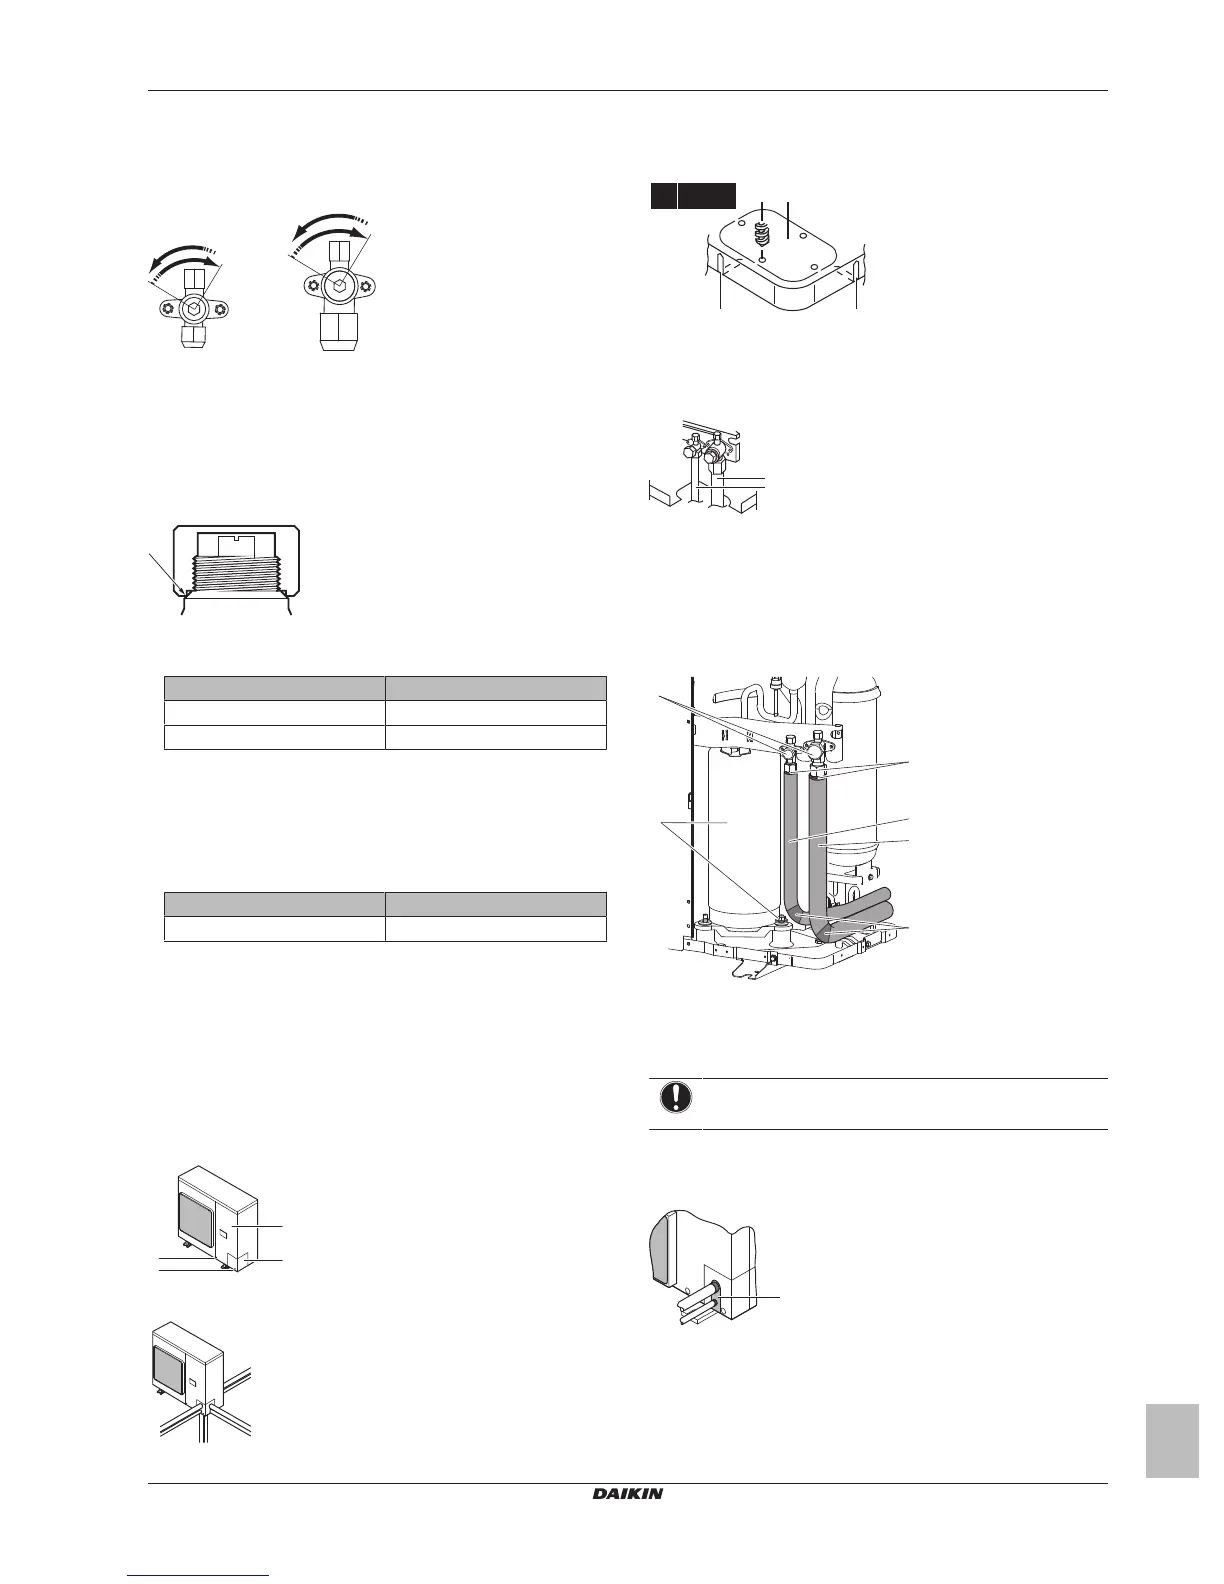
To open/close the stop valve
1 Remove the stop valve cover.
2 Insert a hexagon wrench (liquid side: 4 mm, gas side: 6 mm)
into the valve stem and turn the valve stem:
Counterclockwise to open.
Clockwise to close.
3 When the stop valve cannot be turned any further, stop turning.
The valve is now opened/closed.
To handle the stem cap
▪ The stem cap is sealed where indicated with the arrow. Do NOT
damage it.
▪ After handling the stop valve, tighten the stem cap, and check for
refrigerant leaks.
Item Tightening torque (N∙m)
Stem cap, liquid side 13.5~16.5
Stem cap, gas side 22.5~27.5
To handle the service cap
▪ Always use a charge hose equipped with a valve depressor pin,
since the service port is a Schrader type valve.
▪ After handling the service port, tighten the service port cap, and
check for refrigerant leaks.
Item Tightening torque (N∙m)
Service port cap 11.5~13.9
6.4.8 To connect the refrigerant piping to the
outdoor unit
▪ Piping length. Keep field piping as short as possible.
▪ Piping protection. Protect the field piping against physical
damage.
1 Do the following:
▪ Remove the service cover (a) with screw (b).
▪ Remove the piping intake plate (c) with screw (d).
2 Choose a piping route (a, b, c or d).
3 If you have chosen the downwards piping route:
▪ Drill (a, 4×) and remove the knockout hole (b).
▪ Cut out the slits (c) with a metal saw.
4 Do the following:
▪ Connect the liquid pipe (a) to the liquid stop valve.
▪ Connect the gas pipe (b) to the gas stop valve.
5 Do the following:
▪ Insulate the liquid piping (a) and the gas piping (b).
▪ Wind heat insulation around the curves, and then cover it
with vinyl tape (c).
▪ Make sure the field piping does not touch any compressor
components (d).
▪ Seal the insulation ends (sealant etc.) (e).
6 If the outdoor unit is installed above the indoor unit, cover the
stop valves (f, see above) with sealing material to prevent
condensed water on the stop valves from moving to the indoor
unit.
NOTICE
Any exposed piping might cause condensation.
7 Reattach the service cover and the piping intake plate.
8 Seal all gaps (example: a) to prevent snow and small animals
from entering the system.
 Loading...