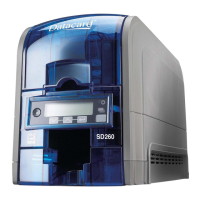
SD160/SD260 Installation and Administrator’s Guide 9
Dothefollowingtoattachtheprintertothebases,andtoinstallthelargeroutputhopper.You
alsocanrefertotheinstructionsshippedwiththelargeoutputhopperkit.
1. Positiononebasesectionwiththeopenendfacingthebackoftheprinter.
2. Lifttheprinteroverthe
basesection.
3. Alignthetabsinthebasewiththeslotsinthebottomoftheprinter.
4. Pushuptoinsertthefourtabsintheslots,andthenpushthebaseforwardtolockittothe
printer.
5. Positiontheotherbasesectionwiththeopeningfacingthefront
oftheprinter.
6. Pushuptoinsertthefourtabsintheslotsandthenpushthebasebacktolockittothe
printer.
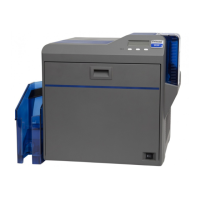
7. Removethe25‐cardoutputhopperfromtheprinter.Slideitout,similartoadrawer.
8. Slidethe100‐cardoutputhopperintothe
assembledbaseandprinter.Makesurethatthe
tabs(shownincirclesintheillustration)securethehoppertotheprinter.
HINTS&TIPS
Thebasesectionscontaindrawers,usefulforholdingcards,cleaningswabs,orother
frequentlyuseditems.Thedrawerscanbeopenedfromeithertheleftorrightsideofthe
printer.
Thebaseandlargeoutputhopperremainattachedwhentheprinterismovedorcarried.
Ifyouinstallthe100‐cardoutputhopper,changethePrinterManagerPrinterSetting >
TransportEjectHopperSpeedsettingtoExtended.Thisallowscompletedcardstostack
properlyinthelargeroutputhopper.Referto“Transport”onpage 50forcomplete
information.
 Loading...