Maintenance and Adjustments
2-10
F1
Auto Media Calibration (See Section 4.6.1)
(See Section 4.6.2)
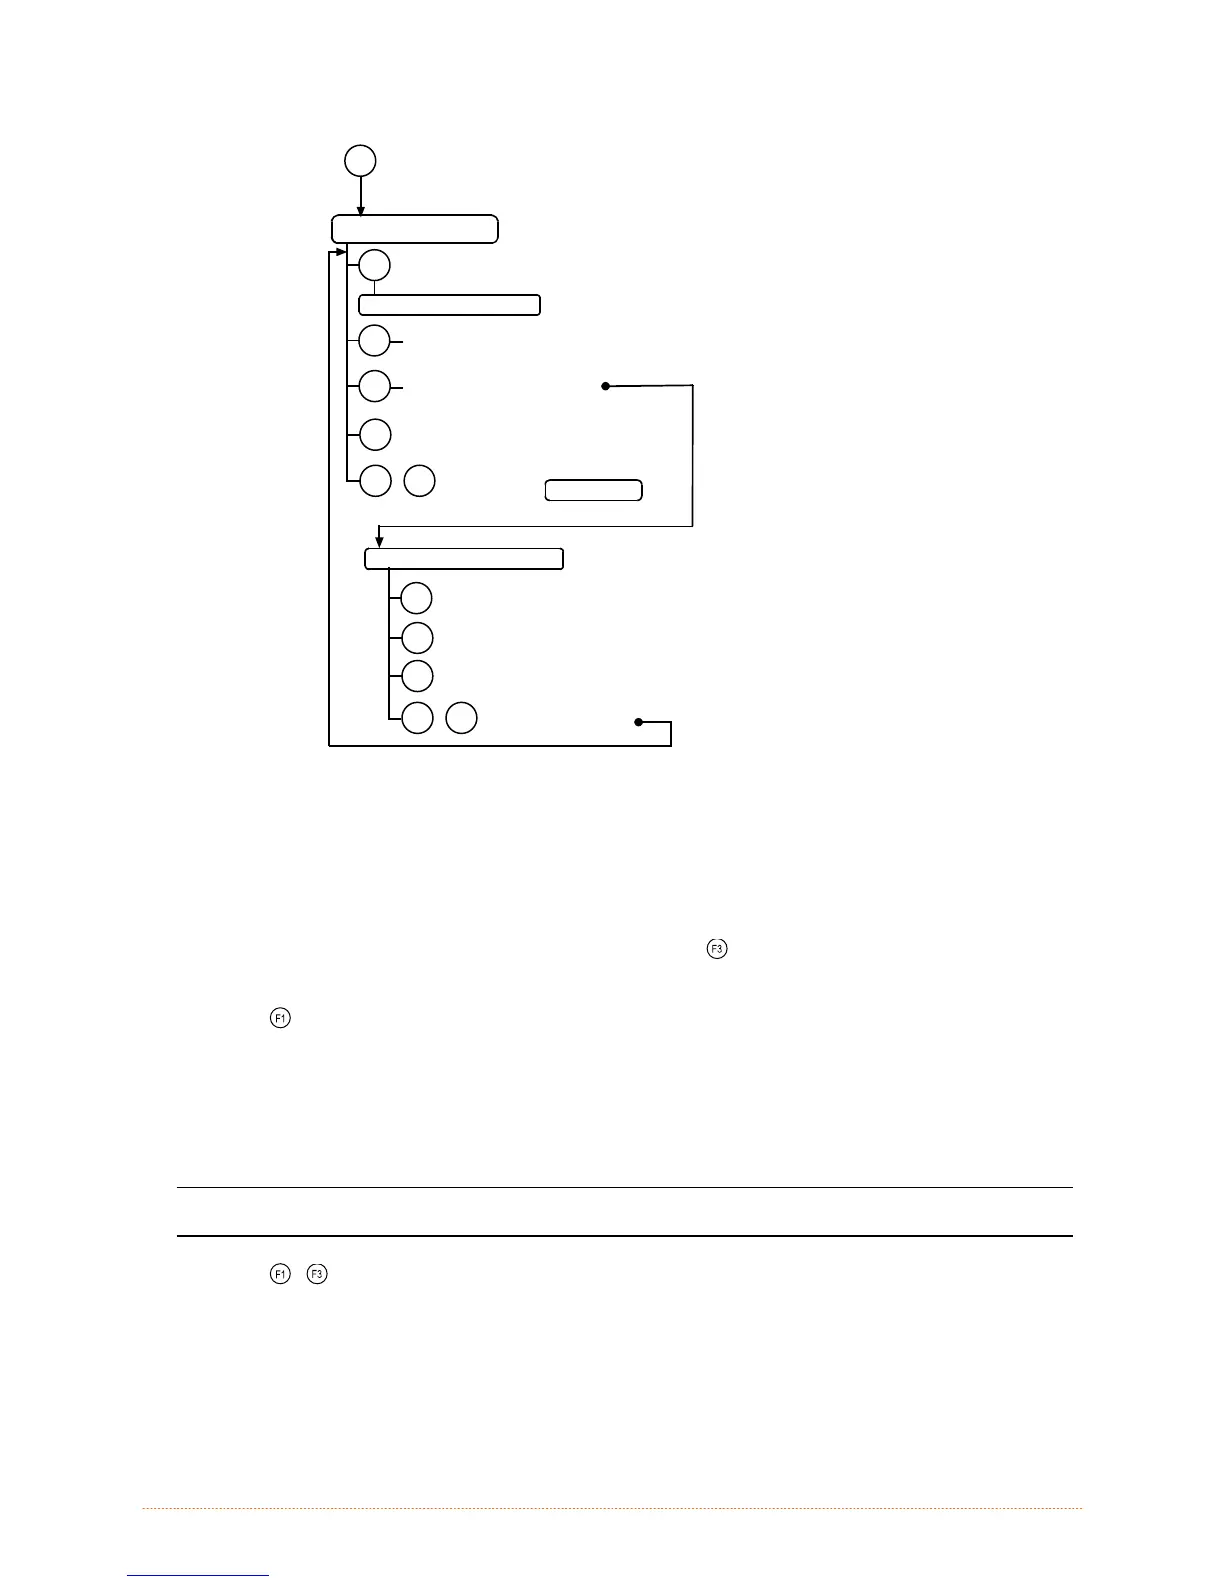
Calibration Mode
F3
Analyze media
F3
F2
Analyze media backing material or reflective mark
Analyze no media condition
F1
Feeds one label for “test”
F2
Press and hold until the
Paused Light turns on
Press and
Release
F2
F3
Prints the ‘Test Label’ for “test”
F1
F3
+
Saves the current values
and resumes
Normal Mode
F1
F3
+
Accepts the current
analysis for “test”
Media Sensor Calibration
(
)
(
)
(Press and hold during power-up until the Paused Light turns off)
(The Fault Indicator flashes during analysis)
2.7.1 Auto Calibration
Auto Calibration automatically establishes the optimum sensing values for the media:
1. With media loaded and the sensor type enabled, hold the
button while powering ON the printer
and until the PAUSED Light turns OFF, then release the button.
2. Press the
button. The printer will feed approximately ten inches of media as readings are taken.
3. Upon completion, one of the indicators will flash five times to denote the calibration result:
PAUSED Light = Successful (proceed to Step 4); or,
FAULT Light = Unsuccessful (see to Section 2.7.2).
;
Note: To discard the changes and revert back to the previous calibration settings, turn OFF
the printer before executing Step 4.
4. Press the
+
buttons simultaneously and briefly. Wait until the PAUSED Light goes OFF.
 Loading...