Display 63
Replacing the Display Panel
1
Follow the instructions in "Before You Begin" on page 9.
2
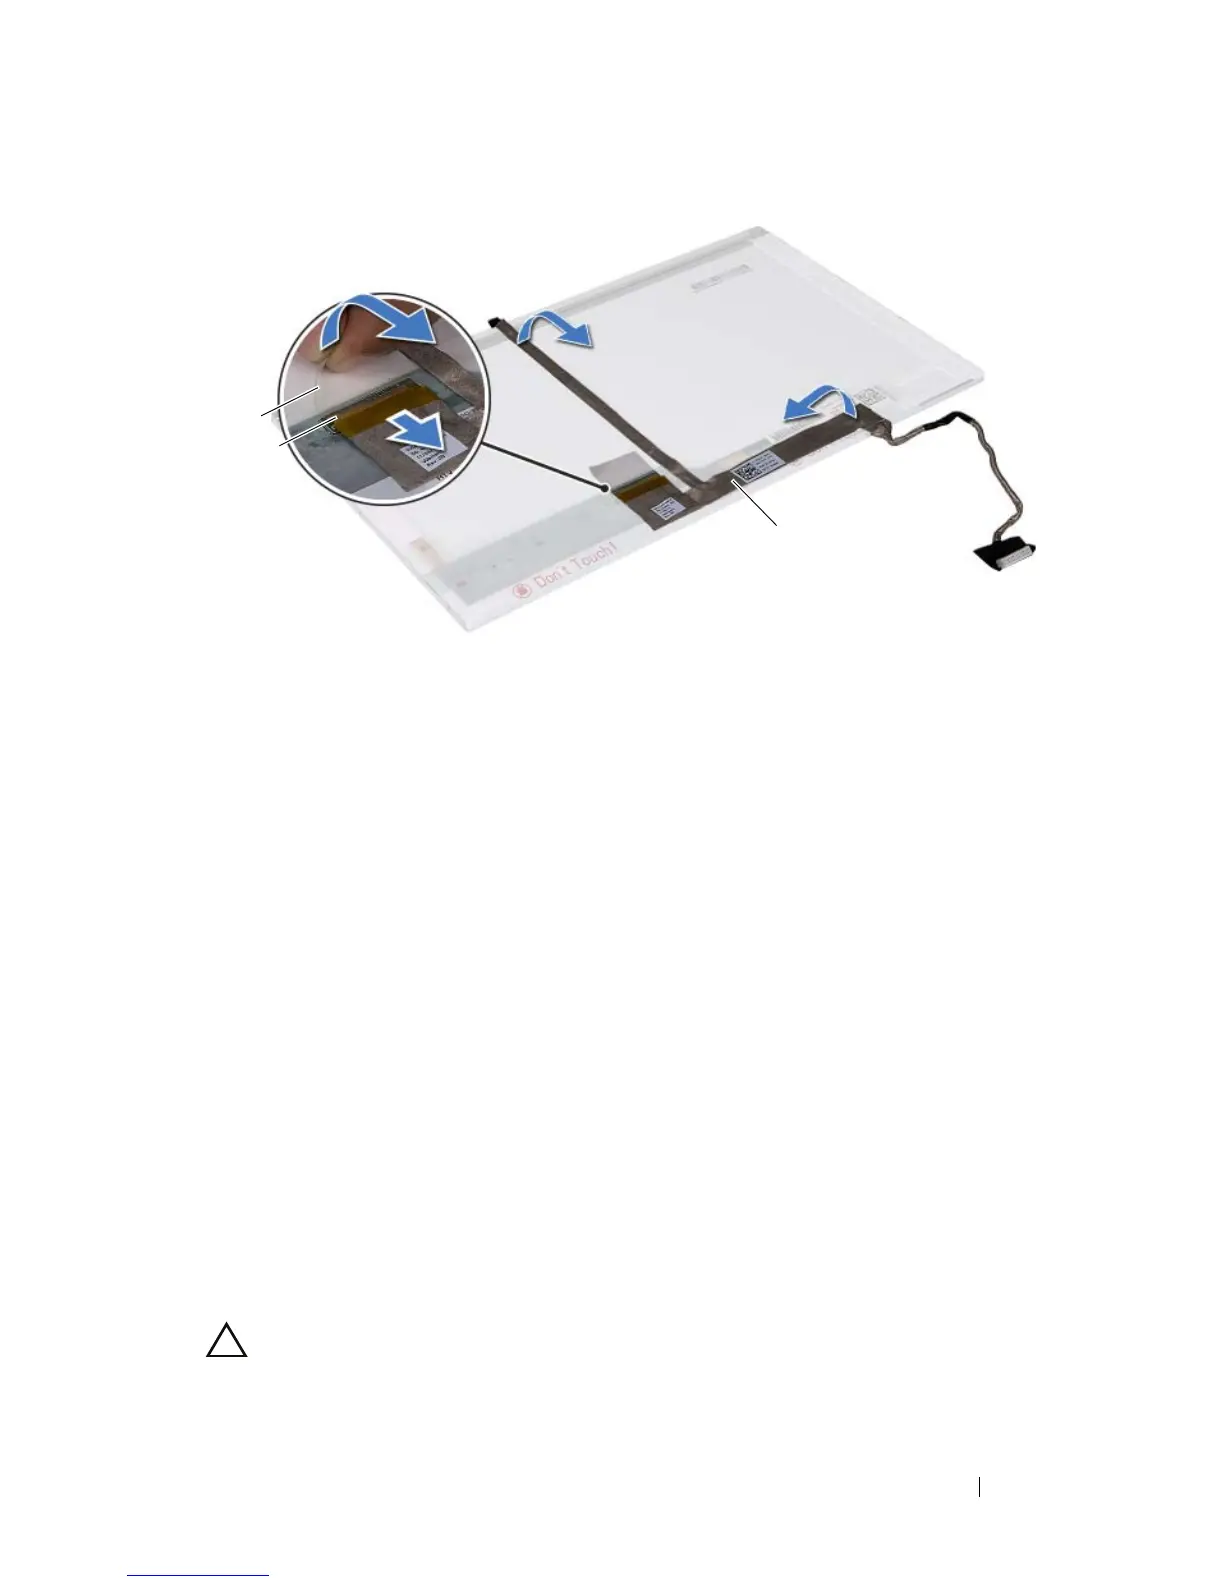
Attach the display cable to the back of the display panel.
3
Connect the display cable to the display-board connector and secure it
with the tape.
4
Align the screw holes on the display bracket with the screw holes on the
display panel and replace the four screws (two on each side).
5
Route the display cable and Mini-Card antenna cables through the routing
guides on the display hinges.
6
Align the screw holes on the display panel with the screw holes on the
display cover and replace the six screws.
7
Replace the display bezel. See "Replacing the Display Bezel" on page 60.
8
Replace the display assembly. See "Replacing the Display Assembly" on
page 58.
CAUTION: Before turning on the computer, replace all screws and ensure that no
stray screws remain inside the computer. Failure to do so may result in damage to
the computer.
1 tape 2 display-board connector
3 display cable
 Loading...