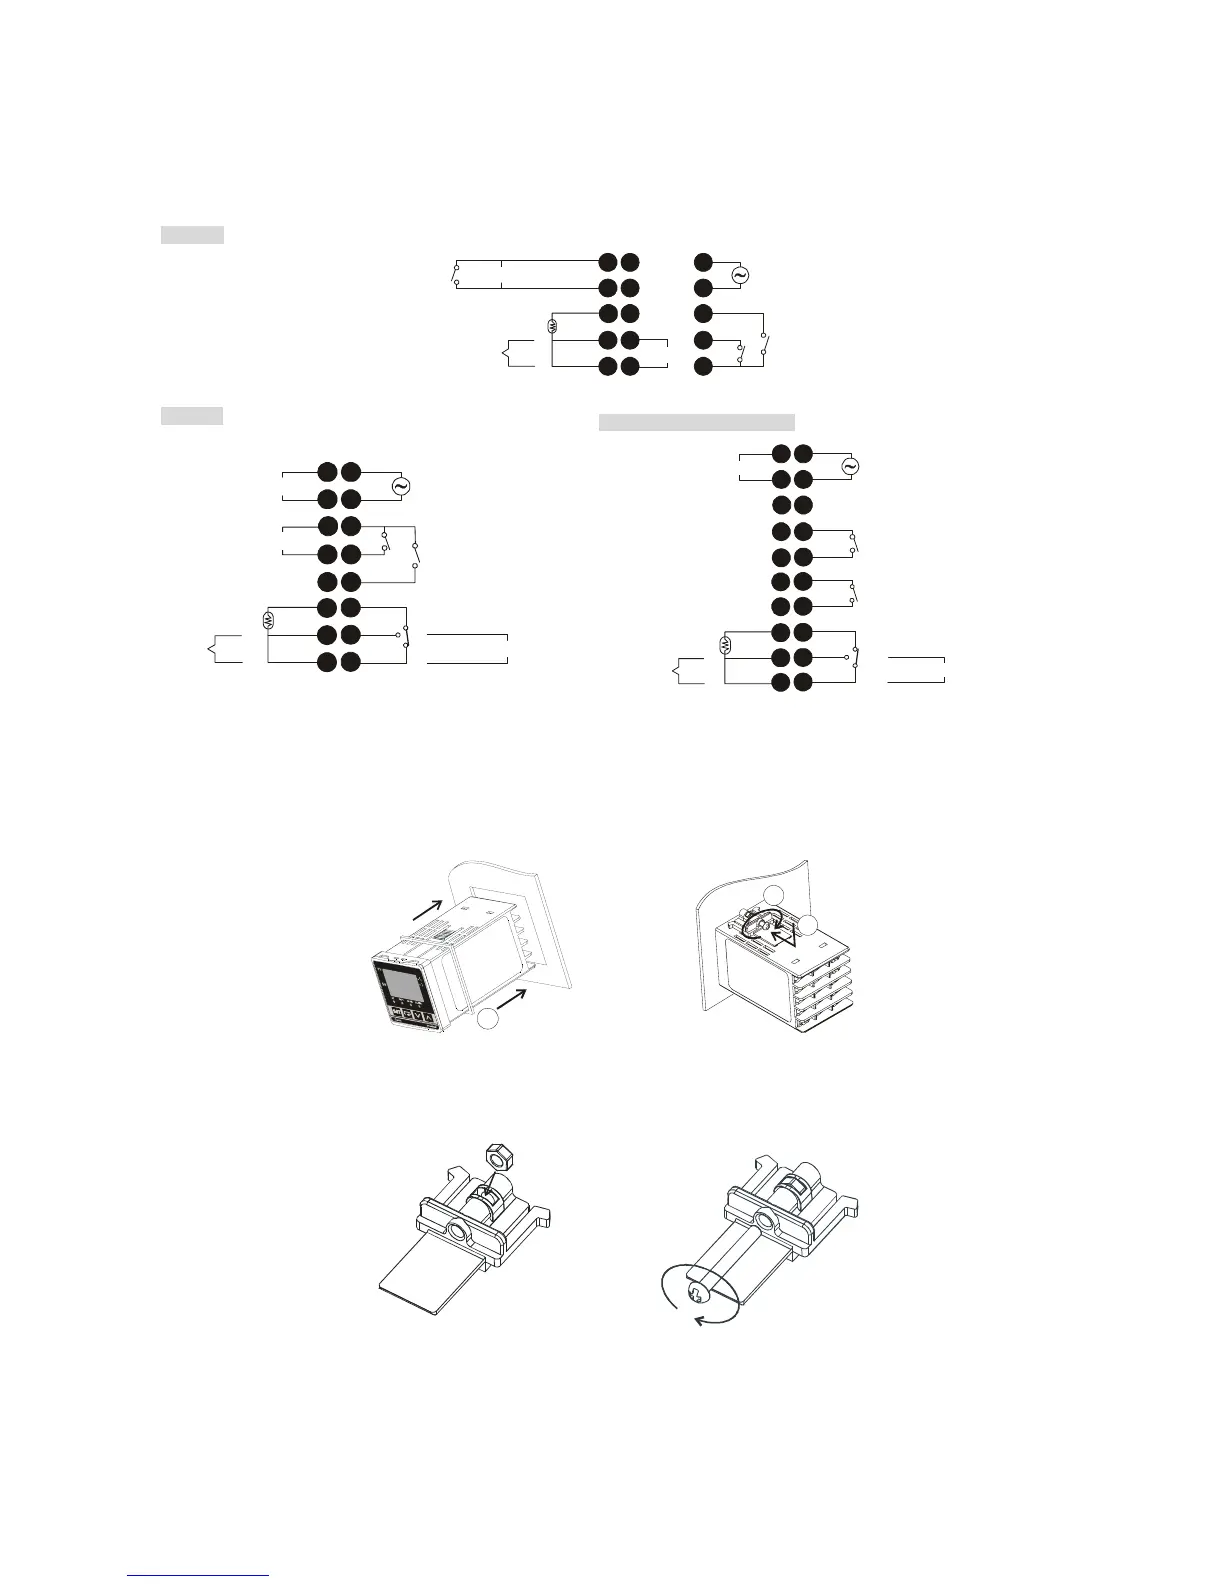
EasyManuals Logo
Home>Delta>Temperature Controller>A Series

Delta A Series User Manual

Delta A Series
12 pages
To Next Page IconTo Next Page
To Previous Page IconTo Previous Page
Page #10 background imageLoading...
Page #10 background image
- 10 -
Terminal Identification
DTA4848
1
2
5
6
8
7
4
3
9
12
13
14
15
11
10
DC 4~20mA
5A 250Vac
RTD
Tc
-
+
+
-
or
DATA-
DATA+
RS-485
COM
ALM2
ALM1
3A 250Vac
3A 250Vac
AC 100~240V
50~60Hz /5VA
14Vdc
DTA7272
DTA4896/DTA9648/DTA9696
1
2
5
6
8
7
4
3
10
11
12
13
9
RTD
Tc
+
-
or
DATA-
DATA+
RS-485
COM
ALM1
ALM2
3A 250Vac
14
16
15
AC 100~240V
50~60Hz /5VA
5A 250Vac
DC 4~20mA
14Vdc
NC
NO
COM
+
-
CT
1
2
5
6
8
7
4
3
9
12
13
14
15
11
10
5A 250Vac
RTD
Tc
+
-
or
DATA-
DATA+
RS-485
ALM1
ALM2
3A 250Vac
3A 250Vac
16
18
17
19
20
AC 100~240V
50~60Hz /5VA
DC 4~20mA
COM
COM
14Vdc
NC
NO
CO
M
+
-
Mounting
Step 1. Insert the controller through the panel cutout.
Step 2. Insert the mounting bracket into the mounting groove at the top and bottom of the controller and push the mounting bracket forward
until the bracket stops at panel wall.
Step 3. Insert and tighten screws on bracket to secure the controller in place. (The screw torque should be 0.8kgf-cm to 1.5kgf-cm)
1
3
2
Mounting Bracket Installation
1. 2.

Questions and Answers:

Question and Answer IconNeed help?

Do you have a question about the Delta A Series and is the answer not in the manual?

Delta A Series Specifications

General IconGeneral
BrandDelta
ModelA Series
CategoryTemperature Controller
LanguageEnglish

Related product manuals