8
ENGLISH
• when breaking or drilling in harder materials, set the dial to a
highsetting.
OPERATION
Instructions for Use
WARNING: Always observe the safety instructions and
applicableregulations.
WARNING: To reduce the risk of serious personal injury,
turn tool off and disconnect tool from power source before
making any adjustments or removing/installing attachments
oraccessories. An accidental start-up can causeinjury.
WARNING: Tool bits may be hot and gloves should be worn when
changing or removing them to avoid personalinjury.
WARNING:
• Be aware of the location of pipework andwiring.
• Apply only a gentle pressure to the tool (approximately 20 kg).
Excessive force does not speed up drilling but decreases tool
performance and may shorten toollife.
• Always hold the tool firmly with both hands and ensure a
securestance. Always operate the tool with the side handle
properlyassembled.
NOTE: Operating temperature is -7˚ to +40˚C. Using the tool outside of
this temperature range will decrease the life of thetool.
Proper Hand Position (Fig. F)
WARNING: To reduce the risk of serious personal injury, ALWAYS use
proper hand position asshown.
WARNING: To reduce the risk of serious personal injury, ALWAYS hold
securely in anticipation of a suddenreaction.
Proper hand position requires one hand on the side handle
3
, with the
other hand on the main handle
4
.
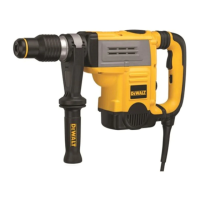
Switching On and Off (Fig. A)
D25501, D25604
To turn the tool on, depress the trigger switch
1
.
To stop the tool, release the triggerswitch.
D25604
The lock-on slider
2
allows the trigger switch
1
to be locked on in
chiselling modeonly. If the lock-on button is activated in drilling mode, as a
feature the tool will switch offautomatically.
To turn the tool on, press the trigger switch
1
.
To stop the tool, release theswitch.
For continuous operation, press and hold down the switch
1
, slide the
lock-on slider
2
upwards and release theswitch.
To stop the tool in continuous operation, press the switch briefly
and releaseit. Always switch off the tool when work is finished and
beforeunplugging.
D25831
To turn the tool on, press the on/off rocker switch
1
at the lower part of
thetrigger.
To stop the tool, press the on/off rocker switch at the upper part of
thetrigger.
Hammerdrilling
To turn the tool on, press the on/off switch
1
.
To stop the tool, release theswitch.
Drilling with a Solid Bit (Fig. A)
D25501, D25601, D25604
1. Insert the appropriate drillbit.
2. Set the mode selector switch
6
to the hammerdrillingposition.
3. D25601, D25604 only: Set the electronic speed and impact control
dial
7
.
4. Fit and adjust the side handle
3
.
5. Mark the spot where the hole is to bedrilled.
6. Place the drill bit on the spot and switch on thetool.
7. Always switch off the tool when work is finished and
beforeunplugging.
Drilling with a Core Bit (Fig. A)
D25501, D25601, D25604
1. Insert the appropriate corebit.
2. Assemble the centerdrill into the corebit.
3. Set the mode selector switch
6
to the hammerdrillingposition.
4. D25601, D25604 only: Turn the electronic speed and impact control
dial
7
to a medium or high speedsetting.
5. Fit and adjust the side handle
3
.
6. Place the centerdrill on the spot and switch on thetool. Drill until the
core penetrates into the concrete approximately 1cm.
7. Stop the tool and remove thecenterdrill. Place the core bit back into the
hole and continuedrilling.
8. When drilling through a structure thicker than the depth of the core
bit, break away the round cylinder of concrete or core inside the bit at
regularintervals.
To avoid unwanted breaking away of concrete around the hole, first drill
a hole the diameter of the centerdrill completely through thestructure.
Then drill the cored hole halfway from eachside.
9. Always turn the tool off when work is finished and beforeunplugging.
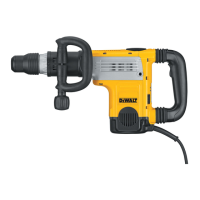
Chipping and Chiselling (Fig. A)
1. Insert the appropriate chisel and rotate it by hand to lock it into one of
18positions.
2. Set the mode selector switch
6
to the hammering onlyposition.
3. D25601, D25604, D25831 only: Set the electronic speed and impact
control dial
7
.
4. Fit and adjust the side handle
3
.
5. Turn the tool on and startworking.
6. Always turn the tool off when work is finished and beforeunplugging.
MAINTENANCE
Your
power tool has been designed to operate over a long period
of time with a minimum ofmaintenance. Continuous satisfactory operation
depends upon proper tool care and regularcleaning.
WARNING: To reduce the risk of serious personal injury,
turn tool off and disconnect tool from power source before
making any adjustments or removing/installing attachments
oraccessories. An accidental start-up can causeinjury.
Brushes (Fig. C)
The carbon brushes are not user-serviceable. Take the tool to an authorized
D
WALT repairagent.
The yellow brushwear indicator LED
17
lights up when the carbon brushes
are nearly wornout. After a further 8 hours of use or after the brushes have
completely worn out, the motor will automatically be shutoff.
Tool maintenance needs to be carried out as soon as the service
indicator
16
lightsup.
 Loading...