8
ENGLISH
ASSEMBLY AND ADJUSTMENTS
WARNING: To reduce the risk of serious personal
injury, turn tool off and disconnect tool from power
source before making any adjustments or removing/
installing attachments or accessories. An accidental
start-up can causeinjury.
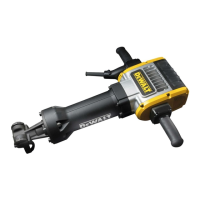
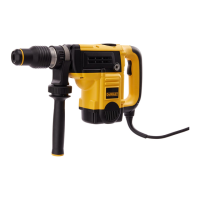
Side Handle (Fig. A, H)
CAUTION: ALWAYS operate the tool with the side
handle properly assembled. Hold tool with both
hands to maximizecontrol.
Attach left side handle
2
with four hex head
screws
5
(supplied). Tighten with hex wrenchsupplied.
NOTE: Side handle must be installed in the proper orientation
with the nub on the end of the grip facingdown.
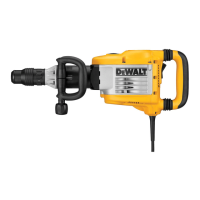
Inserting And Removing 28 mm Hex
Accessories (Fig. D–F)
This machine uses chisels with a 28 mm hex. shank. We
recommend to use professional accessoriesonly.
WARNING: Since accessories other than those offered
by
have not been tested with this product,
the use of such accessories may entail hazardous
situations. To reduce the risk of injury, use only accessories
recommended by
.
Clean the chiselshank.
WARNING: Do not apply lubricant to themachine.
To fit a chisel with collar on the shank,
proceed as follows (Fig. E)
1. Pull the tool retainer
3
to the unlockposition.
2. Insert the chisel shank into the tool holder
4
.
3. Push the retainer
3
in line with the accessory shank to lock
the accessory inposition.
4. Pull on the chisel to check if it is properly locked. The
hammering function requires the chisel to be able to move
axially several centimetres when locked in the toolholder.
To remove a chisel pull back the retainer
3
and pull the chisel
out of the toolholder.
To fit a chisel with notch in the shank,
proceed as follows (Fig. F)
1. Pull the tool retainer
3
to the unlockposition.
2. Hold the chisel in front of the tool holder with the groove
15
facingupwards.
3. Insert the chisel shank into the tool holder
4
4. Push the retainer
3
backwards to lock the accessory
inposition.
WARNING: Always wear gloves when you change
accessories. The exposed metal parts on the tool and
accessory may become extremely hot duringoperation.
OPERATION
Instructions for Use
WARNING:
• Always observe the safety instructions and
applicableregulations.
• Be aware of the location of pipework andwiring.
• Apply a pressure of approx.20–30kg to the tool.
Excessive force does not speed up chiselling but
decreases tool performance and may shorten toollife.
WARNING: To reduce the risk of serious personal
injury, turn tool off and disconnect tool from power
source before making any adjustments or removing/
installing attachments or accessories. An accidental
start-up can causeinjury.
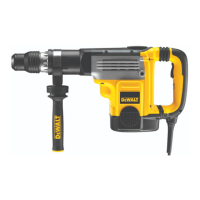
Proper Hand Position (Fig. A, B)
WARNING: To reduce the risk of serious personal injury,
ALWAYS use proper hand position asshown.
WARNING: To reduce the risk of serious personal
injury, ALWAYS hold securely in anticipation of a
suddenreaction.
Proper hand position requires one hand on each side handle
2
.
Switching On and Off (Fig. A)
To run the tool, press the on/off switch
1
.
To stop the tool, release theswitch.
Demolition, Chasing and Channelling
(Fig. A–F)
1. Select the appropriate chisel and clean itsshank.
2. Insert the chisel and check whether it is properlylocked.
3. Hold of the tool at both handles
2
and turn on. The tool
now runs in continuousoperation.
MAINTENANCE
Your
power tool has been designed to operate
over a long period of time with a minimum of maintenance.
Continuous satisfactory operation depends upon proper tool
care and regularcleaning.
WARNING: To reduce the risk of serious personal
injury, turn tool off and disconnect tool from power
source before making any adjustments or removing/
installing attachments or accessories. An accidental
start-up can causeinjury.
This machine is not user-serviceable. Take the tool to an
authorised D
WALT repair agent after approximately 200 hours
ofuse.
If problems occur before this time contact an authorised
D
WALT repairagent.
Lubrication
Your power tool requires no additionallubrication.

 Loading...