ENGLISH
8
Fig. K
18
4. Adjust the pointer up or down until its reading matches
the finished thickness of the workpiece. Securely
re-tighten thescrews.
OPERATION
WARNING: To reduce the risk of serious personal
injury, turn unit off and disconnect it from
power source before making any adjustments or
removing/installing attachments or accessories.
An accidental start-up can causeinjury.
On/Off Switch (Fig. L)
To turn the planer on, lift up the switch
7
. The planer locks
on automatically. To turn the tool off, press the switch
down. A hole
8
is provided in the side of the switch
housing for locking off the planer with apadlock.
Fig. L
7
8
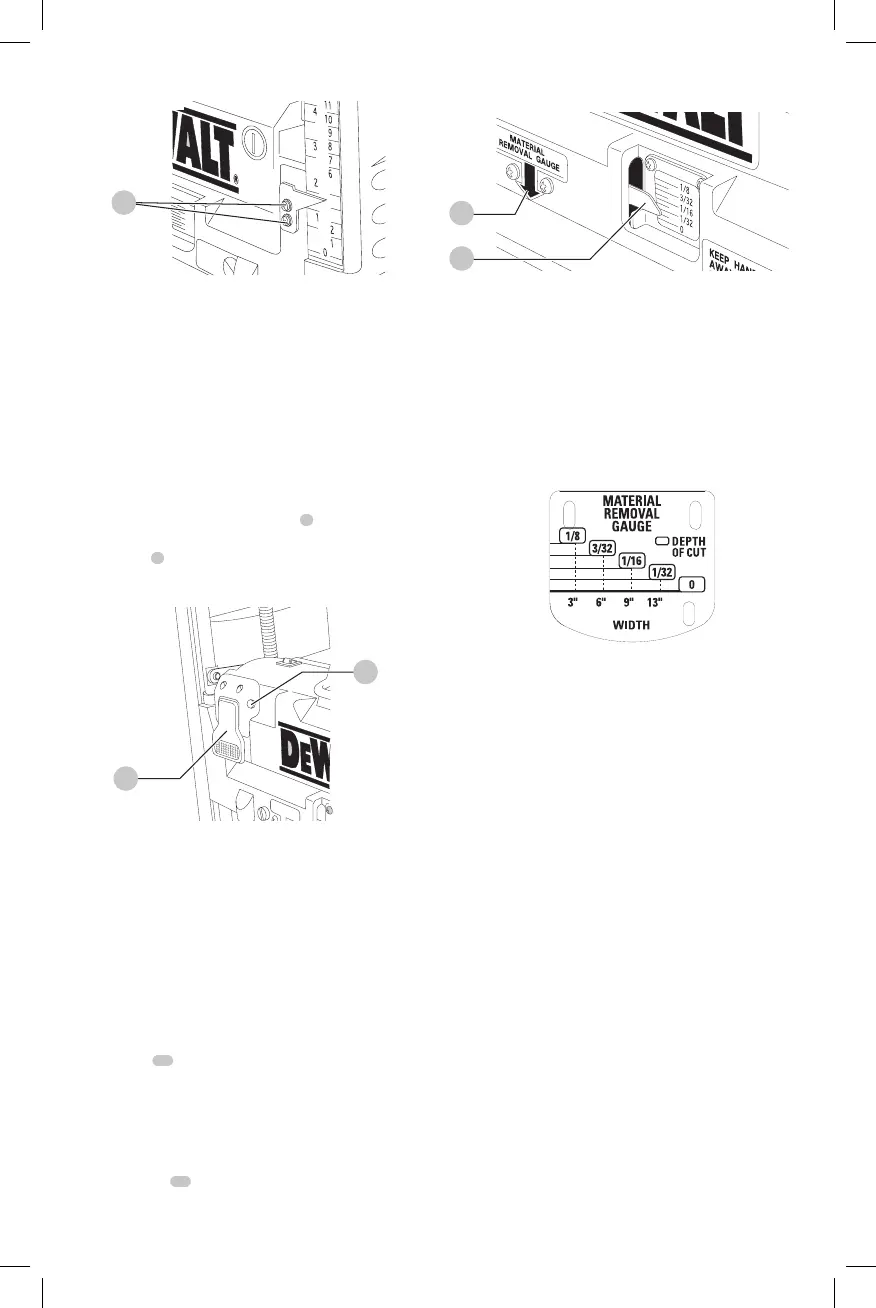
Material Removal Gauge
Your planer is equipped with a material removal gauge. It is
used to indicate the amount of wood that will be removed
in one pass with the carriage set at its currentheight.
To Use the Material Removal Gauge
(Fig. M)
WARNING: DO NOT SWITCH THE UNIT ON WITH
THE MATERIAL POSITIONED UNDER THE CARRIAGE.
SERIOUS INJURY COULDRESULT.
1. Slide approximately 3" (76.2mm) of your material under
the arrow
11
located in the middle of thecarriage.
2. The wood must lay flat against the base of the planer.
If the material is inserted at an angle, the reading may
beinaccurate.
3. Unlock and crank the carriage down on the material
until the material removal bar engages the wood. The
red indicator
12
moves up the scale indicating the
amount of material to be removed with the carriage at
thatheight.
Fig. M
11
12
4. Adjust the carriage height until the desired depth of cut
appears on thegauge.
5. Pull the material out from under thecarriage.
6. Lock the carriage locklever.
7. Turn the unit on and feed your material into
thecutterhead.
NOTE: Do not exceed the recommended depth of cut for
various widths of material recommended on the material
removal gauge (TableA).
TABLE A
Planing Basics
Proper Planing Technique
WARNING: DO NOT turn the unit on with the
material already inserted under the carriage.
Wait until the rollers and cutterhead are up to
full speed before feeding your material into
themachine.
To Plane your Material
Your planer works best on lumber with at least one flat
surface. If both sides of your workpiece are rough, use a
jointer to level oneface.
Support the workpiece adequately at all times. The
maximum depth of cut your planer can take in one pass
is 1/8" (3.2 mm) [on material less than 6" (152 mm) wide].
Never attempt to modify your planer to take a deeper cut.
Follow the depth/width of cut guidelines shown in Table A
for bestresults.
1. Lower the carriage to the desired height for your
firstpass.
2. Turn the unit on and feed the material into the
feedrollers.
3. Examine the finished cut and adjust the carriage to the
appropriate height for your nextpass.
See the Troubleshooting Guide at the end of this section
for moreinformation.
WARNING: Do not place your body between the
workpiece and a stationary structure while the
 Loading...